Authors


Overview
The climactic midair confrontation with the Diamond Weapon is one you will not soon forget.
Nevertheless, Garlond Ironworks has provided a means by which you can relive those memories.
Though nothing more than a simulation, it will demand every onze of mettle you can muster to overcome this enhanced version of an already formidable foe.
The Cloud Deck (Extreme) is the Extreme Trial for Patch 5.5.
It is unlocked after finishing the Normal mode instance by talking to the Resistance Officer in The Lochs for the quest Duty in the Sky with Diamond.
If you have any suggestions, corrections or feedback for particular phases please let us know at feedback@akhmorning.com.
Video Guide
General Considerations
- Figure out light party (2 DPS + Healer + Tank) groups to assign one groups to their respective platforms.
- The teleporter applies
 Immobile Suit, a 20s debuff that prevents you from using it again. Time your jumps sensibly.
 - Decide whether evens or odds move across for Flood Ray (Limit Cut). We recommend evens (red) to the red platform, odds (blue) to the blue platform.
- Respect the visual cues for mechanics.
- Don’t sac strat for Flood Ray (Limit Cut) or Adamant Sphere (Towers). It’s bad play.
Enrage & Required DPS
| Boss | HP | Total Downtime | Enrage Time |
|---|---|---|---|
| Diamond Weapon | 61,063,320 | ~1m 19s | 11:58 |
- Raid DPS requirement with downtime: 85,047 RDPS
- Downtime adjusted Raid DPS requirement: 95,561 RDPS
DPS Role Considerations
The encounter has many windows of downtime that can throw your rotations off. Holding buffs until after dashes can be the right call.
Arm’s Length and Surecast can be used against Vertical Cleave in Phase 2, but only for one of them.
Addle can be used to mitigate most magical actions in the fight, although some of its better uses are for Diamond Rain and Outrage.
Tanks
Both tanks must be top 2 on the aggro table and be positioned away from others as Diamond Weapon shoots beam cleaves on the top 2 aggro players for its auto attacks.
Party Finder Macro
(Styling on the macro block has a bug. Renders legibly in game, but will be fixed to be more accurate!)
Diamond Weapon (Ex) PF Macros
/micon "Diamond Gwiber" mount
/p
/p =====Groups - Diamond Weapon ====
/p | ↓
/p | ↓
/p | ↓
/p | ↓
/p
/p Limit Cut
/p ODDS (BLUE) EVENS (RED)
/p > >
/p
/p > >
Mechanics
Here we’ll explain the underlying mechanics throughout the encounter.
Diamond Weapon Mechanics
| Mechanic | Effect |
|---|---|
| Diamond Rain | Magic raidwide damage per player on a given platform. Each applies Magic Vuln. Light parties per platform. |
| Adamant Purge | Diamond Weapon prepares to slice one platform with claws visible. The players on the claw platform teleport across. |
| Claw Swipe | Diamond Weapon slices one platform. |
| Diamond Flash | Diamond Weapon’s core cannon is visible. Shared beam AoE. Stack together. |
| Homing Laser | Diamond Weapon’s core cannon is not visible. Small AoEs that target each player and apply a Magic Vuln. Spread out. |
| Photon Burst | Flare markers on Top 2 aggro. Tanks be North, party south. |
| Code Chi-Xi-Stigma | Action that once completed begins Phase 2. |
| Auri Cyclone | Blue knockback circles for resolving Diamond Shot. |
| Diamond Shot | Tether action from Articulated Bits. Failing to be knocked far enough will apply a Vuln Up. |
| Airship’s Bane | Diamond Weapon destroys a targeted platform to remove it until Phase 3. |
| Outrage | Magical raidwide AoE damage. |
| Auri Arts | Diamond Weapon’s dashes. Untargetable as these resolve. |
| Auri Doomstead | Physical AoE Tankbuster on main Tank with a Phys Vuln. Tank swap. |
| Vertical Cleave | Raidwide AoE damage with a knockback. Anti-knockbacks work. |
| Articulated Bits | Spawns Articulated Bits that will shoot Aetherial Bullet beams. |
| Aetherial Bullet | Avoidable beam AoEs from Articulated Bits. |
| Flood Ray | Limit Cut. Players marked 1-8 for magic cleaves that apply a Magic Vuln. Odds on Blue platform, Evens on Red platform. |
| Diamond Shrapnel | Chasing AoEs that must be dropped on the outer edge before teleporting across. |
| Flood Ray (Enrage) | Kill or be killed! |
Timeline
Phase 1 Timeline
| Cast Time | Effect Time | Mechanic | Effect |
|---|---|---|---|
| 00:16 | 00:21 | Diamond Rain | Magic raidwide damage per player on a given platform. Each applies Magic Vuln. Light parties per platform. |
| 00:32 | 00:36 | Adamant Purge | Diamond Weapon prepares to slice one platform with claws visible. The players on the claw platform teleport across. |
| 00:46 | 00:46 | Claw Swipe | Diamond Weapon slices one platform. |
| 00:50 | 00:50 | Diamond Flash or Homing Laser | Stack together or spread out. Core cannon sticking out = stack. |
| 01:03 | 01:08 | Photon Burst | Flare markers on Top 2 aggro. Tanks be North, party south. |
| 01:20 | 01:24 | Adamant Purge | Diamond Weapon prepares to slice one platform with claws visible. The players on the claw platform teleport across. |
| 01:34 | 01:34 | Claw Swipe | Diamond Weapon slices one platform. |
| 01:40 | 01:45 | Diamond Rain | Magic raidwide damage per player on a given platform. Each applies Magic Vuln. Light parties per platform. |
| 01:56 | 02:00 | Adamant Purge | Diamond Weapon prepares to slice one platform with claws visible. The players on the claw platform teleport across. |
| 02:10 | 02:11 | Claw Swipe | Diamond Weapon slices one platform. |
| 02:13 | 02:14 | Homing Laser or Diamond Flash | Spread out or stack together. Core cannon sticking out = stack. |
| 02:26 | 02:31 | Photon Burst | Flare markers on Top 2 aggro. Tanks be North, party south. |
| 02:43 | 02:47 | Code Chi-Xi-Stigma | Action that once completed begins Phase 2. |
Phase 2: Code Chi-Xi-Stigma Timeline
| Cast Time | Effect Time | Mechanic | Effect |
|---|---|---|---|
| 02:58 | 03:05 | Auri Cyclone | Blue knockback markers. If your tethered Bit is on the platform, be knocked across, otherwise to the side. |
| 03:08 | 03:08 | Diamond Shot | Be knocked back either to the side or across to the other platform. |
| 03:09 | 03:13 | Airship’s Bane | Targeted platform will glow. Move to the safe platform. |
| 03:24 | 03:29 | Outrage | Magical raidwide AoE damage. |
| 03:32 | 03:37 | Outrage | Magical raidwide AoE damage. |
| 03:42 | 03:57 | Auri Arts | Dashes. Be in the safe area. |
| 04:05 | 04:10 | Outrage | Magical raidwide AoE damage. |
| 04:12 | 04:17 | Auri Doomstead | AoE Tankbuster on main Tank. |
| 04:26 | 04:32 | Auri Arts | Dashes. Be in the safe area. |
| 04:35 | 04:37 | Vertical Cleave | Raidwide AoE damage with a knockback. Anti-knockbacks work. |
| 04:45 | 04:50 | Outrage | Magical raidwide AoE damage. |
| 04:57 | 05:01 | Articulated Bits | Spawns Articulated Bits that will shoot Aetherial Bullet beams. |
| 05:05 | 05:20 | Auri Arts | Dashes. Be in the safe area. |
| 05:09 | 05:12 | Aetherial Bullet | Avoidable beam AoEs from Articulated Bits. |
| 05:15 | 05:15 | Articulated Bits Teleport | The Articulated Bits will spread out on their platform before shooting Aetherial Bullet beams. |
| 05:17 | 05:20 | Aetherial Bullet | Avoidable beam AoEs from Articulated Bits. |
| 05:28 | 05:33 | Outrage | Magical raidwide AoE damage. |
| 05:35 | 05:40 | Auri Doomstead | AoE Tankbuster on main Tank. |
| 05:48 | 05:52 | Articulated Bits | Spawns Articulated Bits that will shoot Aetherial Bullet beams. |
| 05:57 | 06:04 | Auri Arts | Dashes. Be in the safe area. |
| 05:57 | 06:00 | Aetherial Bullet | Avoidable beam AoEs from Articulated Bits. |
| 06:03 | 06:03 | Articulated Bits Teleport | The Articulated Bits will spread out on their platform before shooting Aetherial Bullet beams. |
| 06:06 | 06:08 | Vertical Cleave | Raidwide AoE damage with a knockback. Anti-knockbacks work. |
| 06:07 | 06:10 | Aetherial Bullet | Avoidable beam AoEs from Articulated Bits. |
| 06:17 | 06:22 | Outrage | Magical raidwide AoE damage. |
| 06:30 | 06:47 | Phase 3 Transition | Downtime until Phase 3. |
Phase 3 Timeline
| Cast Time | Effect Time | Mechanic | Effect |
|---|---|---|---|
| 06:50 | 07:02 | Flood Ray | Players marked 1-8 for magic cleaves. Odds on Blue platform, Evens on Red platform. |
| 07:25 | 07:30 | Photon Burst | Flare markers on Top 2 aggro. Tanks be North, party south. |
| 07:45 | 07:49 | Articulated Bits | Spawns Articulated Bits that will shoot Aetherial Bullet beams. |
| 07:58 | 08:01 | Aetherial Bullet | Avoidable beam AoEs from Articulated Bits. |
| 07:52 | 07:56 | Adamant Purge | Diamond Weapon prepares to slice one platform with claws visible. The players on the claw platform teleport across. |
| 08:04 | 08:04 | Articulated Bits Teleport | The Articulated Bits will spread out on their platform before shooting Aetherial Bullet beams. |
| 08:05 | 08:06 | Claw Swipe | Diamond Weapon slices one platform. |
| 08:07 | 08:10 | Aetherial Bullet | Avoidable beam AoEs from Articulated Bits. |
| 08:09 | 08:10 | Homing Laser or Diamond Flash | Spread out or stack together. Core cannon sticking out = stack. |
| 08:16 | 08:21 | Diamond Rain | Magic raidwide damage per player on a given platform. Each applies Magic Vuln. Light parties per platform. |
| 08:32 | 08:36 | Articulated Bits | Spawns Articulated Bits that will shoot Aetherial Bullet beams. |
| 08:36 | 08:36 | Articulated Bits Teleport | The Articulated Bits will spread out on their platform before shooting Aetherial Bullet beams. |
| 08:39 | 08:43 | Diamond Shrapnel | Chasing AoEs that must be dropped on the outer edge before teleporting across. |
| 08:45 | 08:48 | Aetherial Bullet | Avoidable beam AoEs from Articulated Bits. |
| 08:46 | 08:50 | Adamant Sphere | Spawns towers that each player must stand in to prevent the Burst raidwide AoE and a Vuln Up. |
| 08:54 | 08:57 | Aetherial Bullet | Avoidable beam AoEs from Articulated Bits. |
| 09:01 | 09:06 | Photon Burst | Flare markers on Top 2 aggro. Tanks be North, party south. |
| 09:22 | 09:26 | Articulated Bits | Spawns Articulated Bits that will shoot Aetherial Bullet beams. |
| 09:26 | 09:26 | Articulated Bits Teleport | The Articulated Bits will spread out on their platform before shooting Aetherial Bullet beams. |
| 09:29 | 09:33 | Adamant Purge | Diamond Weapon prepares to slice one platform with claws visible. The players on the claw platform teleport across. |
| 09:34 | 09:38 | Aetherial Bullet | Avoidable beam AoEs from Articulated Bits. |
| 09:41 | 09:41 | Articulated Bits Teleport | The Articulated Bits will spread out on their platform before shooting Aetherial Bullet beams.** |
| 09:43 | 09:44 | Claw Swipe | Diamond Weapon slices one platform. |
| 09:43 | 09:47 | Aetherial Bullet | Avoidable beam AoEs from Articulated Bits. |
| 09:46 | 09:47 | Diamond Flash or Homing Laser | Stack together or spread out. Core cannon sticking out = stack. |
| 09:52 | 09:57 | Diamond Rain | Magic raidwide damage per player on a given platform. Each applies Magic Vuln. Light parties per platform. |
| 10:09 | 10:21 | Flood Ray | Players marked 1-8 for magic cleaves. Odds on Blue platform, Evens on Red platform. |
| 10:44 | 10:49 | Photon Burst | Flare markers on Top 2 aggro. Tanks be North, party south. |
| 11:04 | 11:08 | Articulated Bits | Spawns Articulated Bits that will shoot Aetherial Bullet beams. |
| 11:11 | 11:15 | Adamant Purge | Diamond Weapon prepares to slice one platform with claws visible. The players on the claw platform teleport across. |
| 11:17 | 11:20 | Aetherial Bullet | Avoidable beam AoEs from Articulated Bits. |
| 11:25 | 11:26 | Claw Swipe | Diamond Weapon slices one platform. |
| 11:28 | 11:29 | Homing Laser or Diamond Flash | Spread out or stack together. Core cannon sticking out = stack. |
| 11:34 | 11:39 | Diamond Rain | Magic raidwide damage per player on a given platform. Each applies Magic Vuln. Light parties per platform. |
| 11:48 | 11:58 | Flood Ray (Enrage) | Kill or be killed! |
Phase 1
Begin by setting up two light parties. This will help with the flow of the fight as you will be regularly swapping between platforms and unable to swap back for 20 seconds due to the debuff Immobile Suit.
The first mechanic is Diamond Rain. This is a raidwide AoE that gives you a Magic Vulnerability for each player you occupy a platform with. A 4-4 split is recommended to reduce damage for little cost. It can also be mitigated.
Following Diamond Rain, the top two players in aggro will begin getting auto attacked. These attacks are thin line cleaves and should be taken by the tanks as they hit for moderate damage.
Adamant Purge 1
There are three configurations for Adamant Purge and each uses a mechanic from one of the past weapons out of Sapphire, Emerald, or Ruby, in addition to a cleave indicated by a claw forming from one of Diamond Weapon’s hands forcing all 8 players to one side.
During the first Adamant Purge, Diamond Weapon will only access Sapphire Weapon or Emerald Weapon:
- If Sapphire Weapon is accessed, it will grow a canon attachment on its chest and execute Diamond Flash, a party-stack beam AoE.
- If Emerald Weapon is accessed, their shoulders will open up to launch Homing Lasers from its canons which must be resolved by spreading out.
Immediately following Adamant Purge, the light party that crossed to avoid the cleave will remain due to the Immobile Suit debuff preventing them from crossing while the party without the debuff teleports over. This will be a common theme for the remainder of the fight.
Next up is Photon Burst. The 1st and 2nd players in aggro will be marked by a proximity marker that deals heavy damage. Have the tanks stand at the North end of their respective platforms with moderate mitigation while the rest of the party stands at the South end.
You will have to remain on your platforms until Adamant Purge 2 reveals the safe side.
Adamant Purge 2
Adamant Purge 2 is relatively simple as Diamond Weapon will always do a side cleave denoted by a larger danger claw like Ruby Claw.
Have the light party on the danger side teleport across and when the mechanic completes have the other light party without Immobile Suit cross to prepare for Diamond Rain.
Adamant Purge 3
Diamond Weapon will now access the unused Weapon’s power in Adamant Purge 1.
If there was a Diamond Flash (party stack) in Adamant Purge 1, there will now be a Homing Laser (spread) mechanic instead and vice-versa.
Resolve this much the same way you did before, having a light party cross when they see the glowing danger claw and then either stack if Diamond has a chest canon, or spread if their shoulders are preparing to fire.
There is one more Photon Burst proximity buster on the tanks before the phase ends. Only 1 tank needs to change platforms for this if you wish to remain on the same platform.
Phase 2: Code Chi-Xi-Stigma
Phase 2 begins with the completion of the Code Chi-Xi-Stigma cast (or Code 666 for those who are curious as to what the Ancient Greek means). Diamond Weapon will remove its armour, transforming into its true Ifrit-like form while changing up its core mechanics for the phase.
Firstly, Articulated Bits will spawn and tether to players in addition to a massive blue radial knockback that will occur on both platforms. The goal is be far away from your tethered bit by making use of the radial knockback:
- If your tethered Bit is on the same platform that you occupy, get yourself launched to the other platform.
- If your tethered bit is on the opposing platform then simply get knocked from one end of your platform to the other.
You must not use the teleporter here to manipulate your tether as you will need it for the upcoming mechanic. Immediately after the knockback resolves, Diamond Weapon will pick a platform to destroy with Airship’s Bane. Here, you will need to access the teleporters to teleport you to safety if you are on the platform that Diamond chose.
After the platform is destroyed, there will be two Outrage casts for magical raidwide damage.
Auri Arts 1
Diamond Weapon will do a series of dashes in a zig-zag pattern. To find the safe spot, once the boss faces an orb, stand on the edge opposite from the side they face, in front of the middle orb along that wall.
After the zig-zag dashes, Diamond Weapon will then hang upside down from the center and face an the North or South orb. They will dash from that orb creating a danger zone on half the platform.
Following another Outrage, Diamond will cast Auri Doomstead. This is a physical tankbuster that does splash damage and applies a long physical vulnerability. This must be mitigated and is a forced tankswap.
Auri Arts 2
Diamond Weapon will perch itself on an orb along the North or South end of the platform. From this orb, Diamond will jump down doing a large AoE at its point of impact.
If you are struck by this it will apply a vuln stack and knock you back. If there is an orb opposite of Diamond during this mechanic, it will bounce off the orb, return to its starting side and land there.
Therefore:
- If there is no orb opposite Diamond, go towards the boss.
- If there is an orb opposite Diamond, move away from the boss while staying along the sides of the arena to dodge the dash.
Regardless of pattern, there will be an orb floating near the middle of the arena. Position yourself to be knocked to an opposite corner or use your knockback prevention for Vertical Cleave.
Auri Arts 1 + Articulated Bits
Now, we have a repeated of the first Auri Arts, with a change!
This time Articulated Bits will spawn and beam half the arena with Aetherial Bullet, prohibiting us from using that half at the start of this mechanic.
To resolve this:
- If the boss faces away from the safe half, stand in front of the middle orb opposite where the boss is facing just like you did before.
- If the boss faces towards the safe half, stand in front of the orb directly next to the middle orb that is not in the direction of the bosses charge.
These safe spots are lined up with the teleport pads.
After Diamond Weapon finishes its zig-zag dashes, look at where it is facing and dodge the half of the arena being cleaved, get knocked back safely while also avoiding the Articulated Bits that will beam alternating rows.
There will be one last Outrage raidwide before the transition to Phase 3.
Phase 3
Diamond Weapon will revert to its original armoured state and will begin with the first major mechanic Phase 3: Flood Ray.
Flood Ray
Flood Ray will often be referred to by its original mechanic Limit Cut from A11S (Cruise Chaser).
Each player will be assigned a number marker from 1 to 8 for Flood Ray casts, massive magic cone cleaves that apply a Magic Vuln that are consecutively cast on each player according to their number.
This will be handled by splitting the group into light parties. While there are a few ways to do this, we will be utilising the method that covers the most visual tells and allow for the most time to resolve the mechanic.
Since the odd numbers are blue and the even numbers are red, we have them on the blue platform and red platform respectively.
Players 1 and 2 will begin in the north corners closest to the boss while players 3 and 4 will begin in the south corners closest to the boss.
Players 5, 6, 7, and 8 will wait in the middle as it will be safe from both north and south cleaves.
Once your number has been cleaved, swap places with the players waiting at the safe spot as follows:
- 1 swaps with 5
- 2 swaps with 6
- 3 swaps with 7
- 4 swaps with 8
You do not have to wait for the player to move to you after being cleaved.
If they are late to come to the safe spot and you are late moving out, you will likely kill both players at the safe spot in addition to another player baiting.
It is better to kill one party member than it is to kill 3 or more.
Don’t sac the party into Healer LB3.
Adamant Purge + Articulated Bits
Articulated Bits will spawn and cleave half of their respective platforms. At the same time, Diamond Weapon will do a stack or spread mechanic.
First, avoid the cleave by jumping to the platform without the glowing claw. Then resolve either the stack or spread while avoiding the bits which will cleave alternating rows. The group that didn’t teleport to avoid the cleave should then move across for Diamond Rain. This leads us to the final big mechanic.
Diamond Shrapnel
Groups on both platforms will do the same movement for Diamond Shrapnel.
All players will be targeted with a chasing AoE marker that they should bait at the far corner of the platform. Articulated Bits will have spawned covering half of their respective platforms with Aetherial Bullets.
Once your first AoE circle is telegraphed, move immediately to the nearest teleporter to go across to the other platform to avoid the half platform Aetherial Bullet cleave. When you are on the other platform, move along the middle of the platform to avoid the chasing AoEs and maintain uptime.
This will be followed by Articulated Bits reconfiguring to cleave in alternating rows, before finally ending with Diamond Weapon casting Adamant Sphere, which are towers that needs to be soaked by a player.
The number of Adamant Spheres that spawn is according to the number of players alive at the start of the mechanic.
To resolve this mechanic, you should bait your AoE in the far corners of the danger zone that will be cleaved by the Articulated Bits.
Next, avoid the Articulated Bits in their new configuration while preparing to soak a tower. Once you dodge the Aetherial Bullet beams, quickly move into a tower to resolve the mechanic.
After this point there are no new mechanics to the encounter. Resolve the mechanics safely and defeat the final Weapon in The Sorrow Of Werlyt saga!
A good kill time for a group will be under 9 minutes. Enrage happens at around 11m 58s.
Loot
Totems
2x 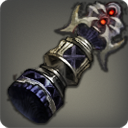 Diamond Totems per clear.
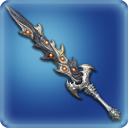
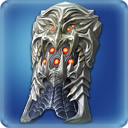
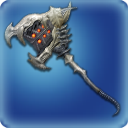
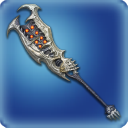
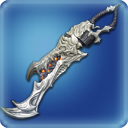
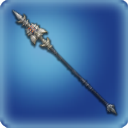
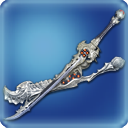
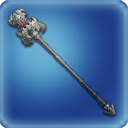
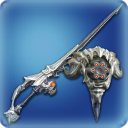
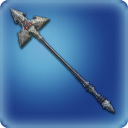
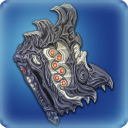
Weapons
Diamond Weapon drops i525 weapons. They can also be bought for 10 Diamond Totems each with the usual exception of 7 + 3 for PLD.
| Job | Weapon | Major Substat | Minor Substat |
|---|---|---|---|
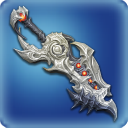
 Diamond Zeta Bastard Sword Diamond Zeta Bastard Sword |
521 Critical Hit | 365 Determination | |
 Diamond Zeta Scutum Diamond Zeta Scutum |
521 Critical Hit | 365 Determination | |
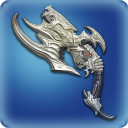
 Diamond Zeta Battleaxe Diamond Zeta Battleaxe |
521 Determination | 365 Critical Hit | |
 Diamond Zeta Guillotine Diamond Zeta Guillotine |
521 Critical Hit | 365 Determination | |
 Diamond Zeta Gunblade Diamond Zeta Gunblade |
521 Determination | 365 Critical Hit | |
 Diamond Zeta Partisan Diamond Zeta Partisan |
521 Determination | 365 Critical Hit | |
 Diamond Zeta Knuckles Diamond Zeta Knuckles |
521 Critical Hit | 365 Determination | |
 Diamond Zeta Blade Diamond Zeta Blade |
521 Determination | 365 Critical Hit | |
 Diamond Zeta Cleavers Diamond Zeta Cleavers |
521 Critical Hit | 365 Determination | |
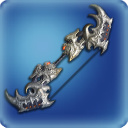 Diamond Zeta Longbow Diamond Zeta Longbow |
521 Critical Hit | 365 Determination | |
 Diamond Zeta Pistol Diamond Zeta Pistol |
521 Determination | 365 Critical Hit | |
 Diamond Zeta Chakrams Diamond Zeta Chakrams |
521 Critical Hit | 365 Determination | |
 Diamond Zeta Rod Diamond Zeta Rod |
521 Determination | 365 Critical Hit | |
 Diamond Zeta Index Diamond Zeta Index |
521 Determination | 365 Critical Hit | |
 Diamond Zeta Hanger Diamond Zeta Hanger |
521 Critical Hit | 365 Determination | |
 Diamond Zeta Cane Diamond Zeta Cane |
521 Critical Hit | 365 Piety | |
 Diamond Zeta Codex Diamond Zeta Codex |
521 Critical Hit | 365 Piety | |
 Diamond Zeta Planisphere Diamond Zeta Planisphere |
521 Critical Hit | 365 Piety |
Mount
Orchestrion Roll
Cosmetics
 Diamond Plating is a crafted material used to create:
 Diamond Weapon Bust (Housing)
 Diamond Barding (Chocobo Barding)
Triple Triad Card
Change Log
- 20/04/2021: Release of this guide.