Duels
Duels are special 1v1 events triggered after the successful completion of specific Critical Engagements in both the Bozjan Southern Front and Zadnor.
Players are selected to participate if they completed the CEs in question while not being hit by mechanics that give vulnerability stacks, and of course, not dying.
The Marching Orders priority buff purchased for 5 Bozjan Clusters does not apply to Duels.
As of Patch 5.55, qualifying for a Duel yet failing to be selected will gain you Notoriety. This increases your odds of being selected and stacks up to 10. Once you are selected for a Duel your notoriety will be entirely spent, falling back to 0.
Let us know on the Eurekan Explorers or AkhMorning Discord if anything needs amending.
Completing all 3 Bozjan Southern Front Duels gains you the Close Encounters achievement with the Sword of the South title.
Completing all 3 Zadnor Duels gains you the Close Encounters of the Zadnoran Kind achievement with the Hero of Zadnor title.
Obtaining both the Close Encounters and Close Encounters of the Zadnoran Kind achievements gains you the Sharper than Blades achievement with the Gunnhildr’s Blade title.
Duel Builds
Coming soon.
Aces High:
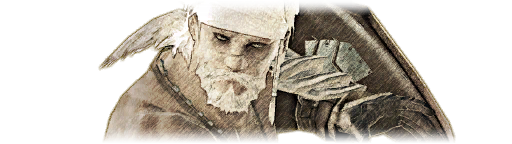
Gabriel
Scanning area for potential targets…
Dabog, the magitek-enhanced pilot, takes to the air in one of the most advanced weapons at the Empire’s disposal: the flying warmachina known simply as Gabriel. If allowed to continue strafing the Resistance front line, your comrades will have little hope of reaching the enemy castrum.
Gabriel’s Rewards
- Gabriel’s Downfall title
- 30 Allagan tomestones of allegory
- 99 southern front lockboxes
- a sheaf of field notes on Dabog
- a lot of mettle scaling to your Resistance Rank
- a +100% mettle earned High Morale buff for all players in a radius around the Duel
Preparing For “Aces High”
To be selected for this Duel, complete the Critical Engagement Vigil for the Lost without being hit by mechanics that give you vulnerability stacks.
Vigil for the Lost is spawned by completing the More Machine Now Than Man Skirmish.
Gabriel is more vulnerable to magic damage. Use of Lost Spellforge if you are on a physical damage job is highly recommended.
Required tools:
- Lost Manawall/Tank invulnerabilities
Recommended tools:
- Lifesteal Essences
- Resistance Potions
- Resistance Reraiser
Gabriel’s Duel
The arena is a circle and will activate a death wall when Gabriel is engaged, reducing the arena’s size.
Gabriel will open up with Magitek Cannon after a few rounds of auto attacks. It will remain stationary while shooting 5 baited ground AoE electricity puddles. Bait and bunch these along the edge of the arena to give yourself maximum combat space for future mechanics.
Shortly after, Gabriel casts Dynamic Sensory Jammer. This applies the Extreme Caution debuff where it ticks down from 5s and if you are moving, performing an action or still resolving damage by the time it wears off, you will take massive damage and be knocked up into the air, likely killing you, if not to that, then the baited AoE circles beneath you.
At 1s left on your timer, missile 3 AoE circles will appear together. Respect the mechanic, wait for Extreme Caution to wear off then move quickly to avoid the missile AoE circles beneath you.
Once you’re in the clear, Gabriel will fly to the side and cast Enhanced Mobility. This damage action knocks you back for just under half of the arena. Become familiar with the distance as it will become important for future mechanics.
Following this, Gabriel will repeat Magitek Cannon. Bait another 5 puddles along the wall.
After the last one is baited is done, get ready for Integrated Scanner. A mechanic returning from Orbonne Monastery, 3 of your cardinal sides will have a marker glowing around you with one side exposed, giving you a “_ Unseen” status. If Gabriel’s next mechanic hits any of the marked sides you will die (unless you use invulnerabilities). Face your exposed “unseen” side to him.
Gabriel will quickly fly to one side then prepare Enhanced Mobility. A Tower marker will spawn in line with Gabriel towards the opposite side of the arena.
You can choose to judge your distance and get knocked back into position, or, use anti-knockbacks and remain in the tower until it resolves. Failing the tower will kill you and if being knocked back you do not have time to adjust. This Tower sequence is repeated once more.
A few autos as a reprieve, Gabriel will prepare Cruise Missile as the next important mechanic. Multiple slow moving missiles will spawn on two cardinal sides and you will be targeted with a Prey proximity pulse marker.
Head to a safe location far away, drop the proximity pulse marker then nagivate around the missiles until you are a safe distance away from the pulses. It will detonate, then Gabriel casts Dynamic Sensory Jammer repeating the previous sequence of Extreme Caution into AoE circles.
Integrated Scanner will then be cast, only this time you have no unseen side and are debuffed with Fully Analysed. This mechanic requires the use of invulnerability cooldowns, or dying and being auto-revived.
Resolve the Tower or sacrifice yourself then prepare for another set of puddles to bait from Magitek Cannon. As before at the start, this is followed by Integrated Scanner with an unseen side. Resolve all the Towers into another Cruise Missile sequence.
That’s all there is to it!
Gabriel will cycle through these mechanics until ~9 minutes pass where an impossible 8 Tower set will spawn as the enrage.
Kill or be killed!
Gabriel TL;DR
- Magitek Cannon - bait puddles along the wall
- Dynamic Sensory Jammer - respect the debuff timer, wait for it to fade then dodge the AoE circles
- Enhanced Motion - damage + knockback. Anti-knockbacks do work.
- Magitek Cannon - bait puddles along the wall
- Integrated Scanner 1 - face unmarked side to boss, get knocked into the tower (or use anti-knockbacks)
- Cruise Missiles - drop the proximity AoE marker on the other side then dodge missiles until far enough away
- Dynamic Sensory Jammer - respect the debuff timer, wait for it to fade then dodge the AoE circles
- Integrated Scanner 2 - use invulnerabilities, Manawall or an auto-revive, survive and resolve the tower
Previously seen mechanics then loop:
[Loop Begins]
- Magitek Cannon
- Integrated Scanner 1
- Cruise Missiles
- Dynamic Sensory Jammer
[Loop Ends]
Enrages at ~9 mins.
Kill boss, don’t die.
Gabriel PoVs
Gabriel PoVs
Beast of Man:
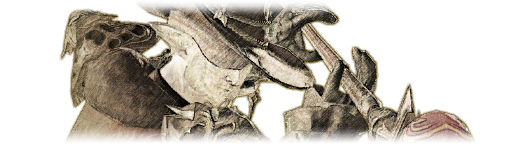
Lyon The Beast King
Does anyone have the stones to face me?
Known for his unmatched command of a variety of ferocious beasts, Lyon is one of the most feared adversaries the Bozjan Resistance has faced to date. This formidable foe must be overcome for them to have any chance at victory.
Lyon’s Rewards
- Queller of Beasts title
- 30 Allagan tomestones of allegory
- 99 southern front lockboxes
- a sheaf of field notes on Lyon
- a lot of mettle scaling to your Resistance Rank
- a +100% mettle earned High Morale buff for all players in a radius around the Duel
Preparing For “Beast of Man”
To be selected for this Duel, complete the Critical Engagement The Hunt for Red Choctober without being hit by mechanics that give you vulnerability stacks.
It’s been said The Hunt for Red Choctober is spawned by killing Magitek in the central sector. (This is the current best theory, but remains to be 100% confirmed).
Required tools:
- Lost Dispel
- Lost Manawall
Recommended tools:
- Lifesteal Essences
- Resistance Potions
- Resistance Reraiser
Lyon’s Duel
The arena is a circle and will activate a death wall shortly after Lyon is engaged, reducing the arena’s size.
Lyon will open with Raging Winds, activating his death wall and buffing himself with Enaero. Remove this with Lost Dispel immediately, then change Lost Dispel to another action as you will not need it any longer.
His first mechanic is Heart of Nature where he creates a large eruption puddle that explodes outwards in rings. This functions the same as what he does in Castrum Lacus Litore and Adrammelech’s Earth Orbs. Stand by the initial circle, then move in to avoid the ring AoEs.
Right after he will dash to the side and prepare Taste of Blood. Run behind him immediately.
Next comes his famed twister mechanic. Move before Ravenous Gale finishes casting and don’t run into the numerous twister objects that spawn across the arena. Lyon will tether you to drop fire orbs on your location. Run around the arena wall and drop them spaced apart. Dodge around the twisters and line AoEs. As this is happening he will jump middle and prepare another Taste of Blood cleave. Run behind him once more and dodge the last line AoEs.
After this he will take 5s to cast Twin Agonies. This is a heavy damage tank buster that pierces invulnerabilities and must be mitigated with Lost Manawall / tank cooldowns.
Now Lyon will begin his mechanic loop.
First he will open with the knockback Wind’s Peak. Anti-knockbacks work against it. Keep that in mind for future mechanics.
Lyon will cast Heart of Nature into Wind’s Peak.
Heart of Nature will spawn 4 arrow markers around the arena indicating moving AoEs that will box around the middle. Energy will crawl across the ground towards the arrows showing when the AoEs will activate and start moving.
Wind’s Peak will knock you back, so either aim yourself to not get hit by the moving AoEs, use an anti-knockback or time a gap closer.
After this, Lyon will cast The King’s Notice. Simply look away from him.
A few autos of reprieve, Lyon declares how much fun he’s having, before preparing Heart of Nature once more. This time there will be two eruption puddles side by side with AoE markers on opposite sides of the arena. Stand by the wall side of an eruption, move into the circle while evading the ring of the other eruption, then dodge into the second eruption while avoiding the moving arrow AoEs.
Pull Lyon to one of the safe sides and get ready for Splitting Rage. This inflicts Temporary Misderation - an old mechanic from the Rabanastre 24 man, this puts a pointing finger marker above your head that spins around. When you prompt to move, it will move you in the current direction it is pointing towards. Lyon will jump to the side of an arena, preparing a Taste of Blood cleave. Direct the arrow to point towards him and run immediately. You have ~3s to get there.
A little later he will prepare Ravenous Gale into Wind’s Peak into Dynastic Flame. While you can knock yourself safely without hitting twisters, it’s recommended to use anti-knockbacks. Drop the fire orbs along the edge of the arena and dodge the line AoEs.
Lyon will eventually jump back to the middle of the arena and prepare Heart of Nature. This may randomise between the square or twin eruption form, however, all PoVs seen imply the twin eruptions with the opposing line AoEs. Dodge the mechanics as before then be behind him as he prepares Taste of Blood. This marks the end of his loop.
Lyon will cycle through these mechanics until ~9 minutes pass where he will jump to the middle of the arena and take 35 seconds to cast his enrage Skyrending Strike.
Lyon TL;DR
- Raging Winds - activates his death wall, applies Enaero to Lyon, Lost Dispel asap
- Heart of Nature + Taste of Blood - stand by the eruption, run into the circle after the first AoE, then go immediately behind Lyon
- Ravenous Gale + Dynamic Flame - move before the cast finishes, avoid the twisters on the ground, drop fire orbs around the edge of the arena wall, dodge line AoEs
- Taste of Blood - get behind the Lyon after he jumps to the middle, keep dodging Fire Orb line AoEs
- Twin Agonies - heavy damage with a long cast. Use Lost Manawall or tank cooldowns
[Loop Begins]
- Wind’s Peak - dodge AoE, don’t get knocked back into the wall. Anti-knockbacks work
- Heart of Nature 1 + Wind’s Peak - AoEs will move across the arena forming a square around the middle. Watch the knockback, don’t get hit by the moving AoEs
- The King’s Notice - gaze attack, look away
- Heart of Nature 2 - dodge eruptions from the wall side, move in to the eruption AoE, dodge the ring AoE then move to the sides dodging the moving AoE pulses
- Splitting Rage + Taste of Blood -
 Temporary Misdirection marker, have it point towards where Lyon jumps, run asap
 - Ravenous Gale + Wind’s Peak + Dynastic Flame - move before the cast finishes, avoid the twisters on the ground, use anti-knockbacks or get knocked back safely, drop fire orbs along the arena wall, dodge line AoEs
- Heart of Nature 2 + Taste of Blood - dodge eruptions from the wall side, move in to the eruption AoE, dodge the ring AoE then move to the sides dodging the moving AoE pulses, then run behind Lyon
[Loop Ends]
Enrages at ~9 mins.
Kill boss, don’t die.
Lyon PoVs
Lyon PoVs
And the Flames Went Higher:
Sartauvoir The Inferno
Dare you brave the Inferno?
Of all the mages assigned to the IVth Legion, Sartauvoir quo Soranus is one of the most experienced…and most sadistic. The Bozjan southern front has provided him with the perfect arena to demonstrate his remarkable control of flame and take part in his favorite pastime: burning people alive.
Sartauvoir’s Rewards
- The Death of Flame title
- 30 Allagan tomestones of allegory
- 99 southern front lockboxes
- a sheaf of field notes on Sartauvoir
- a lot of mettle scaling to your Resistance Rank
- a +100% mettle earned High Morale buff for all players in a radius around the Duel
Preparing For “And the Flames Went Higher”
To be selected for this Duel, complete the Bozjan Southern Front zone 3 Critical Engagement Metal Fox Chaos without being hit by mechanics that give you vulnerability stacks.
Required tools:
- Lost Manawall/Tank invulnerabilities
- Resistance Medikit, Esuna, The Warden’s Paean or Antidotes for Bio IV
Recommended tools:
- Lifesteal Essences
- Resistance Potions
- Resistance Reraiser
Sartauvoir’s Duel
The arena is a square and will activate a death wall shortly after Sartauvoir is engaged, slightly reducing the arena’s size.
Sartauvoir will open with Meltdown. This snapshots your location and repeatedly pulses AoE fire damage 8 times at that place. Move so that only the first pulse registers damage.
After a few autos later he will cast Time Eruption splitting up the arena into 4 squares. One diagonal pair will be slow, the other will be sped up. Move from the slow square to the fast square to dodge the eruptions. During this he will also target you with the line AoE Thermal Gust.
Phenex is the next mechanic where he will summon Phoenices along the sides of the arena. Pay attention to which sides they are covering and which ones arrive first then glow as they prepare to divebomb, as only one corner will be initially safe. Stand in the safe corner, then move to dodge the 2nd divebomb.
Sartauvoir will cast another Meltdown then follow up with his new phase Pyrolatry.
Pyrolatry, aka the “Tornado Phase” or “Liquid Flame” phase, has him change form and spawn a fire tornado in the center of the arena.
The first mechanics are Flaming Rain and Flashover. Flaming Rain will bombard you with 3 lots of 3 AoE circles that will be baited around you, while Flashover is a large AoE circle coming from the firenado. Bait the 1st set of AoEs to the side, move into the corner to bait the 2nd set, wait for Flashover to resolve, then immediately move and dodge the last set of AoEs.
Shortly after Sartauvoir will prepare 3 Thermal Cleaves cones towards your direction. Have Sartauvoir face you towards the middle, while you stand on a diagonal so that when the firenado casts Backdraft it will knock you back into a corner, then dodge the Thermal Cleaves.
The firenado will soon cast Flashover or Backdraft. Look at the aggro list to see which is being cast so you know whether to dodge in the corner, or be knocked back into a corner. Pillar of Flame AoE circles will be covering the arena so you must look to see which corner is safe, or try to rely on surviving/reviving from the mechanic.
Following this will be another Flaming Rain set and 3 Thermal Waves to your direction. Positioning is important, however, if you find the timing tight you can use Sprint or Lost Swift to dodge more easily. This marks the end of the first Pyrolatry phase.
Sartauvoir will revert back to his human pyromancer form and take a breather, then resort to poisoning you with Bio IV. Bio IV will tick for 60k+ on a DPS, so be sure to either automatically cleanse it with Resistance Medikits or precast Esuna to prevent the damage altogether.
After 3 Meltdowns into a Thermal Gust he will prepare Phenex with Time Eruption, only this time there is no safe side to dodge the divebombs. Use Lost Manawall or tank invulnerabilities while standing in the fast clock corner that will only be hit by one divebomb. Then, once you land, dodge the Thermal Gust.
Sartauvoir will then prepare Pyrolatry to begin his loop of mechanics that you have previously seen. Pay attention to the tornado casts and your positioning.
Nothing is new from here, so good luck on the kill!
After 9 minutes Sartauvoir will prepare his enrage.
Sartauvoir TL;DR
Pyromancer Phase 1:
- Meltdown - move and dodge
- Time Eruption + Thermal Gust - dodge from slow to fast clocks, then dodge the line AoE
- Phenex - look for which corner is safe based on which order the birds arrive/glow. Dodge both divebombs
- Meltdown - move and dodge
- Pyrolatry - fire damage & phase change
Liquid Flame + Tornado Phase:
- Flaming Rain + Flashover - bait 1st AoEs to the side, move to the corner to avoid the tornado’s AoE, move out
- Thermal Cleave x 3 + Backdraft - have boss face away from corner you want to be knocked into, get knocked into corner, dodge cleaves
- Backdraft OR Flashover + Pillar of Flame - knockback or AoE circle from the tornado, look for the safe corner and dodge accordingly
- Flaming Rain + Thermal Wave x 3 - dodge around, use Sprint or Lost Swift if you need to
Pyromancer Phase 2:
- Bio IV - Resistance Medikit or Esuna it as it lands
- Meltdown x 3 - move and dodge all 3
- Thermal Gust - dodge line AoE after 3rd Meltdown
- Phenex + Time Eruption - Lost Manawall the fast clock corner that is not being hit by both divebombs
- Thermal Gust - dodge the line AoE right after you land
- Pyrolatry - fire damage & phase change
Previously seen mechanics then loop:
[Loop Begins]
Liquid Flame + Tornado Phase:
- Flaming Rain + Thermal Wave x 3 - dodge around, use Sprint or Lost Swift if you need to
- Backdraft OR Flashover + Pillar of Flame - knockback or AoE circle from the tornado, look for the safe corner and dodge accordingly
- Thermal Wave x 3 - dodge the cones
Pyromancer Phase:
- Time Eruptions + Thermal Gust - dodge from slow to fast clocks, then dodge the line AoE
- Bio IV - Resistance Medikit again earlier or Esuna it as it lands
- Meltdown x 3 - move and dodge all 3
- Thermal Gust - dodge the line AoE
- Phenex + Thermal Gust - dodge birds like at the start, dodge the line AoE
- Pyrolatry - fire damage & phase change
[Loop Ends]
Enrages at ~9 mins.
Kill boss, don’t die.
Sartauvoir PoVs
Sartauvoir PoVs
The Broken Blade:
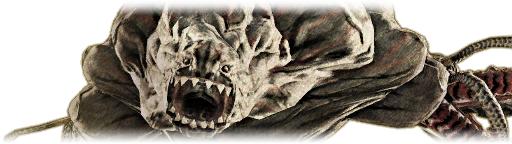
Hypertuned Dabog
Scanning for high-priority targets…
Dabog has been reforged into a foul new weapon, a creature malformed beyond recognition. This thinking, unfeeling biological weapon has but a single purpose…
Dabog’s Rewards
- The Hypertuned title
- 30 Allagan tomestones of revelation
- 99 Zadnor lockboxes
- a sheaf of field notes on Dabog, part II
- a lot of mettle scaling to your Resistance Rank
- a +100% mettle earned High Morale buff for all players in a radius around the Duel
Preparing For “The Broken Blade”
To be selected for this Duel, complete the Zadnor zone 1 Critical Engagement A Familiar Face without being hit by mechanics that give you vulnerability stacks.
Required tools:
- Lost Excellence OR Lost Impetus/Gap Closers
Recommended tools:
- Resistance Potions
- Resistance Reraiser
Dabog’s Duel
The arena is a circle and will activate a death wall shortly after Hypertuned Dabog is engaged, slightly reducing the arena’s size.
Hypertuned Dabog will open with Left-arm Slash. This will be a cleave attack in front with his left arm. Move behind on the opposite side to dodge.
Next will be Right-arm Comet into Left-arm Metal Cutter. The first will spawn a comet tower that you must stand in before it resolves. The second will spawn 3 cone AoEs around Dabog where he will later slice, while also putting a blue knockback marker over your head. There will be a second set of 3 cone AoEs at different angles after the first.
The idea for this sequence is to stand in the comet tower, then angle yourself to the side to be knocked back into the nearest adjacent safe area. The blue marker will disappear and you will be knocked back at the same time as the first cone AoEs go off. Stand near Dabog as the initial knockback happens, then run through to the other side which will be a safe area.
After this sequence, Dabog will cast Left-arm Limit Cut and buff himself with ![]() Left Arm Primed. This means that the next blue marker Left-arm Metal Cutter knockback from Dabog will be stronger, knocking you further back.
Left Arm Primed. This means that the next blue marker Left-arm Metal Cutter knockback from Dabog will be stronger, knocking you further back.
He will then prepare Right-arm Ray into another Left-arm Metal Cutter. The first will spawn 3 large AoE circles around the arena. The second will be similar to the initial Left-arm Metal Cutter, only this time the knockback from Dabog will be almost half the distance of the arena.
To resolve this, look for the safe region after the circle and cone AoEs appear, then hug Dabog and angle yourself to get strong knockbacked into a safe area. After the first cone AoEs go off, rotate around to the next safe area for the second cone set. This movement may be hard to visualise, so do check a PoV to get a better idea on how far you need to move.
Dabog will next cast Right-arm Limit Cut and buff himself with ![]() Right Arm Primed. This means that the next comet tower knockback will be stronger, knocking you further back.
Right Arm Primed. This means that the next comet tower knockback will be stronger, knocking you further back.
The next sequence will be Right-arm Comet into Left-arm Metal Cutter. This will be similar as the first time, only now the comet tower’s knockback is stronger. Angle yourself to get knocked back into the far safe area for the first cone AoE set, hug Dabog and get knocked back by Left-arm Metal Cutter, then run straight through to the opposite side to be in the safe area for the second cone AoE set.
Phase 2 begins with Cell Division where Dabog will spawn 4x Dabog Fragments around the arena edge that will later perform Right-arm Blaster beams. This also marks the beginning of the encounter’s mechanic loop.
Two of the Dabog Fragments will be casting Right-arm Blaster. As this happens there will be a divebomb marker above your head. Bait the first set by the arena wall. Move in towards Dabog as he prepares Left-arm Metal Cutter. The blue marker knockback will be regular, so hug Dabog and be knocked back, then move center hold. Wait for the next two Dabog Fragments to begin casting Right-arm Blaster, bait these middle, then move straight through to the safe area for the second cone AoE set.
Next will be Left-arm Wave. An overhead bait maker will appear for an upcoming large AoE. You can either:
- use Lost Excellence and ignore it entirely.
- drop this at the edge of the arena, then the moment the marker disappears immediately gap close to Dabog and run forward to avoid the AoE. You do not have much time to avoid the blast at all, so having Lost Impetus or an innate job gap closer makes a good difference.
Right-arm Blaster will happen after. Like the casts before, this is a baited mechanic, but without a marker. Look to see where Dabog is pointing his arm and avoid being in the beam’s path.
Dabog will then cast Left-arm Limit Cut into Arm Unit. This mechanic combines Metal Cutter with Comet, so it behaves very similarly to the tower and cone patterns in Phase 1.
Stand next to Dabog in a safe area and be strong knockbacked into the comet tower as the first cone AoE set goes off. Immediately angle yourself to the side and be tower knocked back into the adjacent safe area for the second cone AoE set. There will be several auto-attacks into a Left-arm Slash following this.
Right-arm Limit Cut will be cast into the final big mechanic Right-arm Ray.
Four red Atomic Sphere orbs will appear forming a square around the arena. They will each spawn a cross AoE in addition to having a rotating arrow marker around them, forming 4 square safe areas. Blue rotates left, Orange rotates right. You must find the safe square where, while facing Dabog in the center, Blue is to your left and Orange is to your right.
Stand in the outer most corner of the safe area and wait for the first Right-arm Ray AoE circle to appear under your feet. Immediately move forward outside the edge of the first, and repeatedly drop these fire puddles in a daisy-chain moving forward, whether it is a tight straight line or zig-zag. Keep the circles as tightly together as possible to give yourself as much space while the Orb crosses rotate and pulse after each puddle drop, or else you will run out of space by the time you reach the edge. Once you reach the edge of the wall, wait for the final Orb pulse before moving out.
Following this will be Right-arm Limit Cut into Arm Unit. This works like before, only instead of Dabog’s knockback being strong and the comet tower regular, it is the opposite with the boss knockback being regular and the comet tower knockback is strong.
Stand in the middle of the safe area to be knocked back into the comet tower, then angle yourself to be strong knocked back through to the opposite side safe spot for the second AoE cone set.
Following the second Arm Unit is a Left-arm Slash. Dodge it as usual. This marks the end of the loop before repeating Phase 2 from Cell Division.
Nothing is new from here, so good luck on the kill!
After just under ~8 minutes, Hypertuned Dabog will prepare his enrage Right-arm Blaster to one shot you.
Presently it is known that if you auto-revive after dying to this enrage, Dabog will bug out and will then proceed to only auto-attack you, allowing for an easy kill. This is likely to be fixed in the future.
Dabog TL;DR
Phase 1:
- Left-arm Slash - be on the opposite side behind to avoid the cleave attack
- Right-arm Comet - spawns a comet tower with knockback
- Left-arm Metal Cutter - spawns cone slice AoEs. Angle yourself for the tower to knock you into an adjacent safe area, make sure the weaker knockback does not knock you into a cone, wait for first cone slices to happen, then move directly through the middle to avoid the second cone slices
- Left-arm Limit Cut - gets buffed with
 Left Arm Primed resulting in a bigger knockback from the boss’ Left-arm Metal Cutter
 - Right-arm Ray - spawns large AoE circles
- Left-arm Metal Cutter - spawns cone slice AoEs. Look for an open spot after the cone AoEs go out, angle yourself to get knocked back far into a safe spot, then rotate around into a new cone safe spot
- Right-arm Limit Cut - gets buffed with
 Right Arm Primed resulting in a bigger knockback from the comet tower
 - Right-arm Comet - spawns a comet tower which will result in a big knockback
- Left-arm Metal Cutter - spawns cone slice AoEs. Get knocked by the comet tower into a far safe area, make sure the weaker knockback does not knock you into a cone, wait for first cone slices to happen, then move directly through the middle to avoid the second cone slices
Phase 2:
[Loop Begins]
- Cell Division - spawns Dabog Fragment clones that will use Right-arm Blaster later
- Right-arm Blaster x2 (Dabog Fragments) - divebomb markers. Bait the beam markers at the wall and move out
- Left-arm Metal Cutter - spawns cone slice AoEs. Move further into a safe area after baiting the beams, get knocked back by a regular Left-arm Metal Cutter away from the cones, then move center to Dabog
- Right-arm Blaster x2 (Dabog Fragments) - divebomb markers. Bait the beam markers center and move through to avoid the cone slices
- Left-arm Wave - bait the marker at the edge, then gap close/Lost Impetus and run out of the baited AoE’s radius, or, Lost Excellence and just take it
- Right-arm Blaster - bait the beam and move out
- Left-arm Limit Cut - gets buffed with Left Arm Primed resulting in a bigger knockback from the boss
- Arm Unit - combines Metal Cutter with Comet. Stand next to Dabog in a safe area, be strong knockbacked into a comet tower, then angle yourself to be regular tower knockbacked into an adjacent safe spot for the second cone cleaves
- Left-arm Slash - be on the opposite side behind to avoid the cleave attack
- Right-arm Limit Cut - gets buffed with Right Arm Primed resulting in a bigger knockback from the comet tower
- Right-arm Ray - spawns 4 Atomic Sphere spinning orbs. Find the quadrant where Blue is on your left and Orange is on your right. Stand in the far safe corner, then bait Right-arm Ray puddles forward tightly in a straight line
- Right-arm Limit Cut - gets buffed with Right Arm Primed resulting in a bigger knockback from the comet tower
- Arm Unit - combines Metal Cutter with Comet. Stand in the middle of a safe area, be regular knockbacked into a comet tower, then angle yourself to be strong tower knockbacked into the far safe area on the opposite side for the second cone cleaves
- Left-arm Slash - be on the opposite side behind to avoid the cleave attack
[Loop Ends]
Loop repeats once more.
Right-arm Blaster enrage at just under 8 minutes.
Kill boss, don’t die.
Dabog PoVs
Dabog PoVs
Head of the Snake:
Menenius sas Lanatus
If you would have my head, then come and claim it!
You at last stand face-to-face with Meneius sas Lunatus, commanding officer of the IVth Legion’s forces in Bozja. Defeat him, and you may deal the heaviest of blows to the imperials’ morale.
Menenius sas Lunatus’ Rewards
- Commander Conqueror title
- 30 Allagan tomestones of revelation
- 99 Zadnor lockboxes
- a sheaf of field notes on Menenius, part II
- a lot of mettle scaling to your Resistance Rank
- a +100% mettle earned High Morale buff for all players in a radius around the Duel
Preparing For “Head of the Snake”
To be selected for this Duel, complete the Zadnor zone 2 Critical Engagement Never Cry Wolf without being hit by mechanics that give you vulnerability stacks.
Required tools:
- Light Curtain
- Lost Excellence/Lost Manawall
Recommended tools:
- Resistance Potions
- Resistance Reraiser
Menenius’ Duel
The arena is a square and will activate a death wall shortly after Menenius is engaged, slightly reducing the arena’s size.
Menenius will open with Callous Crossfire around 12s into the encounter. 4 Magitek Turret adds will spawn around the arena preparing to shoot Aethershot. These will deal very lethal damage, but can be reflected by using a Light Curtain.
After a few autos later he will prepare Magitek Minefield. This will spawn 2 mines in a corner of the arena. One will have a foot marker with a slash through the middle, the other will have a foot marker without the slash. Step into the mine marked without the slash to safely explode it, or else it will later detonate for lethal damage. Keep in mind where the other mines are positioned, as they will remain hidden until Menenius deliberately detonates them later.
Giga Tempest is the next mechanic where he spawn a rectangle AoE indicator to one side of the arena. It will pulse and move across to the other side. Stand in the safe area.
Shortly after he will load up his Gunberd weapon with special ammo when he uses Windslicer Shot OR Dark Shot. This will give him the ![]() Nasty Surprise debuff, indicating he has special ammo loaded:
Nasty Surprise debuff, indicating he has special ammo loaded:
- Windslicer Shot is a knockback that can be prevented with anti KBs.
- Dark Shot is distance based damage - imagine as if you had a spiked distance tether attached to you. Run far away in time for the action to not be lethal.
He will then fire it with the Gunberd action.
Menenius will then prepare Magitek Impetus. This will apply a directional forced movement action that when it expires will apply ![]() Forced March, moving you in that direction. While this debuff is on you, another set of mines will spawn with Magitek Minefield in a different corner. Explode the correct mine, then be let
Forced March, moving you in that direction. While this debuff is on you, another set of mines will spawn with Magitek Minefield in a different corner. Explode the correct mine, then be let ![]() Forced March move you to a safe area.
Forced March move you to a safe area.
Following this, he will use the other Shot, loading his Gunberd with another ![]() Nasty Surprise debuff. Immediately after he will prepare Gunberd and fire.
Nasty Surprise debuff. Immediately after he will prepare Gunberd and fire.
Magitek Mines will be a 3rd time, with Menenius jumping to the middle of the arena to prepare Ruination. There will be a cross AoE where once it has exploded will leave behind 12 “exaflare” arrow markers that will cause AoEs to move across the arena. The safe area in a corner is where both the horizontal and vertical arrows are moving away from you, leaving a safe zone.
Shortly after, Menenius will prepare Spiral Scourge. This action deals massive damage and warrants the use of Lost Excellence or Lost Manawall.
Next he will begin to use new munitions. First will be Proactive Munition. This spawns a circle AoE marker with a chase indicator on you. The AoE will follow, so sprint around and dodge - Lost Sprint and similar can help. As the last pulses are resolving, the fourth and final set of mines from Magitek Minefield will spawn. Safely explode the correct mine.
Reactive Munition will follow. Once resolved, this applies the ![]() Acceleration Bomb status for 12s. As it ticks down to closer 0, stop autos, play it safe and leave enough time so that no actions are resolving to kill you. Menenius may be able to trip it if he autos you at the same moment that it fades, so try to leave enough distance between him and you to prevent this unfortunate timing. After this he will use Sense Weakness which is the opposite condition - keep moving and use your actions.
Acceleration Bomb status for 12s. As it ticks down to closer 0, stop autos, play it safe and leave enough time so that no actions are resolving to kill you. Menenius may be able to trip it if he autos you at the same moment that it fades, so try to leave enough distance between him and you to prevent this unfortunate timing. After this he will use Sense Weakness which is the opposite condition - keep moving and use your actions.
This next sequence repeats at the end of the second half.
Menenius will prepare Windslicer Shot for a future Gunberd knockback. There will be a Giga Tempest only this time there will be a second rectangle AoE set to move into after the first. Be mindful to not walk into any hidden mines. As the first resolves, Magitek Impetus will afflict you with a future ![]() Forced March. After the second rectangle AoE set resolves, he will use his Gunberd. This is a good time to use anti KBs so that you can safely let
Forced March. After the second rectangle AoE set resolves, he will use his Gunberd. This is a good time to use anti KBs so that you can safely let ![]() Forced March move you away. After this there will be a Reactive Munition into Ruination then followed by a Sense Weakness. He will the end this phase with Indiscriminate Detonation to explode all remaining hidden mines, clearing the field. Do not be near the remaining mines.
Forced March move you away. After this there will be a Reactive Munition into Ruination then followed by a Sense Weakness. He will the end this phase with Indiscriminate Detonation to explode all remaining hidden mines, clearing the field. Do not be near the remaining mines.
By this point all mechanics have been experienced other than enrage, however, the combination and sequence of actions will be different at the start of the second half.
He will open with Windslicer Shot but will not use his Gunberd for some time. There will be a Reactive Munition, Magitek Minefield, Magitek Impetus and a 2nd Magitek Minefield before he finally uses his knockback Gunberd. ![]() Forced March from Magitek Impetus will resolve right after, so be sure not to march into a mine or wall.
Forced March from Magitek Impetus will resolve right after, so be sure not to march into a mine or wall.
The 3rd Magitek Minefield will spawn, followed by an additional Windslicer Shot for a future knockback Gunberd.
Ruination will follow. As the moving AoEs are pulsing, the 4th and final mine set will be spawned. Explode the mine after the pulses have finished, then the knockback Gunberd will fire. Get knocked back safely avoiding any of the hidden mines.
Menenius will prepare his final Windslicer Shot of the encounter for a knockback Gunberd in the near future, repeating the earlier aforementioned sequence.
Resolve the mechanics safely and kill him!
After 9 minutes, Menenius will prepare his enrage Tera Tempest. Auto reviving here will have him spam it over until you are dead for good.
Menenius TL;DR
Phase 1:
- Callous Crossfire - use a Light Curtain to reflect Aethershot damage back to the four Magitek Turrets
- Magitek Minefield - spawns 2 mines in a corner. Step on the one mine without the slash through the foot marker
- Giga Temptest - moving rectangle AoE with a safe region
- Windslicer Shot OR Dark Shot - buffs his next Gunberd shot with
 Nasty Surprise
 - Gunberd (Windslicer Shot OR Dark Shot) - knockback or distance damage attack
- Magitek Impetus - applies a directional
 Forced March debuff
 - Magitek Minefield - spawns 2 mines in a corner. Step on the one mine without the slash through the foot marker then be Force Marched to a safe area
- Dark Shot OR Windslicer Shot - buffs his next Gunberd shot with Nasty Surprise
- Gunberd (Dark Shot OR Windslicer Shot) - knockback or distance damage attack
- Magitek Minefield - spawns 2 mines in a corner. Step on the one mine without the slash through the foot marker
- Ruination - cross AoE that leaves behind alternating “exaflare” markers. Stand in a safe area where both intersecting arrows are facing away
- Spiral Scourge - heavy damage tank buster. Use Lost Excellence/Lost Manawall
- Proactive Munition - spawns a circle AoE marker with a chase indicator. AoE will follow you around, move and dodge
- Magitek Minefield - spawns 2 mines in a corner. Step on the one mine without the slash through the foot marker
- Reactive Munition - applies
 Acceleration Bomb on you with a 12s duration. Stop actions/autos as it ticks to 0
 - Sense Weakness - sword markers counting down until the cast completes. Keep moving/acting.
- Windslicer Shot - buffs his next Gunberd shot with Nasty Surprise
- Giga Tempest - moving rectangle AoEs with safe regions. Move into the first safe area, do not move into previously spawned mines for the second
- Magitek Impetus - applies a directional Forced March debuff
- Gunberd (Windslicer Shot) - knockback attack. Forced March will go off after, make sure you do not run into a wall or mines
- Reactive Munition - applies Acceleration Bomb on you with a 12s duration. Stop actions/autos as it ticks to 0
- Ruination - cross AoE that leaves behind alternating “exaflare” markers. Stand in a safe area where both intersecting arrows are facing away
- Sense Weakness - sword markers counting down until the cast completes. Keep moving/acting
- Indiscriminate Detonation - detonates all remaining mines, clearing the field
Phase 2:
- Windslicer Shot - buffs his next Gunberd shot with Nasty Surprise (knockback)
- Reactive Munition - applies Acceleration Bomb on you with a 12s duration. Stop actions/autos as it ticks to 0
- Magitek Minefield - spawns 2 mines in a corner. Step on the one mine without the slash through the foot marker
- Magitek Impetus - applies a directional Forced March debuff
- Magitek Minefield - spawns 2 mines in a corner. Step on the one mine without the slash through the foot marker
- Gunberd (Windslicer Shot) - knockback attack. Forced March will go off after, make sure you do not run into a wall or mines
- Magitek Minefield - spawns 2 mines in a corner. Step on the one mine without the slash through the foot marker
- Windslicer Shot - buffs his next Gunberd shot with Nasty Surprise (knockback)
- Ruination - cross AoE that leaves behind alternating “exaflare” markers. Stand in a safe area where both intersecting arrows are facing away
- Magitek Minefield - spawns 2 mines in the last corner. Step on the one mine without the slash through the foot marker
- Gunberd (Windslicer Shot) - knockback attack. Get knocked into a safe area, or use anti KBs
- Windslicer Shot - buffs his next Gunberd shot with Nasty Surprise (knockback)
- Giga Tempest - moving rectangle AoEs with safe regions. Move into the first safe area, do not move into previously spawned mines for the second
- Magitek Impetus - applies a directional Forced March debuff
- Gunberd (Windslicer Shot) - knockback attack. Forced March will go off after, make sure you do not run into a wall or mines
- Reactive Munition - applies Acceleration Bomb on you with a 12s duration. Stop actions/autos as it ticks to 0
- Ruination - cross AoE that leaves behind alternating “exaflare” markers. Stand in a safe area where both intersecting arrows are facing away
- Sense Weakness - sword markers counting down until the cast completes. Keep moving/acting
- Indiscriminate Detonation - detonates all remaining mines, clearing the field
Tera Tempest enrage after ~9 mins. Will repeat if you auto revive.
Kill boss, don’t die.
Menenius PoVs
Menenius PoVs
Taking the Lyon’s Share:
Lyon rem Helsos Rematch
Come to threaten me with a good time, have you? Well, let’s be about it!

Lyon has grown restless waiting in the wings, and would see the Resistance brought low by his own hands. Has anyone the strength to tame this feral beast once and for all?
Lyon’s Rematch Rewards
- Lyon Tamer title
- 30 Allagan tomestones of revelation
- 99 Zadnor lockboxes
- a sheaf of field notes on Lyon, part II
- a lot of mettle scaling to your Resistance Rank
- a +100% mettle earned High Morale buff for all players in a radius around the Duel
Preparing For “Taking the Lyon’s Share”
To be selected for this Duel, complete the Zadnor zone 3 Critical Engagement Feeling The Burn without being hit by mechanics that give you vulnerability stacks.
Required tools:
- Lost Dispel
Recommended tools:
- Resistance Potions
- Resistance Reraiser * 1 (dying and reraising once has Lyon apply
 Down and out preventing further auto-revives)
Lyon’s Rematch Duel
The arena is a circle and will activate a death wall shortly after Lyon The Beast King is engaged, slightly reducing the arena’s size.
Lyon will open with Wildfire’s Fury to activate the death wall and to cause some light damage.
After a few auto-attacks he will cast then cast Harness Fire to buff himself with ![]() On Fire. Like with Enaero from his first duel, you must use Lost Dispel on this immediately or else his auto-attacks will hit for lethal damage.
On Fire. Like with Enaero from his first duel, you must use Lost Dispel on this immediately or else his auto-attacks will hit for lethal damage.
The next mechanic is Hidden Dynasty where Lyon will spawn a Lyon’s Image clone of himself. He will then tether you and apply the status ![]() Duel or Die. His being the tether source is important as it means you must take damage from his next action and not his clone in order to cleanse the debuff.
Duel or Die. His being the tether source is important as it means you must take damage from his next action and not his clone in order to cleanse the debuff.
Lyon will jump to the side then both he and his clone will cast Taste of Blood. This is the same wide room cleave as from the first duel, only its purpose is different this time. You must look to see where Lyon and his clone are facing so that you are only hit by Lyon’s Taste of Blood. If you get hit by the clone and not him you will die. If you fail to cleanse the debuff you will also die.
After cleansing ![]() Duel or Die, Lyon will use his signature move Heart of Nature just like in his first duel. This will spawn 2 eruptions side by side in the middle and 4 “exaflare” arrow markers at opposite sides of the arena. Dodge into the nearest eruption then move into the second eruption towards the center of the arena as it resolves, then move out to avoid the moving earth AoEs.
Duel or Die, Lyon will use his signature move Heart of Nature just like in his first duel. This will spawn 2 eruptions side by side in the middle and 4 “exaflare” arrow markers at opposite sides of the arena. Dodge into the nearest eruption then move into the second eruption towards the center of the arena as it resolves, then move out to avoid the moving earth AoEs.
The new twist is that while this sequence is finishing, he will cast Soul Aflame and spawn 3 sets of Vermillion Flame orbs. The first will always be in the center. They will detonate in sequence doing a large cross AoE at an angle - think of Niddhogg or Midgardsormr’s orb mechanics. Before they detonate, Lyon will cast his familiar knockback attack Wind’s Peak. Avoid the initial AoE circle, then move in and be knocked back towards the 3rd Vermillion Orb set. Wait for the central one to explode, then move forwards to avoid the detonation of the 3rd for a 3 → 1 dodge.
Next will be Heaven and Earth. Lyon will spawn 4 cone AoEs with a spinning arrow marker to incidate whether they will rotate clockwise or counter clockwise. Follow and dodge quickly into the AoE for 4 pulses total.
Following this, Lyon will cast Move Mountains revealing 7 landslides. This functions exactly like UWU’s woke Titan double landslides. Avoid the first set, then immediately dodge into where the old landslides were to dodge a second set.
To finish with the first phase, Lyon will use Splitting Rage into Taste of Blood. This is the same as in his first duel where ![]() Temporary Misdirection is applied and then he jumps to one side, where you must then point the marker and run behind him before Taste of Blood resolves.
Temporary Misdirection is applied and then he jumps to one side, where you must then point the marker and run behind him before Taste of Blood resolves.
Phase 2 begins with Hidden Dynasty where Lyon spawns 2 Lyon’s Image clones that will later perform Taste of Blood cleaves. This also marks the beginning of the encounter’s mechanic loop.
Either Lyon and one of his clones or both clones will tether you to apply a separate ![]() Duel or Die status each. This means that you must later be hit by Taste of Blood from both sources to cleanse both debuffs while avoiding the untethered enemy.
Duel or Die status each. This means that you must later be hit by Taste of Blood from both sources to cleanse both debuffs while avoiding the untethered enemy.
Lyon will jump to the middle and face a direction before casting Caged Heart of Nature. This will spawn 2 eruptions at opposite sides to one another, in addition to 4 “exaflare” arrow markers. While you dodge the eruptions and earth pulses, Lyon and his clones will cast Taste of Blood. You must be on the side that lets you get hit by both enemies who tethered you to cleanse both debuffs.
After this sequence will come Splitting Rage paired with Move Mountains. Try to give yourself a fair amount of distance so that it is easier to reach a safe area with ![]() Temporary Misdirection affecting you. It will wear off before the first landslide resolves, giving you time to run into the old landslide area to dodge the second set.
Temporary Misdirection affecting you. It will wear off before the first landslide resolves, giving you time to run into the old landslide area to dodge the second set.
Next he will cast Harness Fire to buff himself with ![]() On Fire again. Lost Dispel it immediately.
On Fire again. Lost Dispel it immediately.
Following this, Lyon will combine Soul Aflame, Wind’s Peak and Heaven and Earth into one big sequence. 3 sets of Vermillion Flame orbs will again spawn. Avoid Wind’s Peak initial AoE then be knocked back into the 3rd set of orbs, then after the 1st set in the middle detonates, run towards the middle of the arena and closely dodge into the rotating Heaven and Earth cones in order to avoid the remaining orb detonations.
Afterwards, like in his first duel, Lyon will cast Heart of Nature to spawn 4 “exaflare” arrow markers around the arena indicating moving AoEs that will box around the middle. Avoid Wind’s Peak initial AoE and use an anti-knockback.
The last big mechanic will be Heart of Nature with Move Mountains. One large eruption AoE will appear that you must dodge into while avoiding the landslides, then you must dodge into an old landslide location to be safe like before.
He will then finish the loop with a jump before casting Taste of Blood. Run behind him to avoid being hit.
Lyon will cycle through these mechanics until a second loop is complete where he will then cast his long enrage Wildfire Crucible.
Lyon’s Rematch TL;DR
Phase 1:
- Wildfire’s Fury - raidwide damage that activates the death wall
- Harness Fire - applies
 On Fire to Lyon buffing his auto-attacks for lethal damage. Lost Dispel this immediately
 - Hidden Dynasty - spawns a single Lyon’s Image clone
- Duel or Die - tether from Lyon applies
 Duel or Die to you. You must be hit by his upcoming Taste of Blood and not the clone’s
 - Taste of Blood - hide behind the clone and be hit by Lyon’s to cleanse Duel or Die
- Heart of Nature - 2 eruptions + 4 “exaflare” arrow markers. Dodge your nearest eruption, then dodge into the second moving more towards the center of the arena, before avoiding the moving AoE paths
- Soul Aflame - spawns 3 sets of Vermillion Flame orbs that will detonate doing cross AoEs in order of spawning (think Nidhogg/Midgardsormr orbs)
- Wind’s Peak - be knocked back into the 3rd set of orbs, wait for 1st set to explode then move in for a 3 → 1 dodge
- Heaven and Earth - rotating cone AoE, follow the rotation and move into the last cone for 4 pulses
- Move Mountains - 7 point double landslides, stand in a safe area for the first hit, then move into an old landslide to avoid the second (think UWU woke Titan)
- Splitting Rage + Taste of Blood - Temporary Misdirection marker, have it point towards where Lyon jumps, run asap
Phase 2:
[Loop Begins]
- Hidden Dynasty - spawns 2 Lyon’s Image clones
- Duel or Die - tethers from Lyon + Clone or both clones applies 2x Duel or Die to you. The untethered one must be avoided. See where they are facing
- Caged Heart of Nature + Taste of Blood - 2 eruptions + 4 “exaflare” arrow markers, dodge into the opposite side where the untethered Lyon/Image is facing and be hit by the tether enemies’ Taste of Blood to cleanse both Duel or Die debuffs
- Splitting Rage + Move Mountains - Temporary Misdirection marker, have it point to a safe area in between the landslides, then move immediately into where the first set of landslides
- Harness Fire - applies On Fire to Lyon buffing his auto-attacks for lethal damage. Lost Dispel this immediately
- Soul Aflame - spawns 3 sets of Vermillion Flame orbs
- Wind’s Peak - be knocked back into the 3rd set for a 3 → 1 dodge
- Heaven and Earth - immediately move into first cone after it casts, rotate closer to the center with it for 4 pulses and do not be hit by the orb explosions
- Heart of Nature + Wind’s Peak - AoEs will move across the arena forming a square around the middle. Anti-KB the knockback, don’t get hit by the moving AoEs
- Heart of Nature + Move Mountains - one large eruption AoE will radiate out while woke landslides happen. Dodge the eruptions, then move into a safe area for the second landslides
- Taste of Blood - run behind Lyon to avoid lethal damage
[Loop Ends]
Loop repeats once more.
Wildfire Crucible enrage after ~8 mins 10.
Kill boss, don’t die.