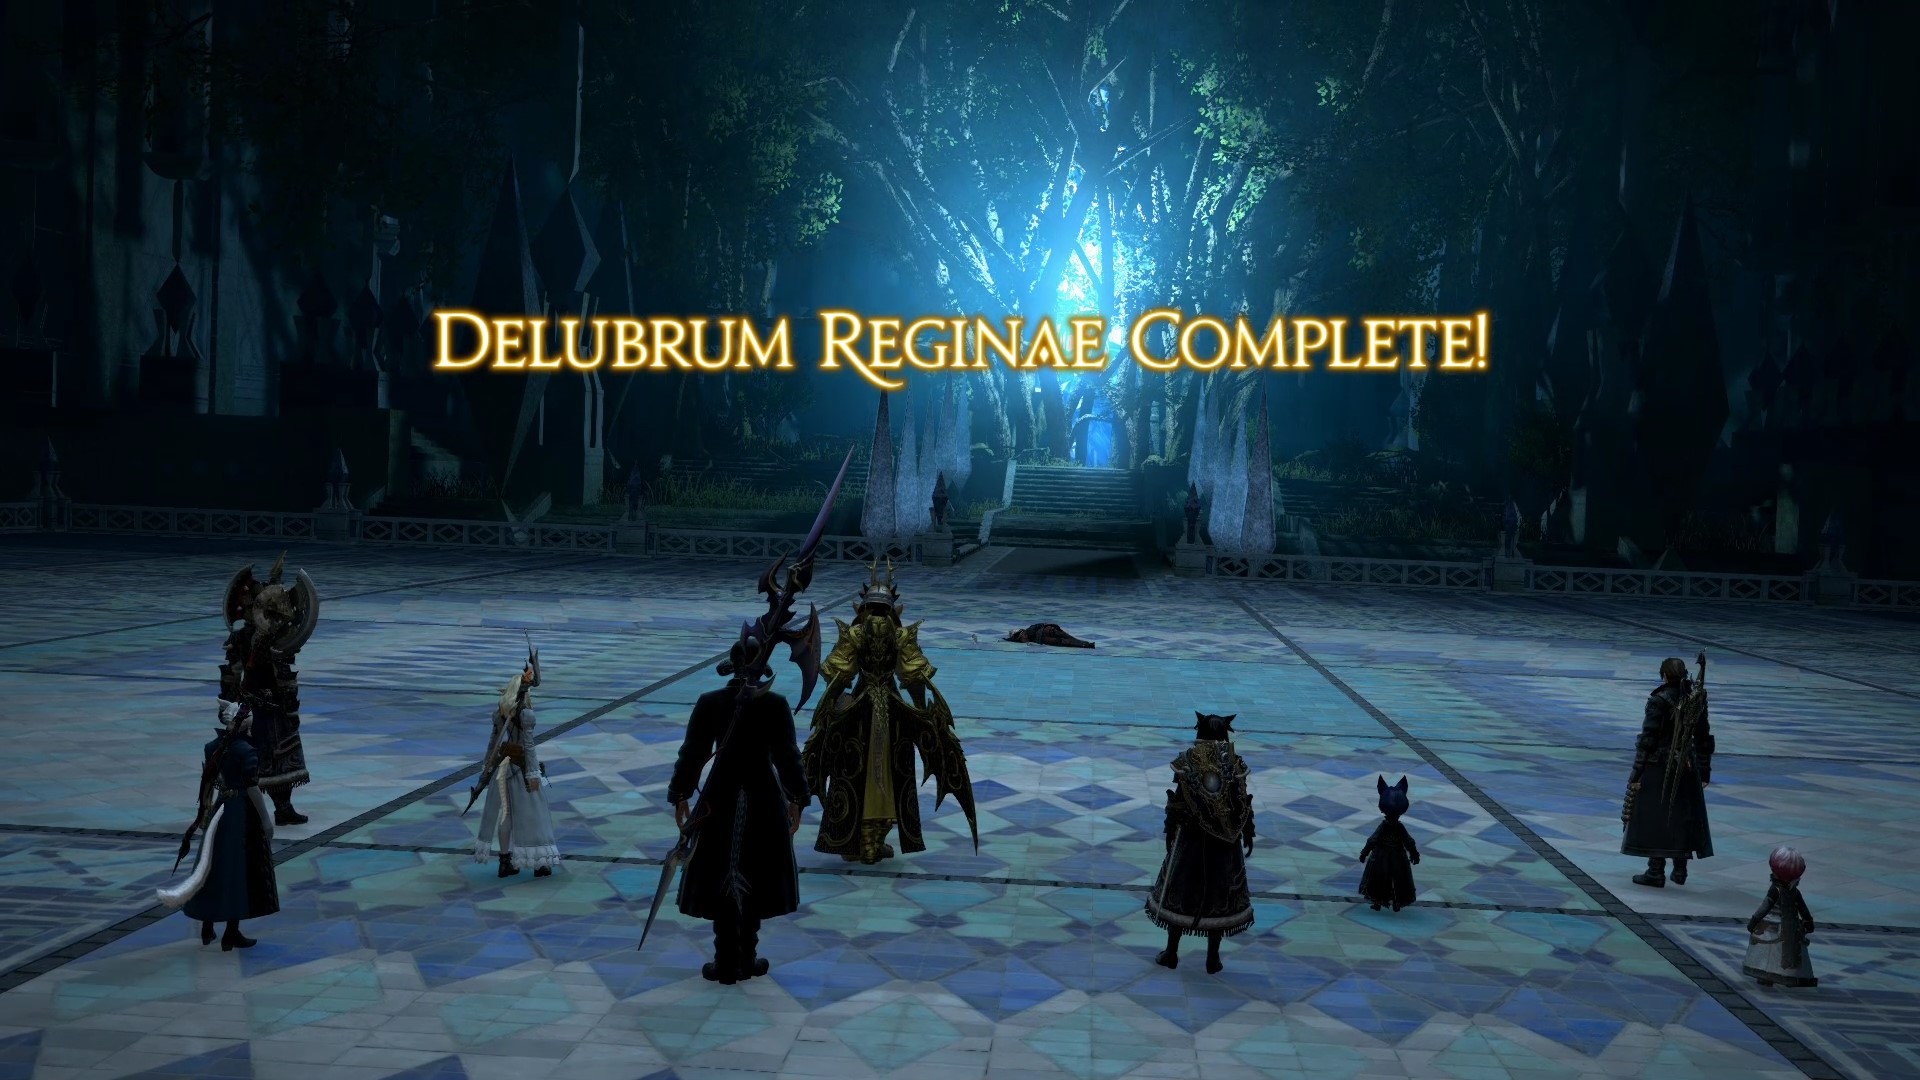
Delubrum Reginae
Welcome to our guide for Delubrum Reginae, the 24 man raid instance for Chapter 3 in the Save The Queen saga.
Delubrum Reginae translates from Classical Latin as “Temple/Shrine of the Queen”.
There’s quite a few encounters in this instance with some interesting twists on familiar mechanics and some newer additions.
One of the notable changes here compared to Castrum Lacus Litore is that encounters punish you for getting hit by avoidable mechanics more than once where being hit twice in a fight will put an immediate Doom on you due to  Twice-come Ruin, the same status that can apply during Relativities in E12s when you resolve mechanics incorrectly.
There are also dangerous traps throughout the instance that can be detected with the Lost Action Lost Perception.
The main bosses feature death walls where being knocked back into them will result in you dying.
In normal Delubrum Reginae you can raise and recover.
Let’s get started with the encounters!
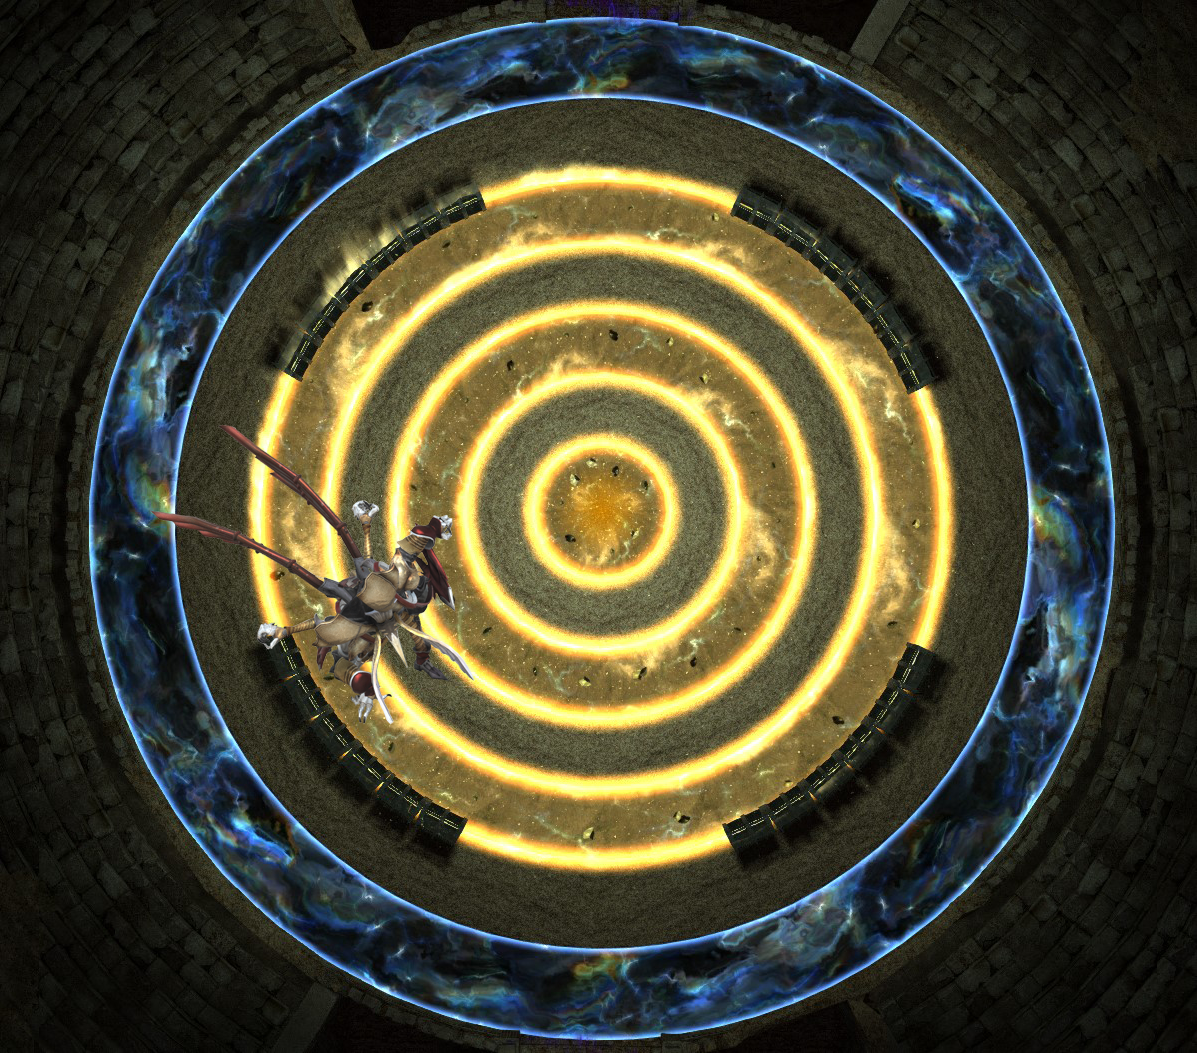
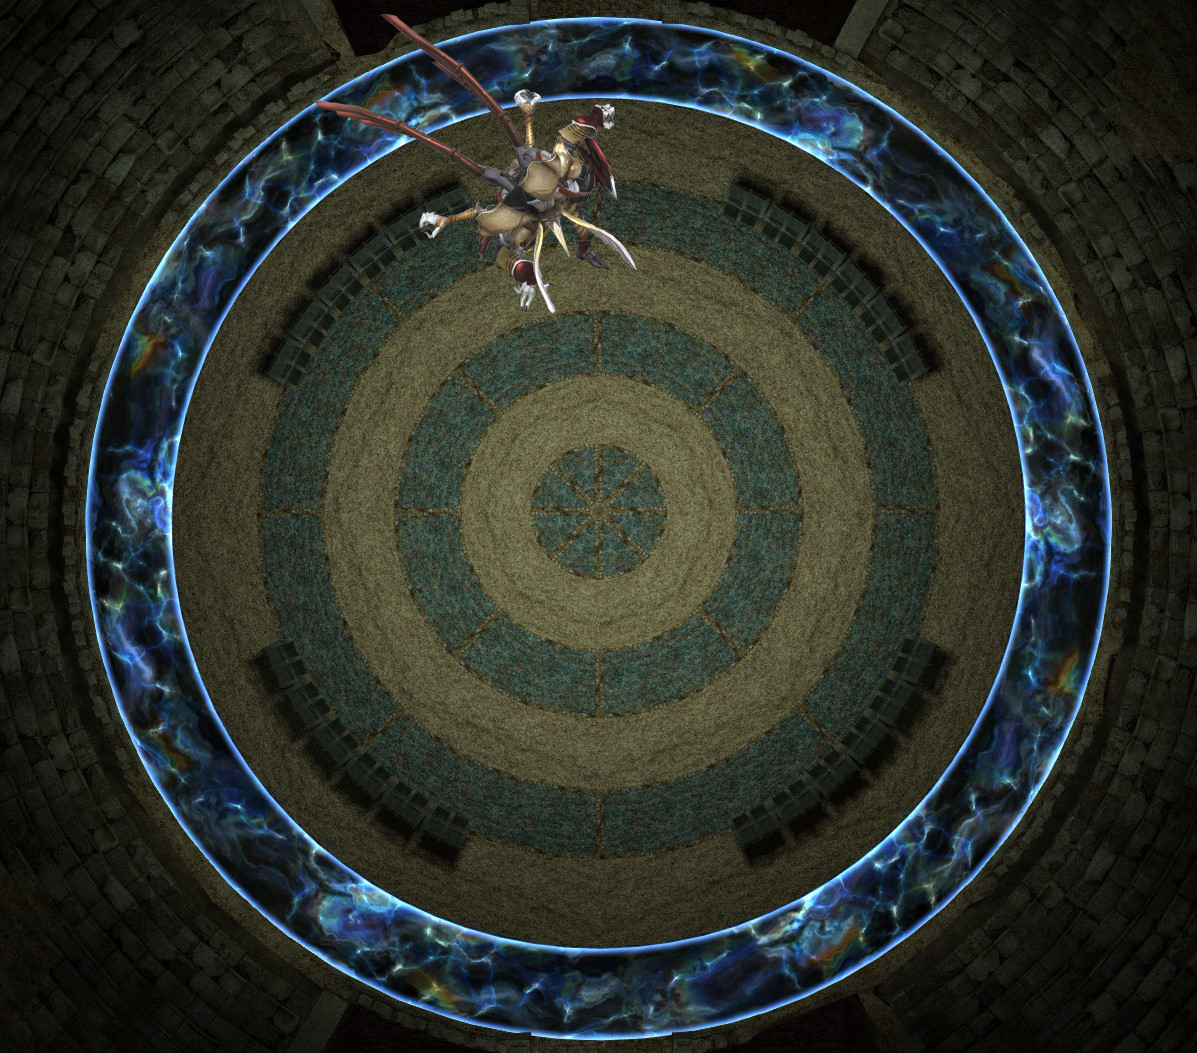
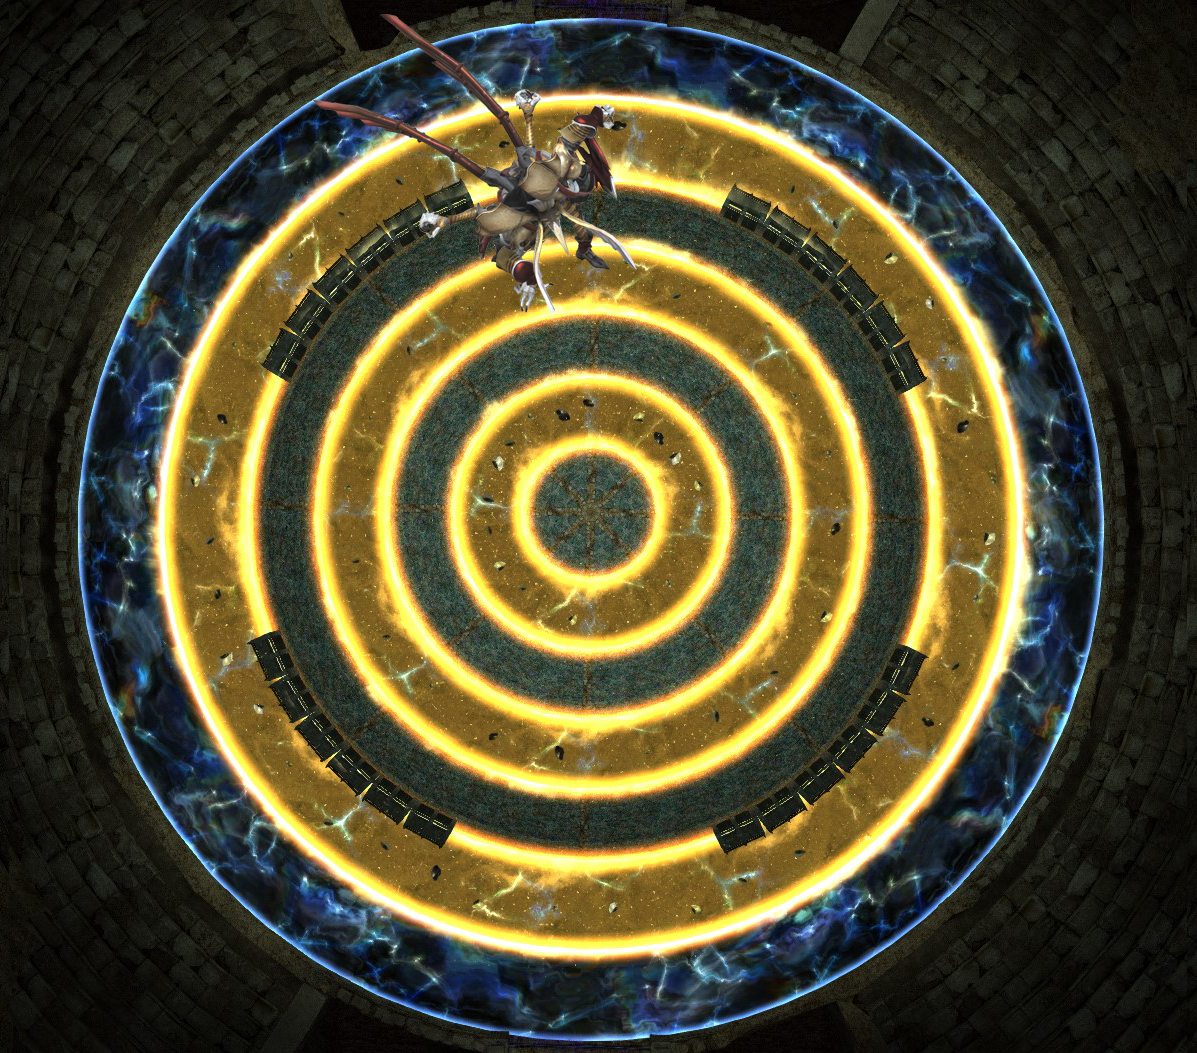
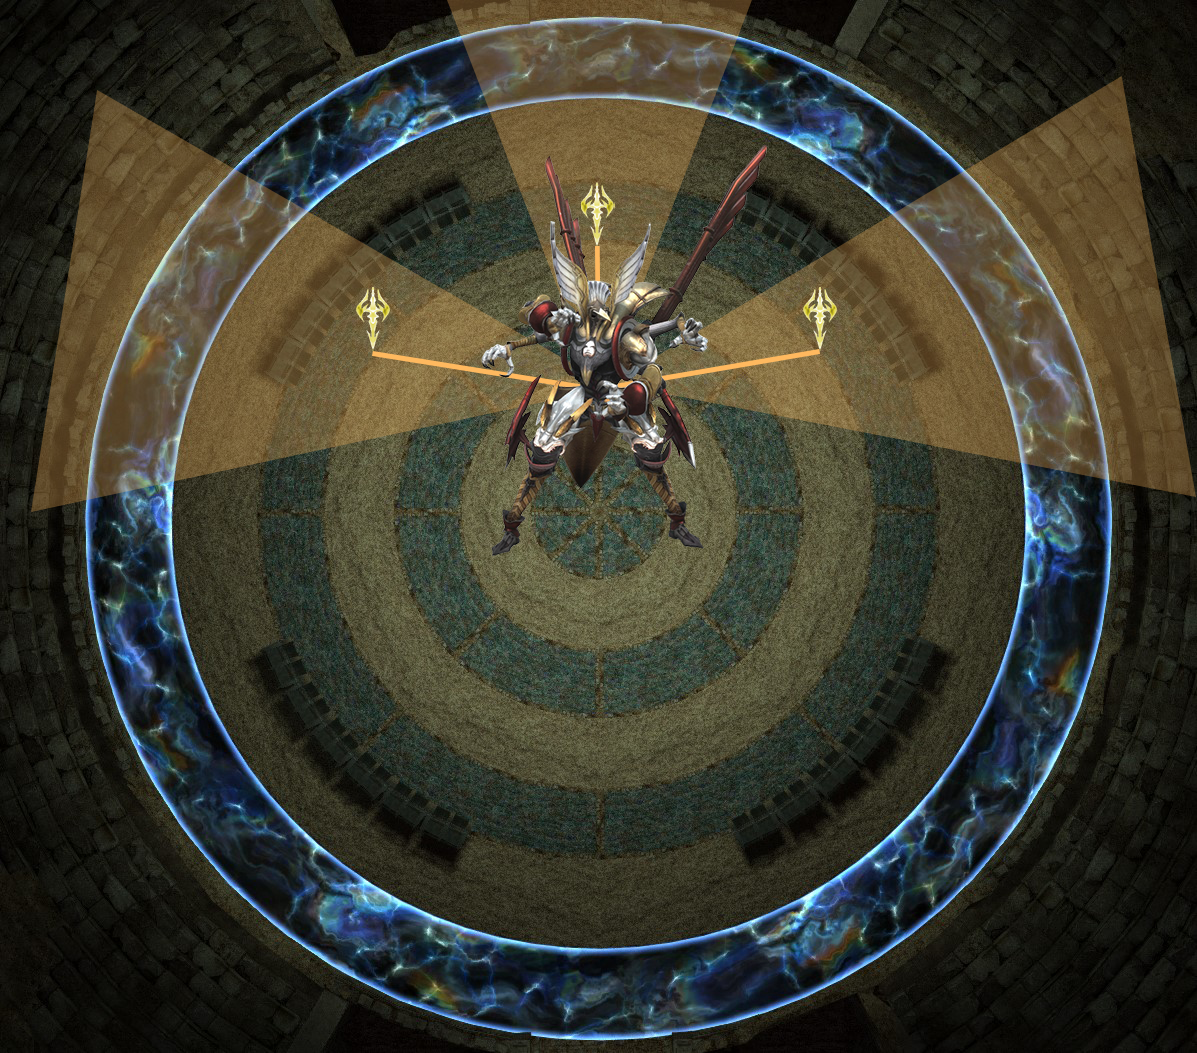
Trinity Seeker
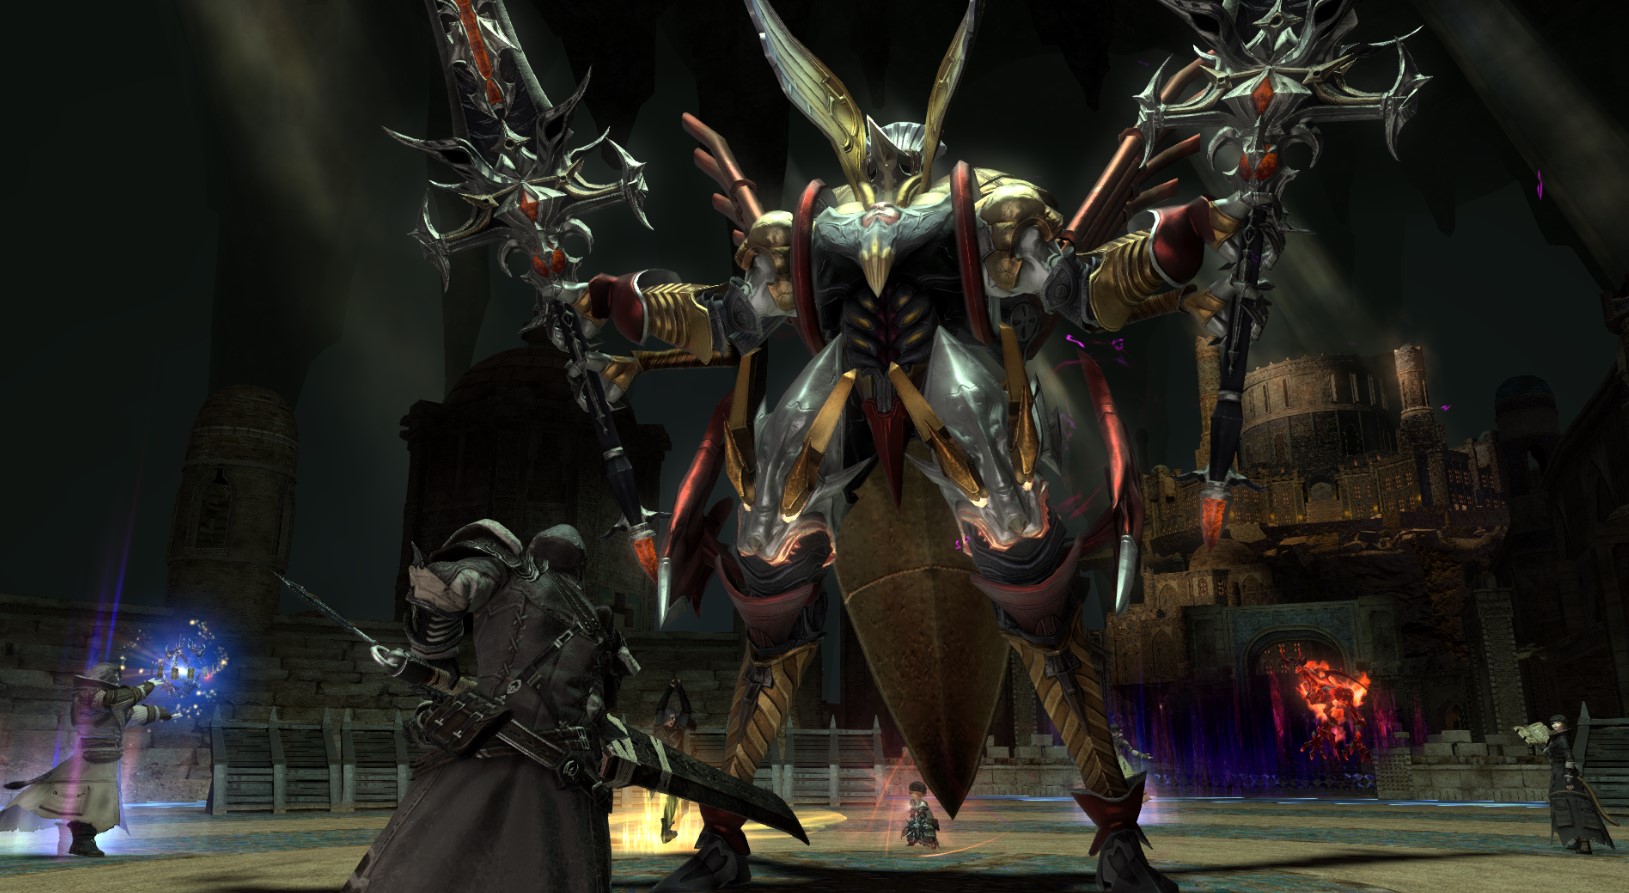
The first encounter involves the fighting styles of Aggie, Blaz and Velibor combined into the cyber-Ravana-like entity that is the Trinity Seeker.
Its mechanics will be familiar to those of the Heavensward Primal with some new twists and additions.
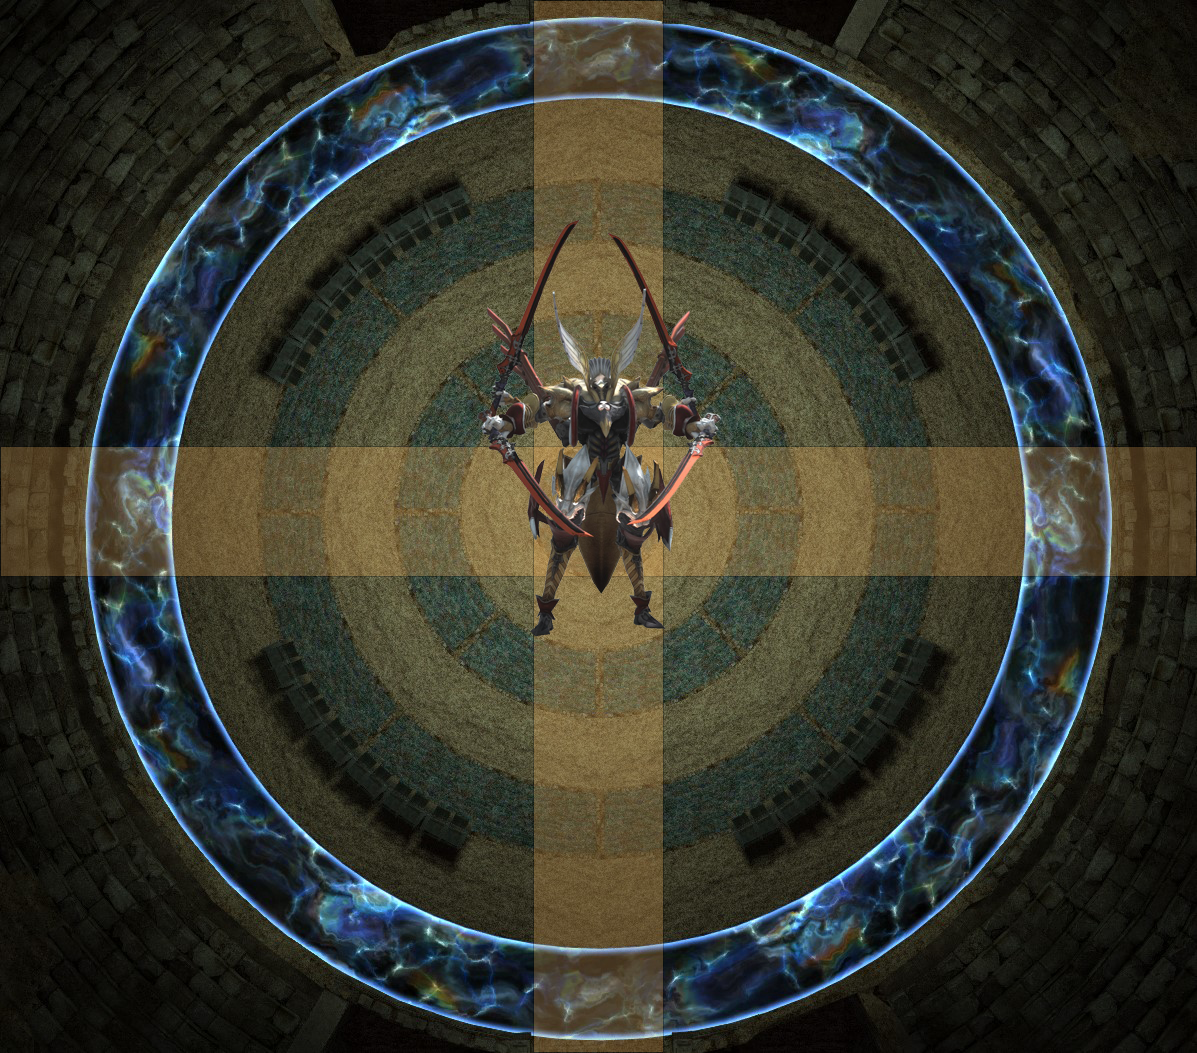
Each weapon stance has its own mechanics where the Trinity Seeker will transition between them when casting Verdant Path. The current weapon stance can be identified by the following:
 Merciful Air (Wielding elegant katana in a manner reminiscent of Blaz): Large blue graphic on cast completion, wields a katana in each hand (like Ravana).
 Baleful Air (Wielding intimidating greatswords in a manner reminiscent of Velibor): Large purple graphic on cast completion, wields two large DRK greatswords.
 Iron Air (Wielding relentless fists in a manner reminiscent of Aggie): Large green graphic on cast completion, no weapons in hands.
The boss begins the encounter in Merciful Air stance and opens with the Verdant Tempest raidwide AoE.
Merciful Air
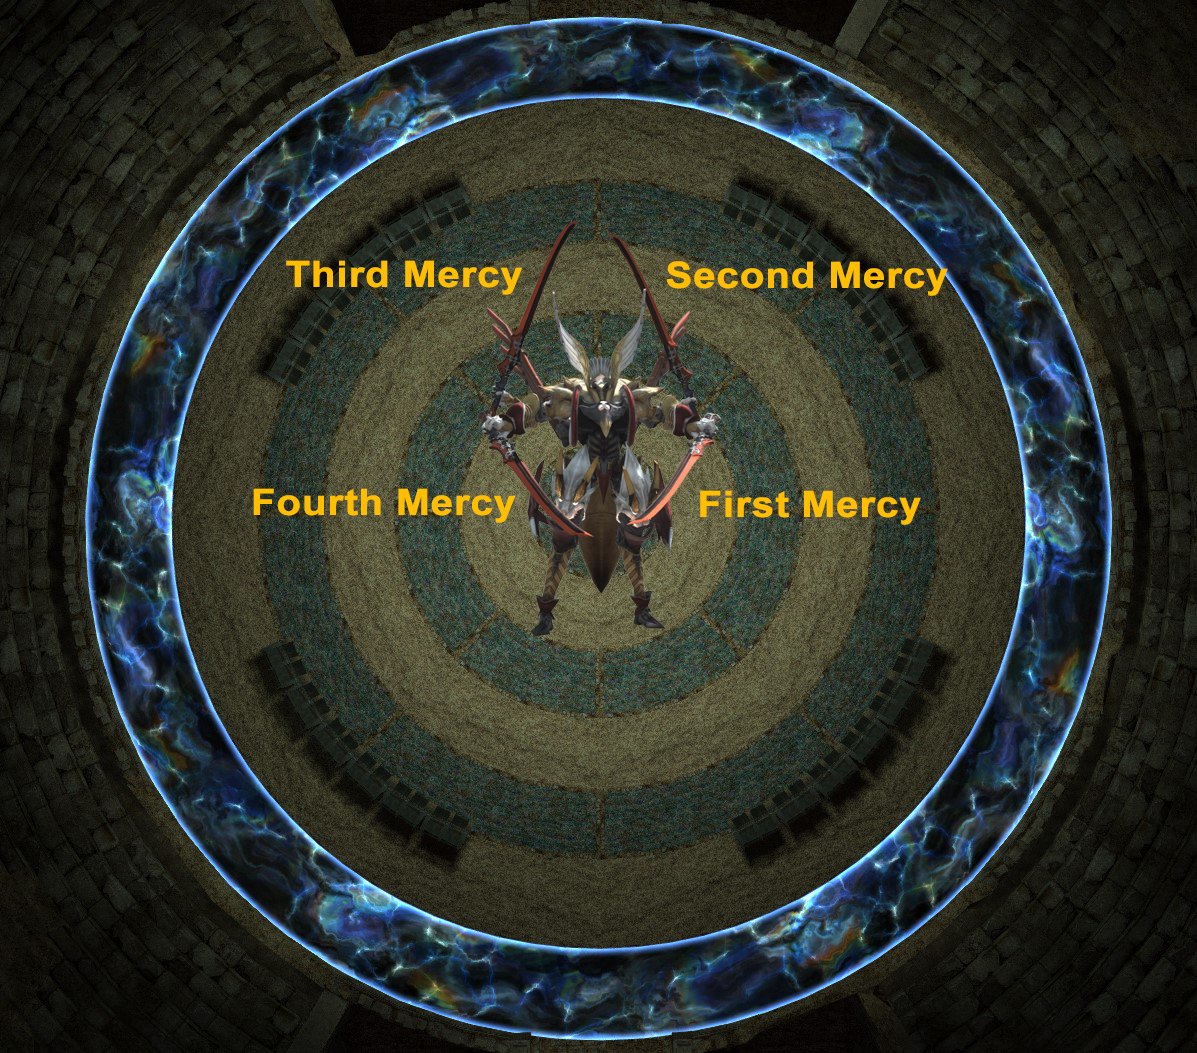
Mercy Fourfold
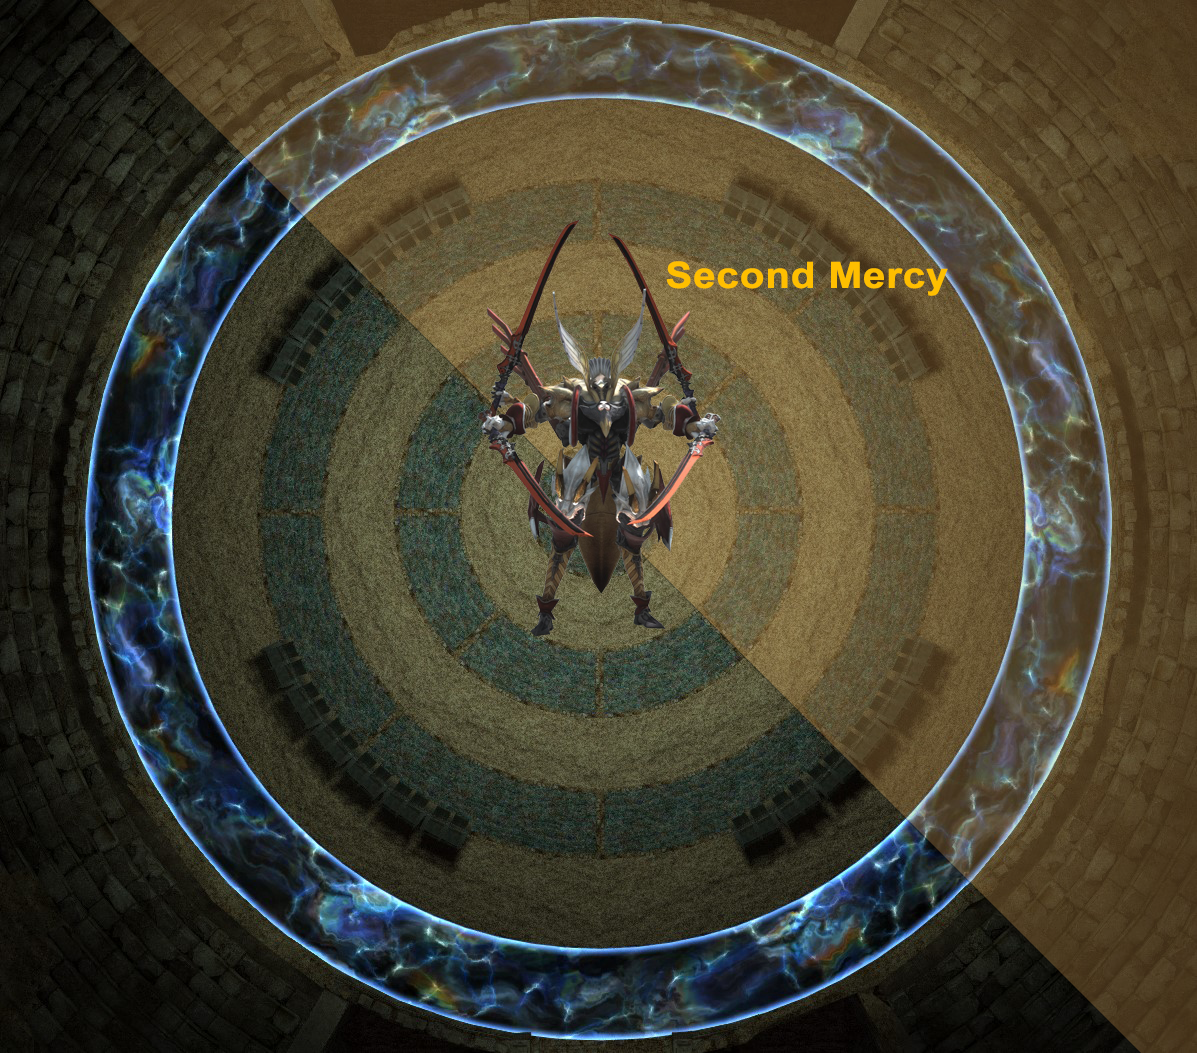
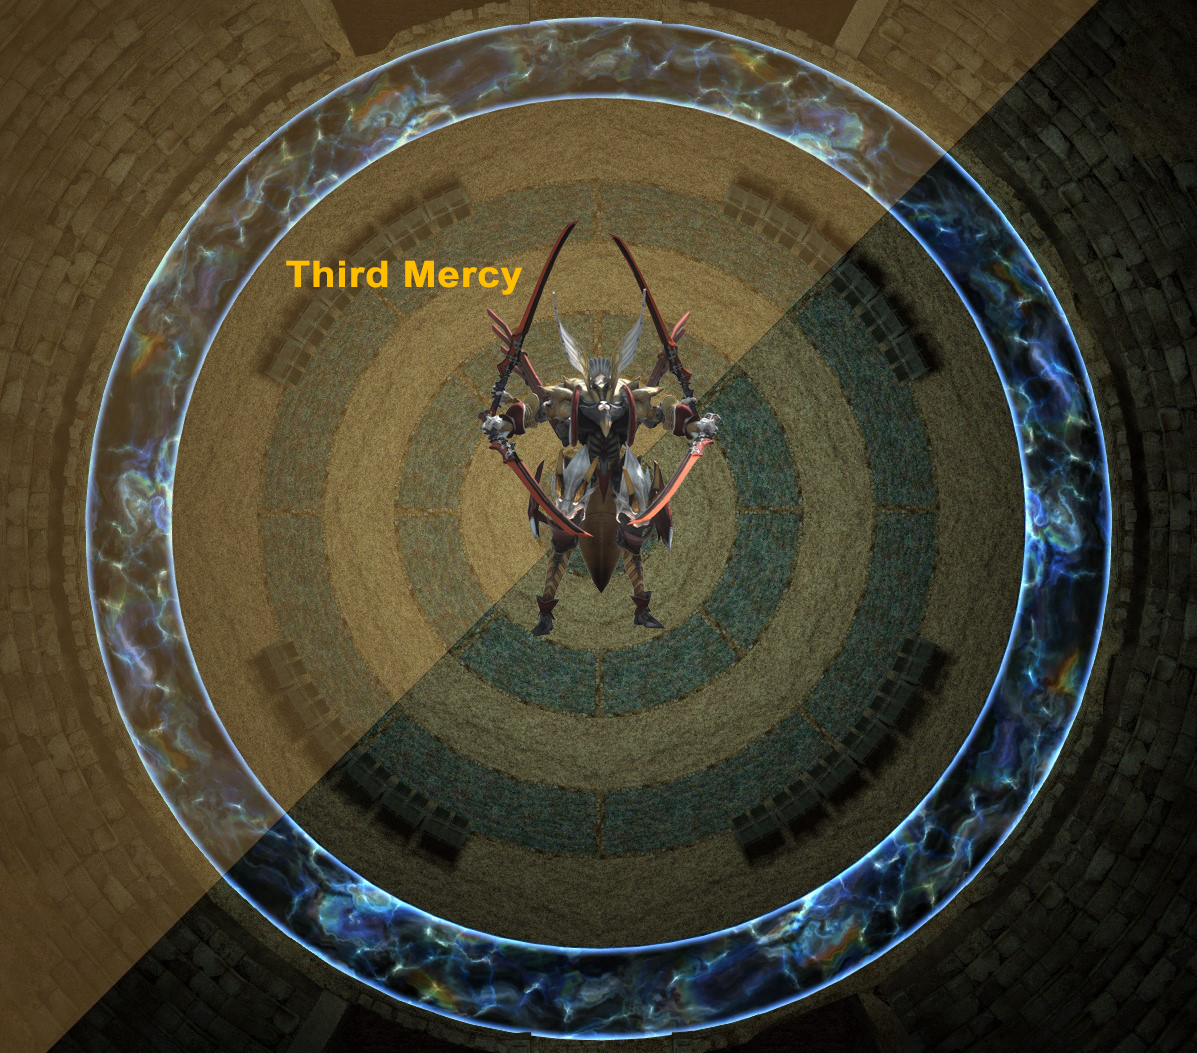
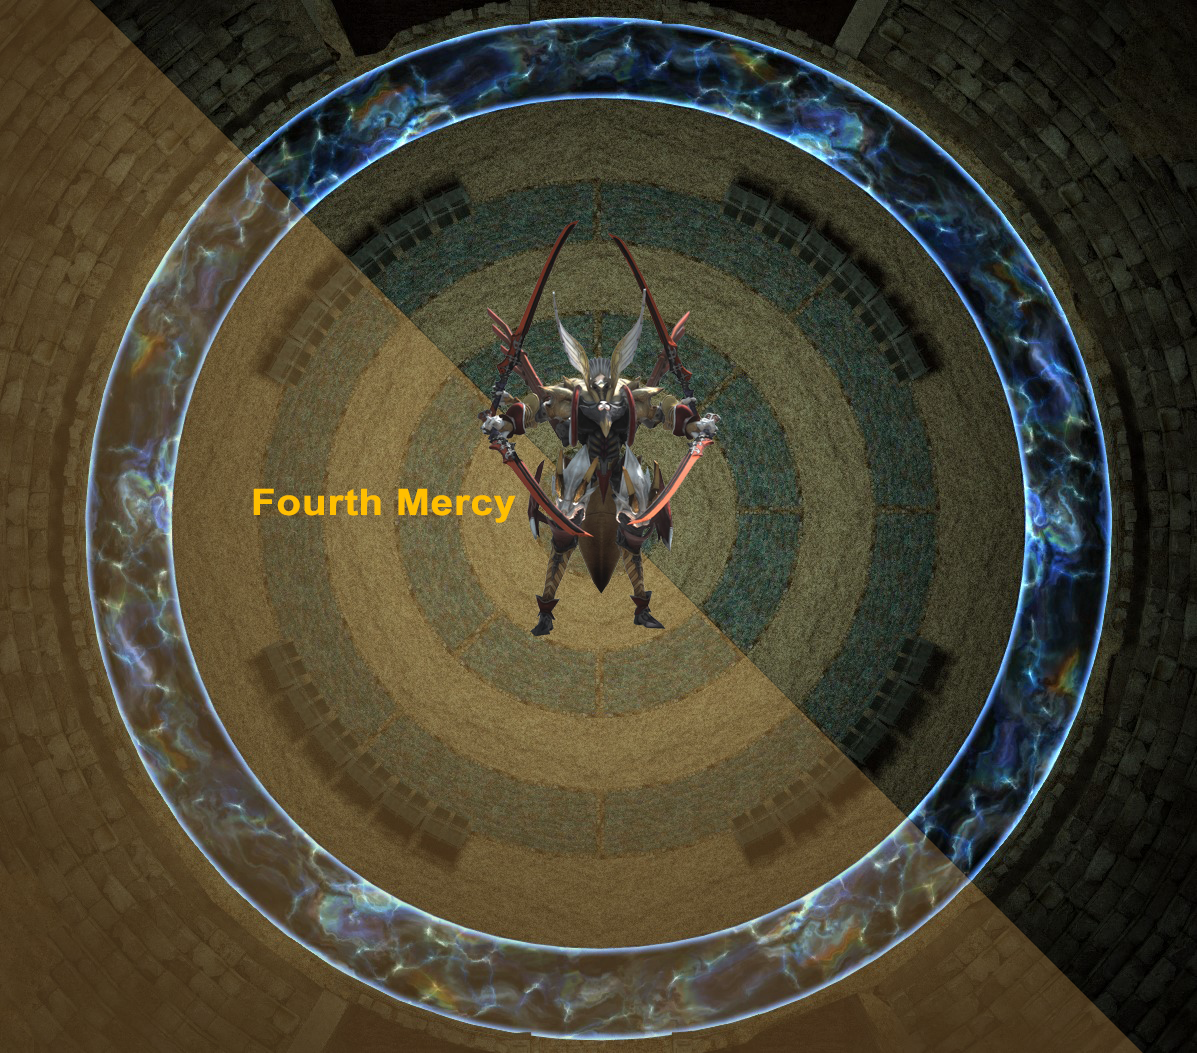
Trinity Seeker will cast one after the other First Mercy, Second Mercy, Third Mercy and Fourth Mercy.
Take note of which swords are raised and glowing golden as these indicate which of Trinity Seeker’s intercardinals, based on where the boss is positioned and facing, will be cut by large room-wide cleave AoE.
There can be a lot of visual noise obfuscating which arm is which in terms of front and back, however, there are a few ways to keep track:
- The front pair of swords will be pointed lower towards the ground.
- The front arms are thicker with armour.
- The back pair of swords will be pointed higher towards the sky.
- The back arms are thinner without armour.
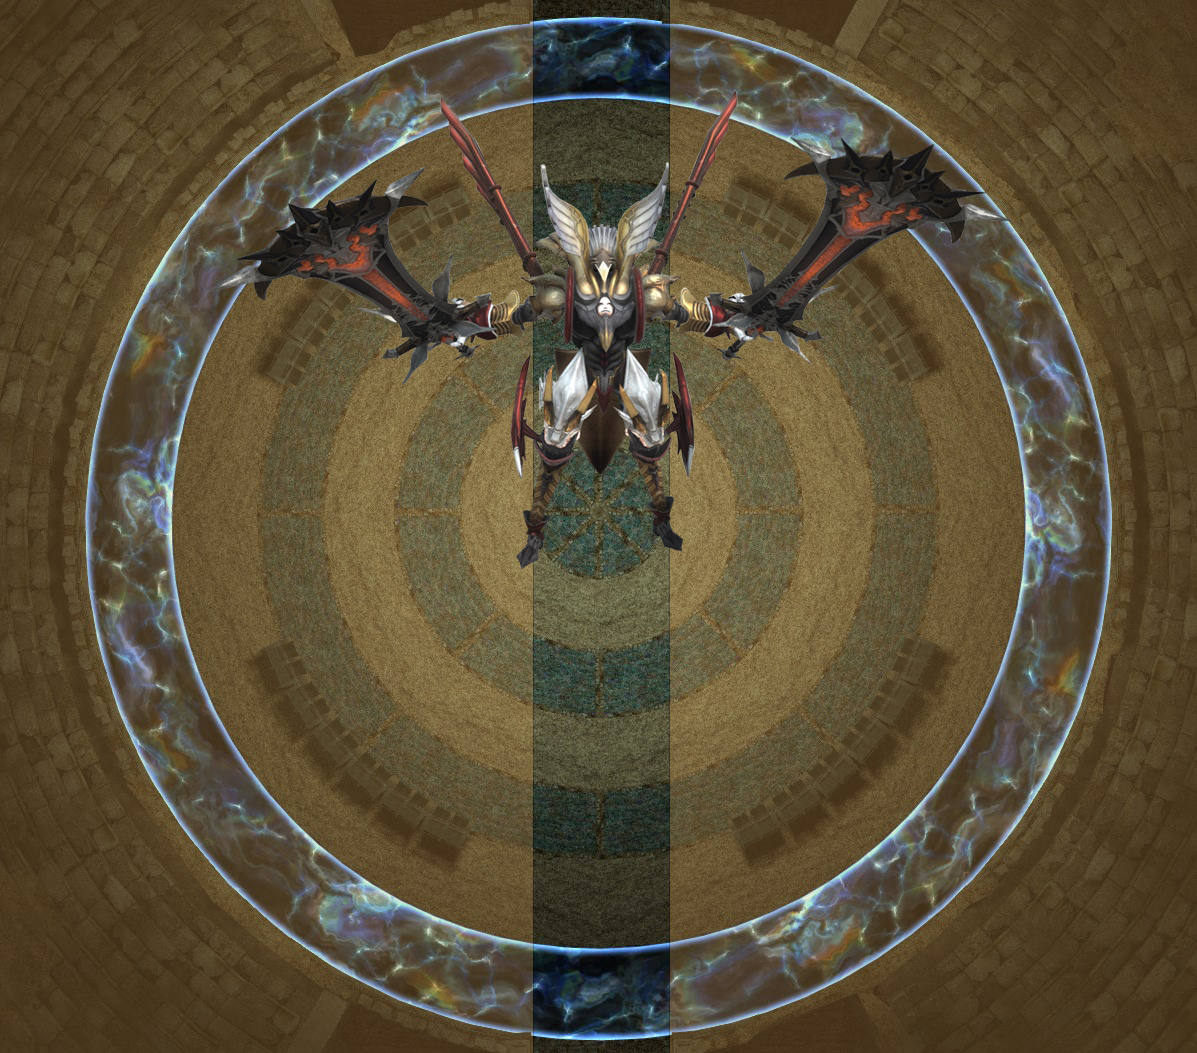
When the Fourth Mercy has been cast, the boss will quickly cast Mercy Fourfold and execute those cleaves in order one after the other. You do have a brief moment to adjust in Normal mode as long as you are not too far out from the middle of the boss.
This is reminiscent of E10’s cleaves with the shadows where the movement order to be in the safe half of the room can be clockwise, counter clockwise, or having to run through the boss. Keep in mind unlike E10 you are not dealing with cardinal cleaves!
See the example below where the order is counter clockwise: Front Left → Back Left → Back Right → Front Right.

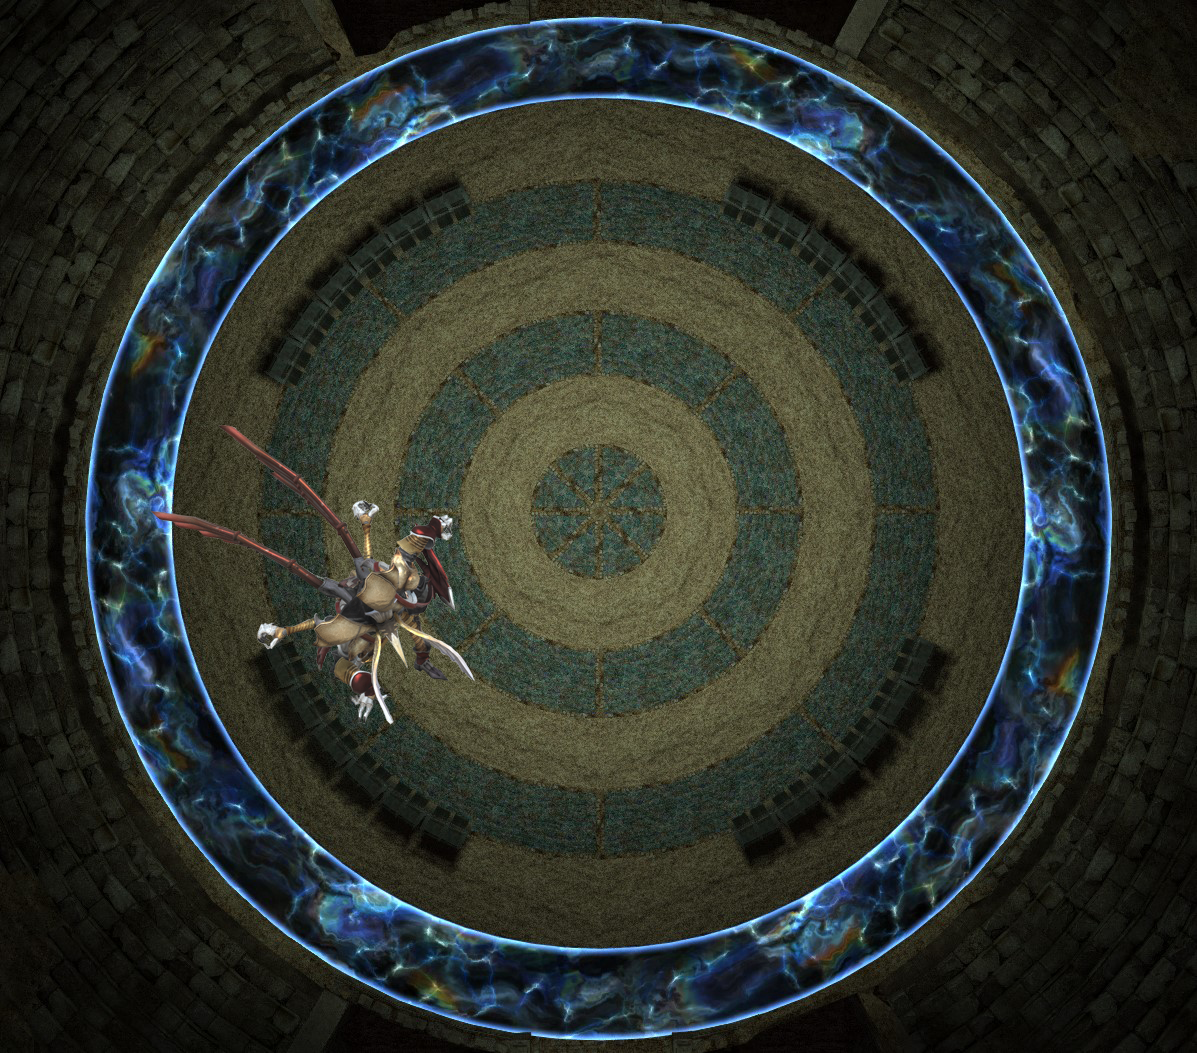
After this there is a tank buster then the boss will transition into the next weapon form by casting Verdant Path.
Baleful Air
Trinity Seeker will transition with a purple aura and go into dual wielding to large Dark Knight greatswords.
Shortly after this, Baleful Swathe will be cast with the boss preparing to cleave to his left and right cardinals leaving a rectangle through the middle with the width of his target ring being safe. Think of the Leviathan safe rectangle in E12.
Baleful Blade
After this, the boss will cast Baleful Blade with a pulsing circle AoE covering the entire arena. Hide behind the barricades for this one.
Trinity Seeker will next cast  Phantom Edge (Wielding aetherial blades. Damage dealt is decreased, but its cuts are not impeded by physical objects.). This will buff the greatswords to glow bright with aether.
Instead of Baleful Blade being lethal damage forcing you to hide behind the barricades, it now ignores the barricades and if you were hiding behind it would knock you back into the death wall. The idea thus is to be knocked into the barricade from closer to the middle of the arena. The knockback is strong enough that if your angle misses the barricade you will get knocked into the death wall.
Next comes a Verdant Tempest raidwide into a Verdant Path stance swap to the next weapon stance.
Iron Air
Trinity Seeker will transition with a green aura and go into an unarmed, martial arts stance. The boss will open with Iron Impact, a targeted rectangle stack marker. After this comes the next mechanic: Iron Splitter.
Iron Splitter
The boss will jump to a portion of the arena and put its hand to the ground while casting Iron Splitter.
Take note of which colour ring the hand is on as these rings will detonate when the cast finishes.
Trinity Seeker again finishes the current stance with a Verdant Tempest raidwide into Verdant Path, changing back to Merciful Air.
Merciful Air #2
Trinity Seeker will transition with a blue aura and go back into the four katana stance.
Changing up how the fight began, the boss will cast Act of Mercy. This is a 4s cast telegraphed cross attack that goes through the boss’ cardinals.
Mercy Fourfold will follow playing out as before.
Seasons of Mercy will be the next core mechanic.
Seasons of Mercy
Trinity Seeker will cast Seasons of Mercy which spawns:
- a criss cross of ice paths (think Gilgamesh from ARR)
- a light moon orb with a gaze attack called Merciful Moon
- a purple circle AoE with a flower that expands into a much larger AoE Merciful Blooms
Being hit by any of these will increase your Twice-come Ruin stacks.
To resolve this, be on the side of the moon orb but facing away from it, dodge into a safe square in the ice paths and be far enough away from the expanded Merciful Blooms AoE.
The boss will follow this with a Verdant Tempest raidwide into a tank buster, then will stance swap with Verdant Path.
Baleful Air #2
As before, this phase opens with Baleful Swathe, but instead of a normal Baleful Blade, Phantom Edge will be cast.
Get knocked into the barricades, then shortly after  Burning Chains will be applied to the raid, tethering you to another player. Gather mid, as the boss will next prepare a regular Baleful Blade. Separate from your tethered partner to break the chain and hide behind the barricade.
Verdant Tempest is cast into a Verdant Path changing stance.
Iron Air #2
As earlier, this phase opens up with the Iron Impact rectangle party stack. Share the damage then prepare for the next new mechanic: Dead Iron.
Dead Iron
3 players in the raid will be tethered to the boss with Earthshaker markers. For players unfamiliar with this type of mechanic, a cone AoE will be targeting each marked player.
Marked players can spread out loosely and should avoid having their cones hit the core of the raid. A more efficient way of resolving this is having marked players spread out to one half of the boss with the raid on the opposite side. In normal mode it is likely this will not be as coordinated.
There are two sets of 3 Earthshaker markers before the boss will jump to perform Iron Splitter, then jumping again to the alternate ring for a second Iron Splitter
After this the boss will cast Verdant Tempest into Verdant Path changing stance back to katanas.
From here onwards there are no new mechanics. The boss will cycle through stances in the same order featuring the additional mechanics from the second roud of mechanics.
Loot (Trinity Seeker)
Dahu

The second encounter and the first minor boss, Dahu is a large firebreathing scalekin that has taken up residence in the ruins along with various other creatures.
Dahu opens with telegraphed semi-circle cleaves Left-sided Shockwave and Right-sided Shockwave. These are small enough for ranged jobs to be safe standing away.
After this will come Feral Howl, a light damage knockback that stuns you with the Staggered status for 3s. The boss will then turn to face the raid preparing Firebreathe, a massive 90 degree cone from his front. Run out to dodge.
6 untargetable Marchosias adds will spawn around the edge of the arena preparing straight Head Down dashes across. They jump around the arena edge and execute another Head Down pattern before Dahu prepares Feral Howl. As this happens, the Marchosias adds will be casting the Hunter’s Claw circle AoE around them. Get knocked back into the safe areas around the arena edge.
Next comes the rotating Firebreathe with a directional arrow spinning around Dahu. The cone is the same size as his one before so make sure you are not caught in his front arc as you rotate around. Starting with directly in front of him, he will rotate 90 degrees each time doing a total of 5 fire breaths.
Dahu will next howl causing rocks to fall from the ceiling. These are multiple small circle aoes that are telegraphed. As the last ones resolve, the boss will turn to a direction, rear back then dash towards a wall with Hot Charge. Being hit by this will deak damage, knock you back and apply Twice-come Ruin. He will turn to the opposite side of the arena, Hot Charge to the other wall, then prepare Firebreathe. Run to the other side and dodge.
A second set of 10 Marchosias will spawn around the edge of the arena. Dahu will howl causing more rocks to fall while the dashes are telegraphed. After the third Head Down dashes, Dahu will do his shockwave cleaves. When the last set of dashes finishes, the boss will cast Feral Howl to knock you back into the adds. There are 2 safe spots to get knocked into.
The rotating Firebreathe comes next with 5 breaths, then shortly after the boss will cast Heat Breath on the main tank.
By now Dahu should be close to dying. (There may be more mechanics after Heat Breath).
Loot (Dahu)
The Queen’s Guard
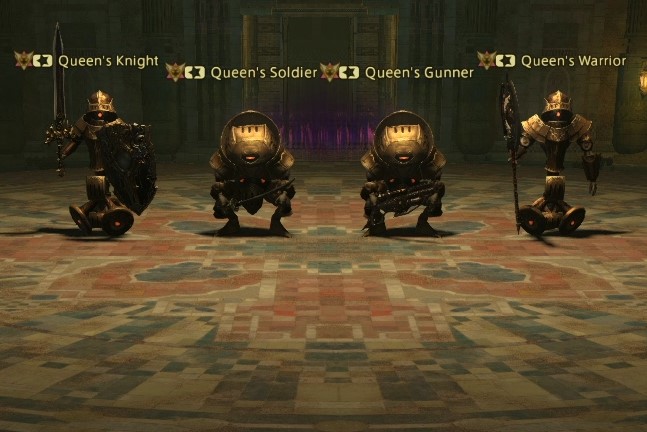
The third encounter and second major boss, the Queen’s Guard are four robots wielding different abilities and weapons.
- Queen’s Knight
- Queen’s Soldier
- Queen’s Gunner
- Queen’s Warrior
The fight begins with all four robots active. They can be grouped up to AoE them down. 25s into the fight they will jump away and despawn with one robot returning to fight the raid alone.
The order at which you fight the robots is random and they retain their HP from the first 25s of the fight, meaning the opening window makes for a good burn opportunity on all four.
Queen’s Knight
After 8 seconds of being active, the Queen’s Knight opens with  Sword Omen or
  Shield Omen into Optimal Play. When the cast resolves it the AoE will either be a circle AoE around the boss, or a donut AoE with the boss being safe.
- Sword Omen = AoE around the boss, run out.
- Shield Omen = donut AoE, stay in.
After a set of two, the boss will perform a Rapid Sever tank buster into a Blood and Bone raidwide dealing moderate damage.
Then another set of Omens will be cast, however, the robot should be near death by now.
Queen’s Soldier
After 8 seconds of being active, the Queen’s Soldier will cast Double Gambit, spawning 4 Soldier’s Avatar clones at the intercardinals of the arena. It will tether to two of the avatars casting Secrets Revealed. Take note which ones are tethered as these will be the “real” clones for the next mechanic.
All 4 avatars will cast Pawn Off revealing large circle AoE telegraphs. The two that were tethered are real AoEs while the other two are fake. Stand outside of the real AoE circles.
Once this resolves, the Queen’s Soldier will prepare the Rapid Sever tank buster.
Double Gambit is cast again. This time a pair of the avatars will jump around the arena. Keep track of where will be safe then move over once they have finished jumping around.
The robot will cast the Blood and Bone raidwide into another Rapid Sever buster.
After this comes another Double Gambit, however, the robot should be near death by now.
Queen’s Gunner
After 8 seconds of being active, the Queen’s Gunner will summon two Bishop turrets with Automatic Turret. They will spawn with a target ring pointing in a direction indicating where the robot’s Turret’s Tour orb attack will dash across the arena to.
Queen’s Shot is cast dealing moderate damage to the raid followed by a second Automatic Turret. This time 4 Bishop turrets will spawn and Turret’s Tour will release two orbs dashing across the arena.
Another Queen’s Shot into another Automatic Turret.
After comes the Shot in the Dark tank buster, then a Queen’s Shot into Automatic Turret. The robot should be near death by now.
Queen’s Warrior
After 8 seconds of being active, the Queen’s Warrior will cast Bombslinger spawning multiple large and small bombs across the arena that will later explode.
Above Board is the core mechanic to this phase where the boss will levitate all of the bombs and players. The large bombs, being heavy, will fall back down while the small bombs, being lighter, will remain up above.
You are stunned while levitated so for this round stand on a large bomb so that they detonate when they fall to the ground, avoiding you.
The Rapid Sever tank buster follows into the next round of Bombslinger.
This time the twist is that the bombs are all tethered, inverting their weight. Small bombs will fall and detonate on the ground while large bombs will remain floating, so be sure to stand on small bombs away from large bombs.
Two Blood and Bone raidwides will happen after, make sure to mitigate and heal up.
Bombslinger happens again without tethers, then a Rapid Sever tank buster into another Bombslinger with tethers.
Mechanics will repeat until the Queen’s Warrior falls.
Strongpoint Defense
Once all four robots have been defeated for the first time, they will respawn untargetable at full health around the arena. The Queen’s Knight will cast Strongpoint Defense which begins the enrage phase.
All four robots will begin a long cast of their raidwides and will be encased in an Aetherial Ward that must be destroyed before the casts finish.
The Aetherial Wards will cast Coat of Arms applying  Directional Parry. Take note of which sides of the wards have a golden shield, and attack facing the unshielded sides, or else your actions will be reflected back to you with Counterplay, stunning you, dealing damage and applying Twice-come Ruin stacks.
When all four wards are destroyed the encounter ends with the robots retreating.
Caster LB3 may be tempting to hit all of the Aetherial Wards, however, if it is not ready in time before the reflect buffs go out, resolving Caster 3 on all the adds while some have the reflect up will result in damage being returned back, resulting in Twice-come Ruin stacks and possibly immediate Doom/death.
Loot (The Queen’s Guard)
Bozjan Phantom
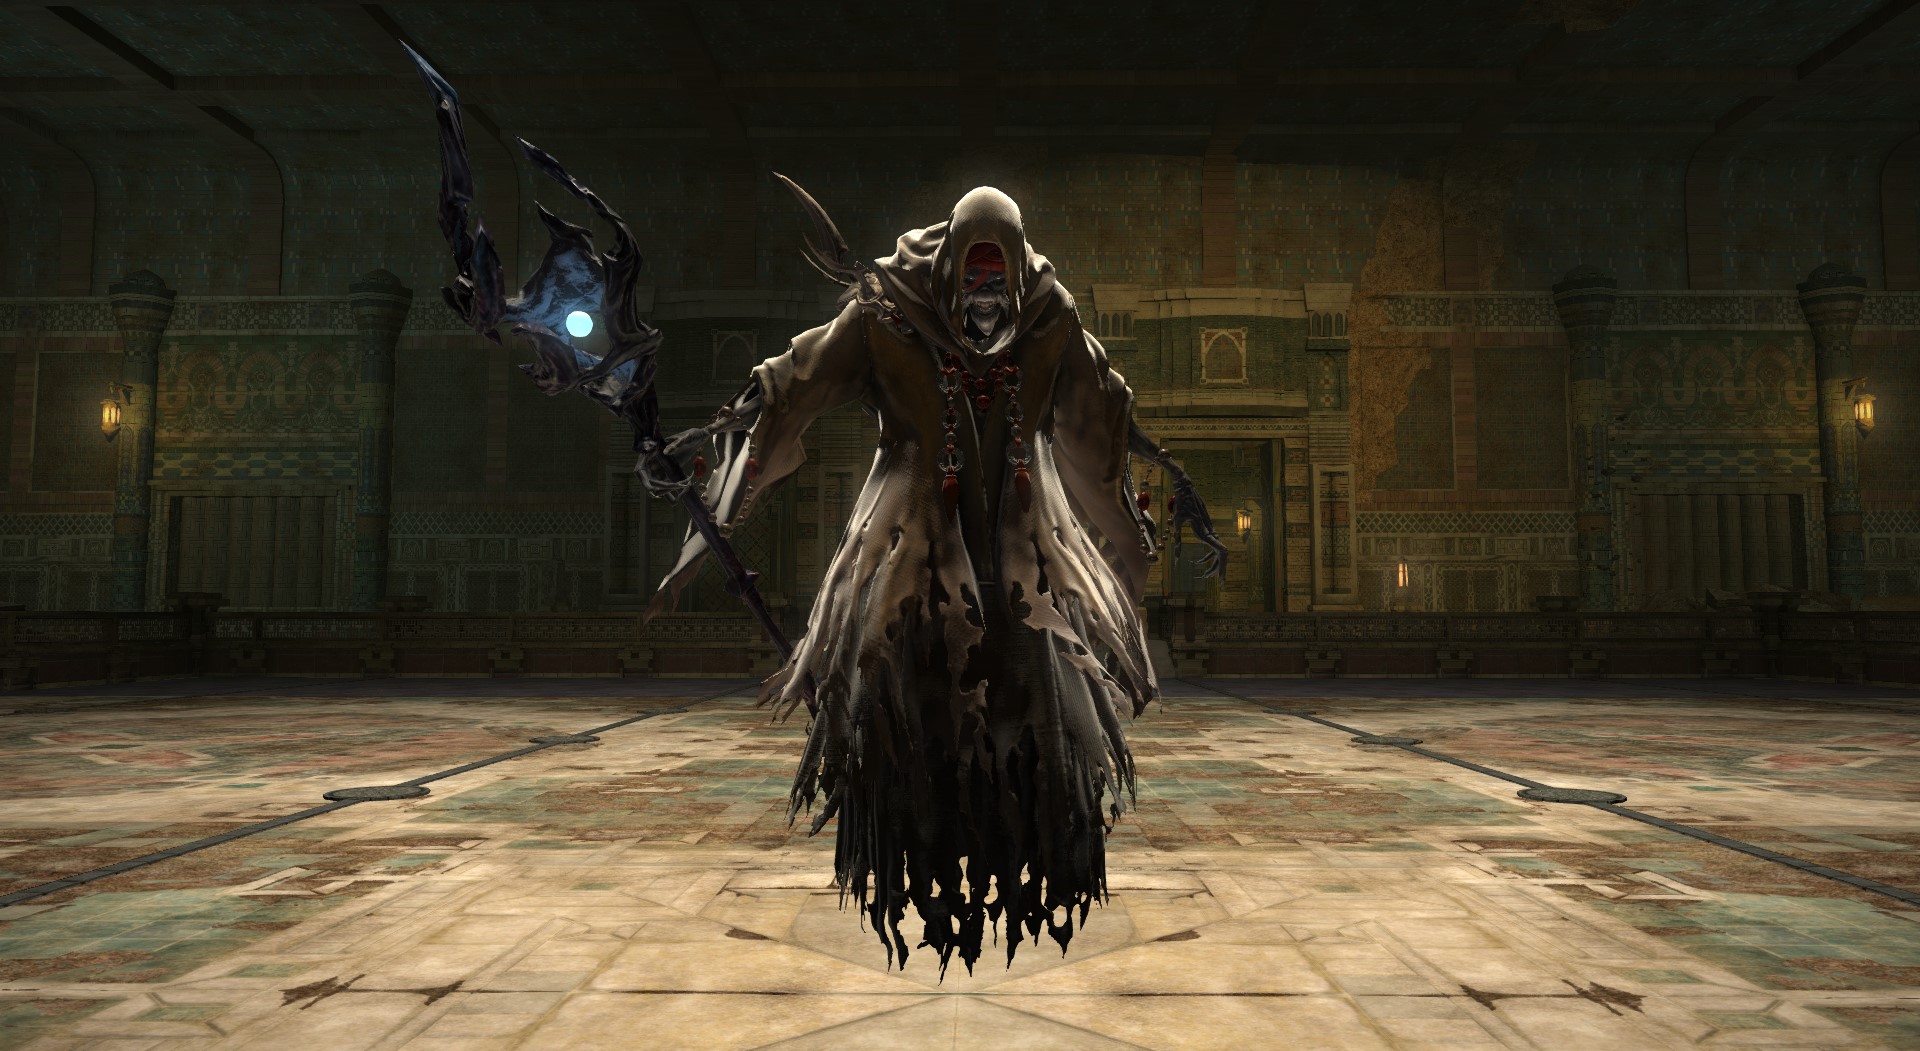
The fourth encounter and second minor boss, the Bozjan Phantom denied of his solace and eternal rest.
Lost Banish III can be used against this boss to increase the raid’s damage against him by 25% for 60s. Multiple do not stack.
After 8 seconds into the encounter, the Bozjan Phantom will cast Weave Miasma, activating two purple miasma death walls on the northern and southern sides. On cast completion, a square symbol and ring symbol will appear above the northern miasma wall.
- Square = beam AoE, don’t stand in it.
- Ring = moving donut AoE Swirling Miasma, stand in the safe circle within and move with it as it pulses across the arena.
Shortly after the last Swirling Miasma pulse, the Bozjan Phantom will cast Summon. A phantasm will spawn at the miasma wall side of the arena, casting a heavy knockback on the raid. After the knockback resolves, the Bozjan Phantasm will turn to cast Vile Wave, a wide angled frontal cleave.
Weave is cast along with Summon combining the two mechanics, so be knocked back into the Swirling Miasma safe spot KB into swirling miasma safe spots. You have a bit of time to adjust. Follow the miasma donut until it finishes, then dodge Vile Wave once more.
The boss casts the Excruciation tank buster into 2 Malediction of Agony raidwide AoEs.
The Bozjan Phantom will repeat Weave Miasma into Summon. Get knocked back into the Swirling Miasma donuts, follow them to the other side of the room then run out of the Vile Wave cleave.
Malediction of Agony is then followed with an Excruciation. The boss should be near death by now.
Loot (Bozjan Phantom)
Trinity Avowed
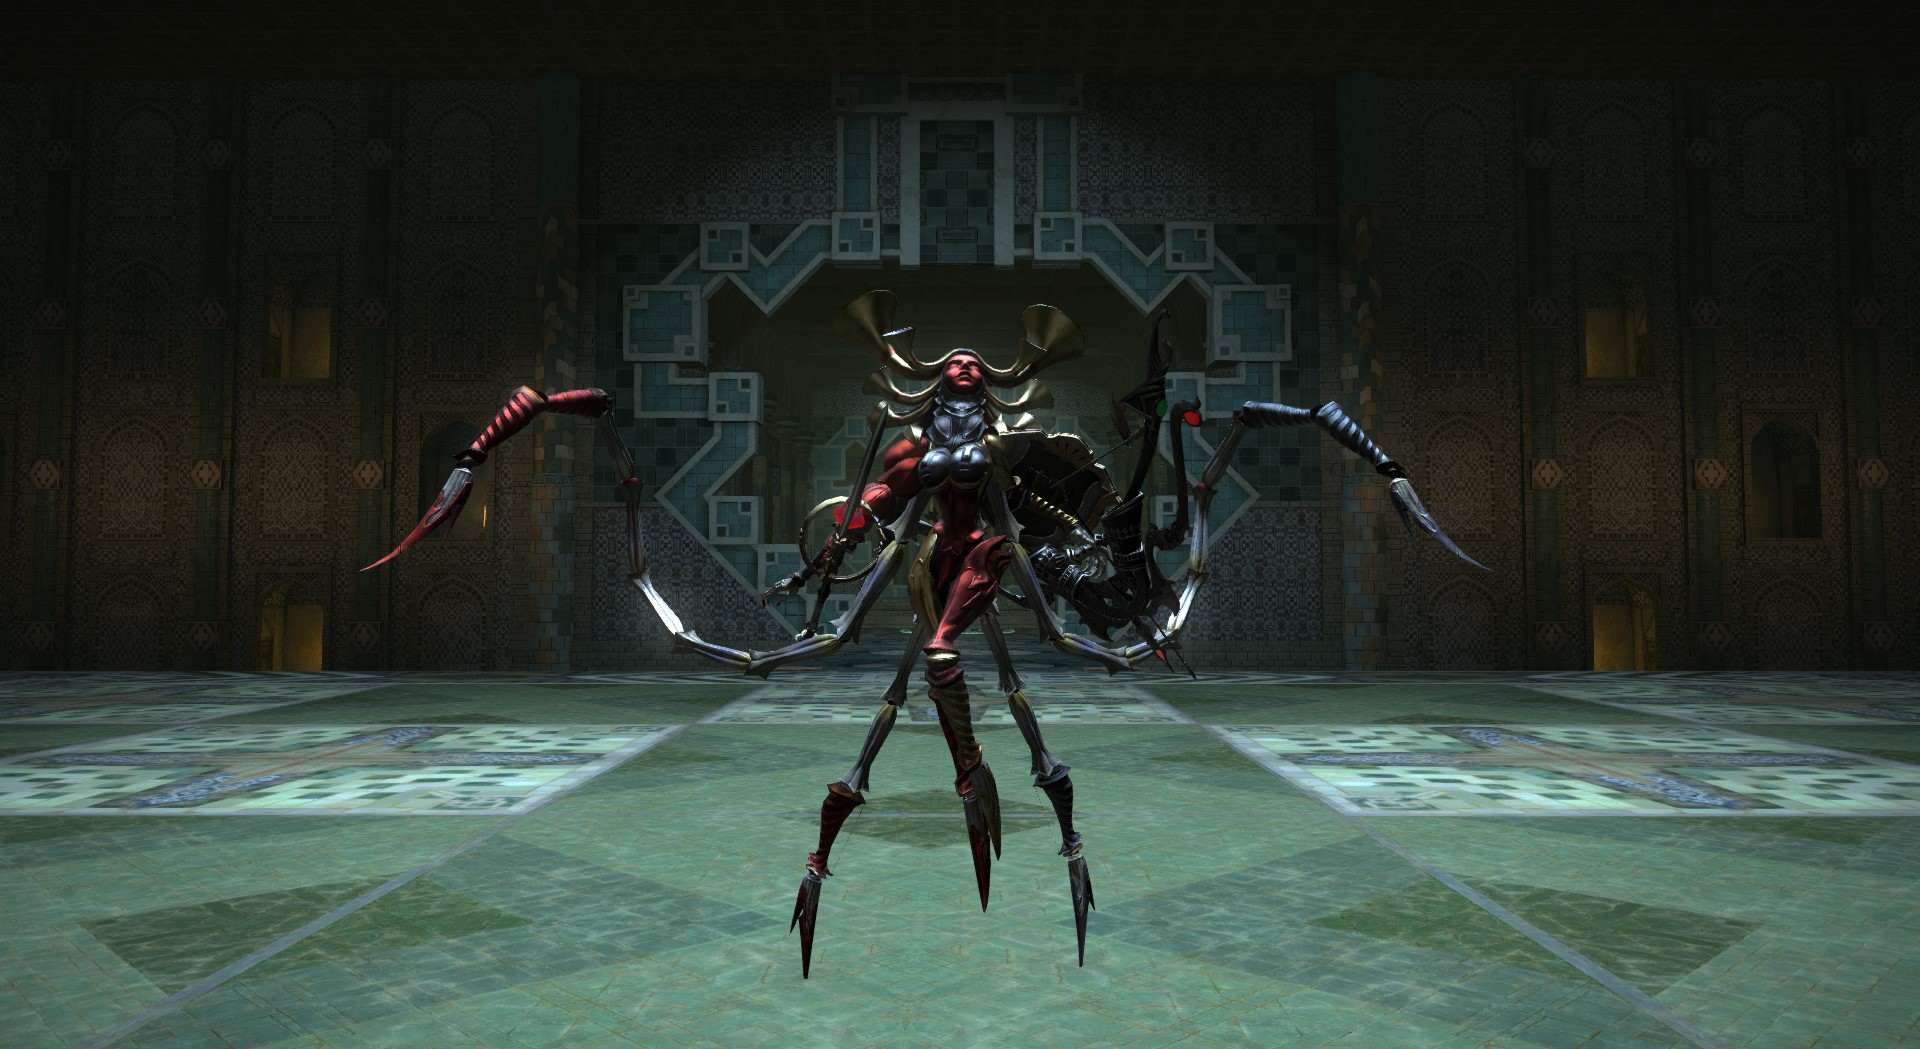
The fifth encounter and third major boss, Trinity Avowed is a puzzle encounter where players must balance their temperatures between hot and cold in order to resolve mechanics correctly. She also borrows heavily from ARR Shiva’s design with weapon forms.
Trinity Avowed opens with a tank buster, Wrath of Bozja, 8s into the encounter. After this she follows up with the Glory of Bozja raidwide for moderate damage. The deathwall turns on with completion of this cast.
Allegiant Arsenal is cast to begin the next series of mechanics as indicated by the weapon she holds that glows. The first one will be the staff.
Allegiant Arsenal: Staff
This weapon form opens with a telegraphed Fury of Bozja AoE circle around her.
Next she casts Hot and Cold introducing the core mechanic to the fight: managing the temperature gauge.
When Hot and Cold finishes resolving, players within the raid will be afflicted with the following:
 Intemperate (Easily affected by changes in body temperature. When effect expires, running hot or cold will result in K.O.) (the temperature gauge)
 Running Cold: - 1 (1 blue bar below normal)
 Running Cold: - 2 (2 blue bars below normal)
 Running Hot: + 1 (1 red bar above normal)
 Running Hot: + 2 (2 red bars above normal)
The core gimmick is to restore your temperature to neutral or else you will die when the mechanics finish resolving. In order to do so you must be hit with opposing temperature mechanics to lower or raise your temperature level.
She will cast Freedom of Bozja spawning four proximity markers in the corners for the elemental orbs that will fall in those positions. Blazing Orbs and Swirling Orbs will spawn casting Elemental Impact resolving the proximity damage x4. Hug middle.
The elemental orbs will feature a gauge above them indicating how much your temperature gauge will change. If you have -1 from Running Cold: - 1 then you must stand on the AoE circle of a Blazing Orb with +1 on the temperature gauge. This will return you to  Normal allowing you to survive the subsequent mechanic check with a Green check mark. Failing to return to Normal will result in death.
Allegiant Arsenal: Bow
Allegiant Arsenal is cast again this time with a bow. The Flashvane that follows is a massive telegraphed arc around her with only behind her being safe.
Shortly after she casts Flames of Bozja turning most of the arena into a death floor. Don’t stand in the fire. This is followed with another Hot and Cold.
She will then cast Shimmering Shot. A line maze, reminiscent of Japanese あみだくじ (Ghost Leg) lotteries, will appear in the fire floor that will trace out possible routes for two elemental arrows to follow:
- Flame Arrow (+1 heat, red arrow)
- Frost Arrow (+1 cold, blue arrow)
The paths each arrow will take will light up briefly one at a time. Stand in front of the correct element arrow to negate your temperature.
A Glory of Bozja raidwide is cast then another Allegiant Arsenal phase will begin this time wielding a sword.
Allegiant Arsenal: Sword
In the reverse of the bow form’s Flashvane, Infernal Slash is an arc around the boss behind her with only in front of her being safe.
Hot and Cold happens again introducing the +/-2 variants of the temperature debuffs along with the +/-1.
Trinity Avowed will cast Blade of Entropy, raising up her sword to one side with a notable elemental tell and the appropriate elemental gauge above it. Stand in the cleave if it would negate your temperature, otherwise dodge.
She will perform four Blade of Entropy casts for each debuff type so make sure you eat the correct cleave.
After the blades she will cast Unseen Eye, spawning Avowed Avatar clones around the arena that will shoot Gleaming Arrow beams. Stand in the safe squares. With this resolved, Trinity Avowed casts her Wrath of Bozja tank buster into a Glory of Bozja raidwide, then casts Allegiant Arsenal to change weapon form again.
Allegiant Arsenal: Staff #2
Trinity Avowed begins this phase again with the Fury of Bozja circle around her then follows with Hot and Cold. Now that +/-2 debuff variants have been introduced, the two new orbs will spawn to counter one each of the specific debuffs:
- Tempestuous Orb (+2 cold, icicles around the base of the orb)
- Roaring Orb (+2 hot, more fire around the orb)
Make sure to stand in the correct AoE circle.
Unseen Eye will be cast next to summon clones once more. Again they will cast beams across the arena, so stand in the safe squares. This will then be followed with the Glory of Bozja raidwide into the Wrath of Bozja tank buster, then another Allegiant Arsenal form change.
Allegiant Arsenal: Bow #2
This phase opens again with Flashvane, so hide behind the boss. She will summon clones again with Unseen Eye, following with a Flames of Bozja cast to turn the floor on fire after the Gleaming Arrow beams go off. Run to the safe area after.
As before, Hot and Cold will happen with the arrows, only this time two new arrows are introduced for the +/-2 debuffs:
- Glacier Arrow (+2 cold, more ice on the arrows)
- Spark Arrow (+2 fire, more flames on the arrows)
Take note of which column your specific arrow will travel to then stand in front of the correct path to negate your temperature.
Glory of Bozja will hit the raid, then a Wrath of Bozja tank buster, then another Glory of Bozja raidwide will follow into Allegiant Arsenal: Sword once more.
There are no new mechanics after this point.
Loot (Trinity Avowed)
The Queen
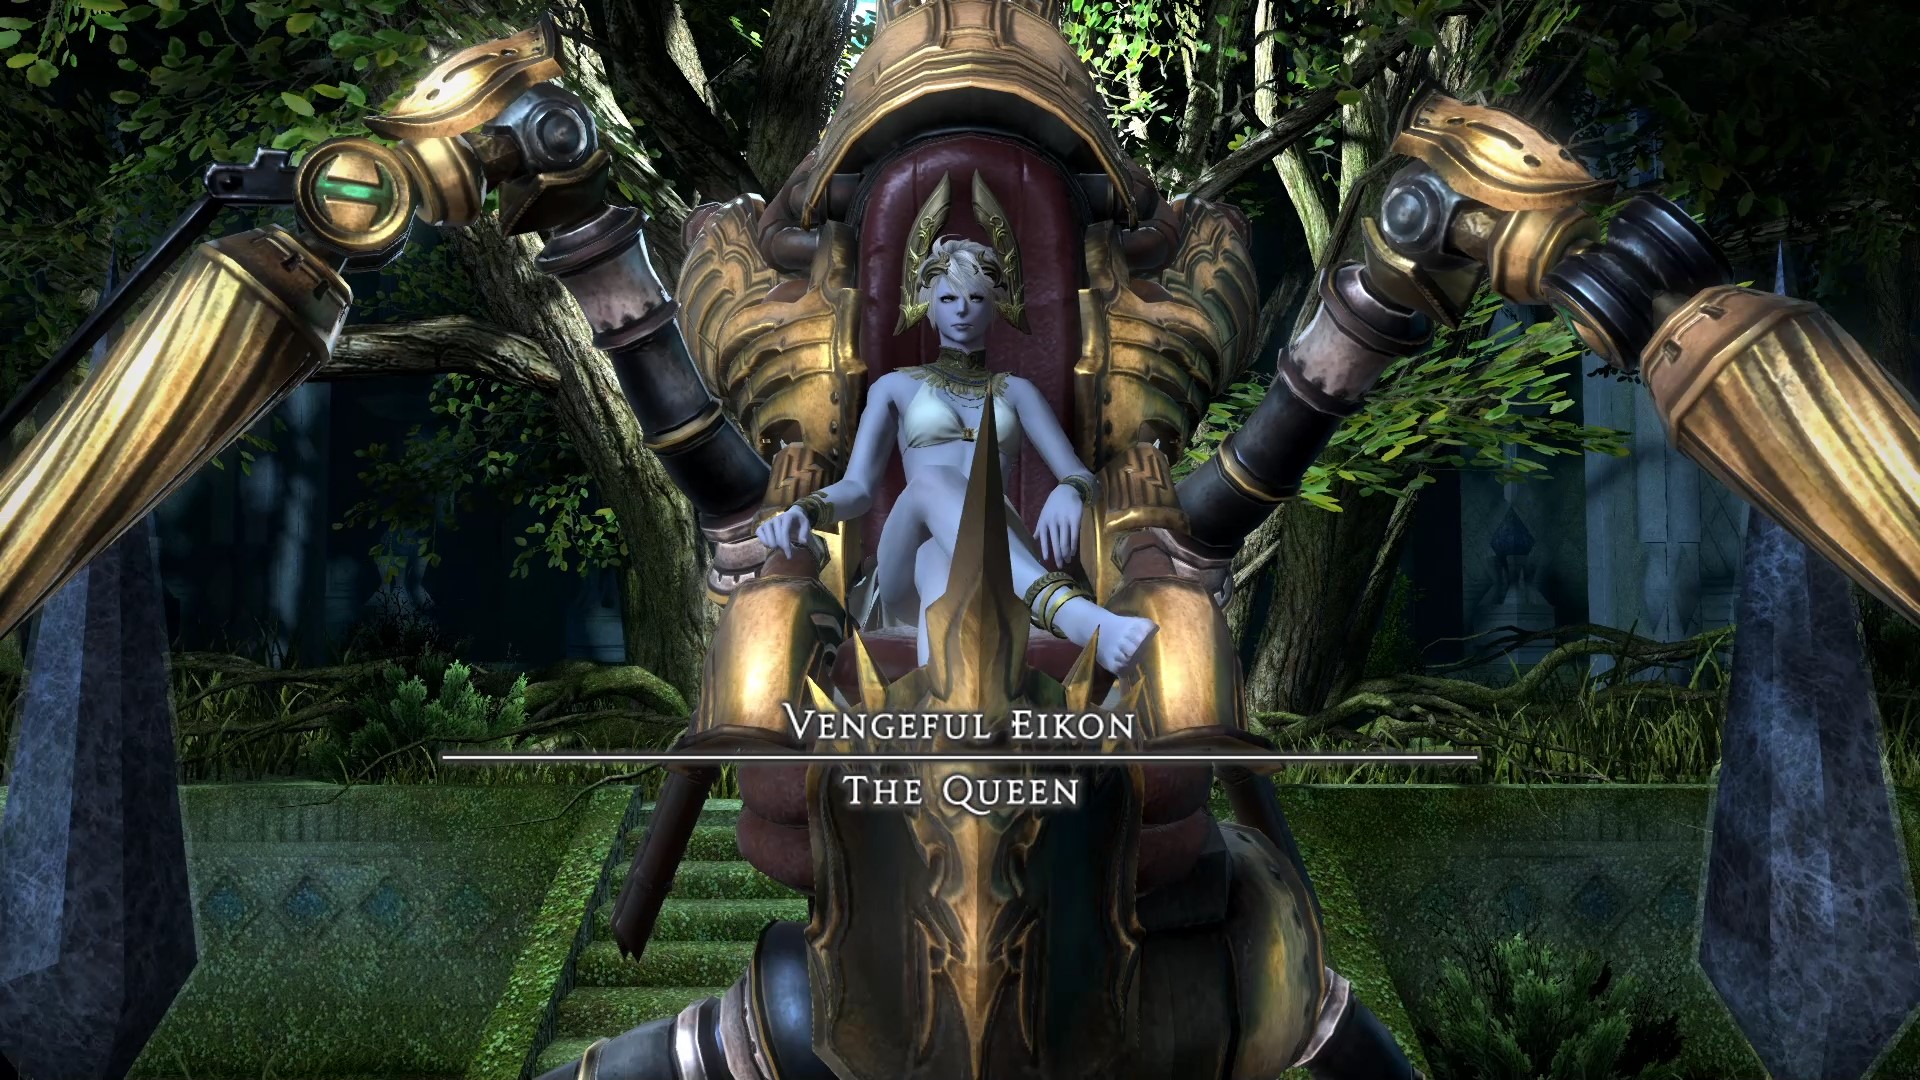
The final encounter is Misija as the Lady of Blades incarnate, The Queen Gunnhildr.
The Queen will open with the Empyrean Iniquity raidwide for high damage, then follows with casting a Cleansing Slash tank buster. As she does this, a large death wall will appear around the arena enclosing it to form a circle shape.
Next she will prepare her first key mechanic: Queen’s Will.
Queen’s Will
As she casts Queen’s Will, the arena’s death wall will change to turn the arena into a 5x5 tile chess board.
Two of the Queen’s Guard will spawn on tiles around her with a target ring marker showing the direction they will march. The boss will cast Back and Call to Arms tethering herself to both robots. Each one will have glowing red dots that correspond to how many tiles they will march forward. When they stop, both will shoot out cardinal beams in all directions. Stand in the safe regions or be hit by The Means, suffering damage and a Twice-come Ruin stack.
After this phase, the arena will revert back to a circle as The Queen casts Empyrean Iniquitiy. She will then cast the next key mechanic: Northswain Glow.
Northswain Glow
Three red orbs will spawn on the ground as the middle point of lines that will expand out. Take note of where the lines are going as one line will intersect with the other two. When the intersects happen they will result in a large AoE circle. Stand in the safe half away from this.
The Queen will cast Heaven’s Wrath spawning a bar of light that crosses through the arena that when it detonates will knock the raid back. Stand on the middle tile to not get knocked into the death wall as Arm’s Length/Surecast does not work.
A Cleansing Slash tank buster follow into another Queen’s Will.
Queen’s Will #2
Spawning different Queen’s Guard, this sequence plays out the same initially. Count the number of tiles for where they are moving to then stand in the safe regions. As they resolve this and then despawn, The Queen will move outside the arena preparing Judgment Blade. She will raise up her blades on one side to show which side of the room will be cut.
After this she will return to the middle, teleport to realign herself then glow golden as she casts Gods Save The Queen for high raidwide damage.
After a reprieve, next will come the Queen’s Edict mechanic.
Queen’s Edict
Players among the raid will be afflicted with the following debuffs:
Movement Edict
 Movement Edict: 2 Squares
 Movement Edict: 3 Squares
 Movement Edict: 4 Squares
These debuffs represent how many squares you must move in order to survive. If you do not move enough squares, or more too many, you will take damage and receive a Twice-come Ruin stack.
A 10s countdown will begin with “Enacting the queen’s will in 10 seconds…”. Once this timer elapses, the raid will be afflicted with the following debuffs instead:
Your Move
 Your Move: 2 Squares
 Your Move: 3 Squares
 Your Move: 4 Squares
You have a limited time to move enough squares where a countdown will again tick down from 5s. As you move squares your counter will tick down. Once the timer has elapsed the raid will be stunned and The Queen will check if you obeyed her will.
The boss will then cast a Cleansing Slash tank buster into a new mechanic: Relentless Play.
Relentless Play
Summoning two of her Queen’s Guard, this will repeat mechanics from their encounter.
First she opens with the Queen’s Gunner and Queen’s Warrior. Dodge the turrets and watch where the large and small bombs spawn. A Heaven’s Wrath will cut through part of the arena foretelling of an upcoming knockback. Stand by the Heaven’s Wrath and get knocked back, moving on top of the safe bombs to resolve Above Board. You have a bit of time to adjust.
The Queen will return to the middle and prepare her second Queen’s Edict.
Queen’s Edict #2
This time the mechanic will combine the Queen’s Will with Queen’s Edict. Two Queen’s Guard robots will spawn with counters for movement while the raid will also be afflicted with the movement debuffs from before.
The goal is to move enough squares to finish in a safe region to not be hit by the robot beams. Look to where the robots will end up, then figure out your movement from there.
After this the arena will return to a circle and she will Cleansing Slash the main tank.
She will follow with Relentless Play with the other two robots.
Relentless Play #2
This time she summons the Queen’s Knight and Queen’s Soldier.
Pay attention to which Soldier Avatars are tethered, staand in the false AoE circles then stand on the safe half of the arena to avoid Judgment Blade, then resolve the Queen’s Knight’s sword (out) or shield (in) mechanic.
After this sequence will come an Empyrean Iniquity raidwide into the second Northswain Glow.
Northswain Glow #2
Like the first time, 3 lines will begin to expand detonating where they intersect. The change being The Queen summons two robots with Queen’s Will outside of the arena to force them to march with Beck and Call to Arms.
Pay attention to how many movement counters they both have, then run to a safe region. After this comes a Cleansing Slash into a third Relentless Play.
Relentless Play #3
Similar to Relentless Play #1, the Gunner and Warrior return with more turrets and tether bombs in addition to the Heaven’s Wrath knockback.
Dodge the orb dashes, get knocked back towards a small bomb then wait for the levitate to resolve.
The Queen finishes this sequence with Empyrean Iniquity, then begins her third Queen’s Edict. This one plays out just like the second.
Cleansing Slash follows into the fourth Relentless Play. This one plays out just like the second.
Next comes an Empyrean Iniquity into Northswain Glow with the robots.
From here there are no new mechanics. The Queen will continue to cycle between her phases with raidwides and tank busters until she falls.
Loot (The Queen)
- 4x Bozjan silver coins
- 5x Bozjan silver coins
- Gabriel Mark III Identification Key (rare drop)
- Modern Aesthetics - Early to Rise (rare drop)
Congratulations on clearing Delubrum Reginae. If it is your first time, enjoy the story cutscene and get ready for Delubrum Reginae (Savage)!