Moving content-specific elements (all)
To move any of the content-specific elements, you will need to use a mouse cursor (virtual, physical, or touchpad). Hold left click to move, Right click to reach resize option.
For resizing, you can also use the HUD select button to reach the element and use R3 to go through sizes if that feature has been turned on in System configuration. This is how all Duty-specific elements not available in HUD Layout are handled.

There are some content-specific elements that are available in HUD Layout, but not many. Certain PVP elements are available if you go to the Wolves’ Den under the Duty Section.
List of Duties With Special Controls
Command Missions
Command Missions do come with some actions for controlling your squadron. And yes technically they’re in the Actions menu and you can allocate those to your cross hotbars if you wanted to.
However, it is not necessary, and there is really no reason, especially on higher-button jobs, to try to make space for these extra action buttons.
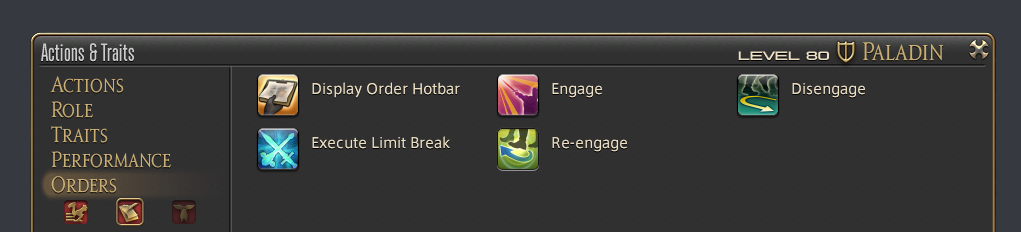
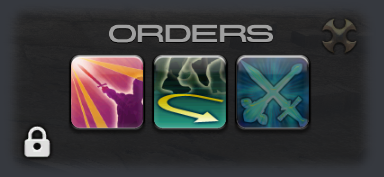
Instead, there is a menu that looks like this:
If you don’t see this menu, go into Actions and use “Display Order Hotbar” (don’t allocate this to your hotbar either).
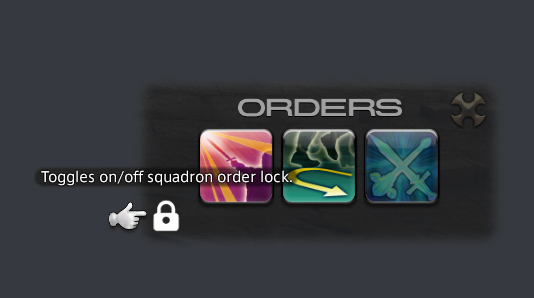
Once you have this menu open, lock it. You can use your HUD Select button to get to it and you can just leave your HUD cursor there. It won’t stop you from being able to attack or target.
The d-pad is used to pick an order, and you can use either the Confirm button (X) or the Subcommand button (Square) to push out an order.
Do note that since it uses those two buttons, you will need to leave the Orders (by canceling, Circle) to interact with chests or open your map. Once done, just use your HUD select button to get back to Orders when you need to.

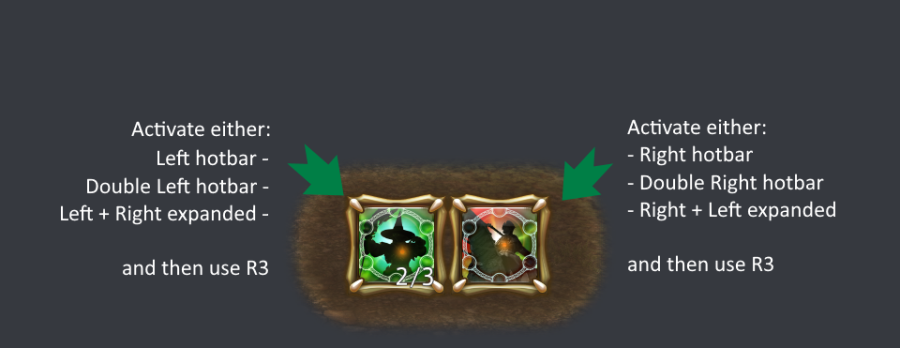
As shown above, the HUD select interaction is on the Orders menu while an enemy is targeted and a cross hotbar is activated. It’s quite simple:
The below example assumes a default configuration of Confirm as X and Subcommand as Square
- If your hotbar is activated, pressing X or Square will do the action you have allocated there
- If your hotbar is not activated, pressing X or Square will do engage.
The above also applies to your d-pad. Activated Hotbar = do action, Not Activated = manipulate Orders.
Eureka/Bozja
Eureka
In Eureka you will have access to the Elemental wheel. Use your HUD select to reach it. From there, you can access two other closable elements as well.
The Elemental Wheel can not be closed or hidden.
Using Gamepad mode does have hints.
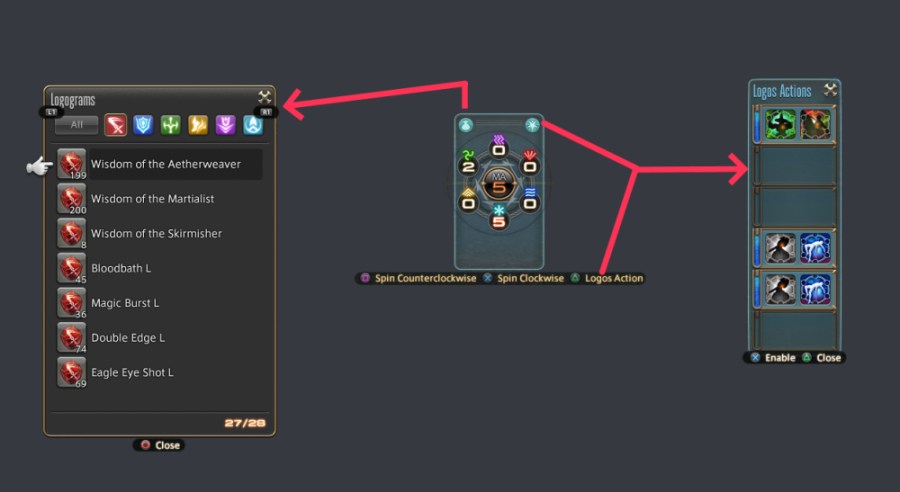
Additionally, if you use the Subcommand button (Square) while having an enemy targets, you will have two extra options in the subcommand list for changing your magicite.
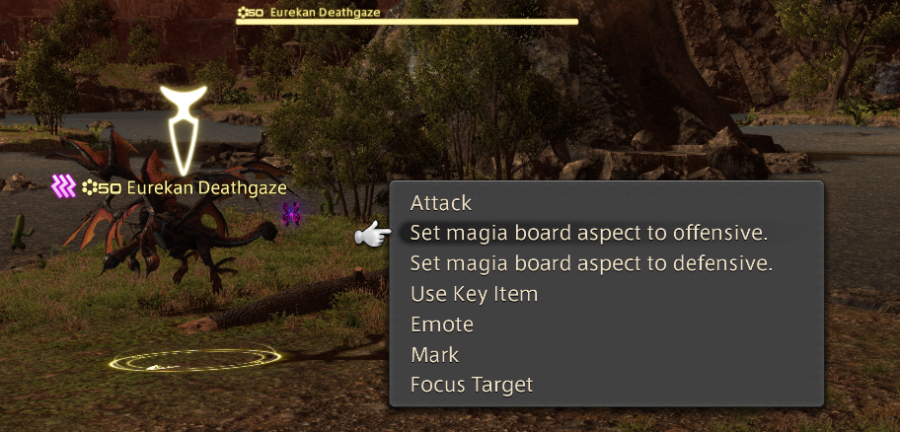
Using Eureka and Bozja Actions
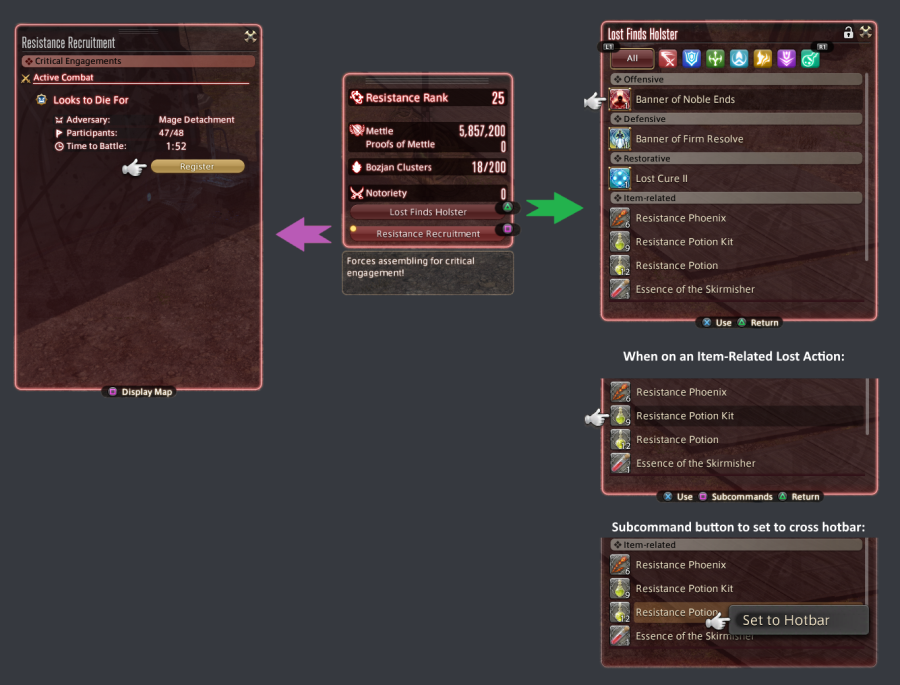
Bozja
As with Eureka, there is an element that cannot be hidden or closed. It is not in the HUD layout screen so you will need to follow the same instructions directed at the beginning of this page regarding how to move or resize.
That element can then open two other elements.
Lords of Verminion
The game actually does provide most of the commands for this, but it requires opening up the Help menu.
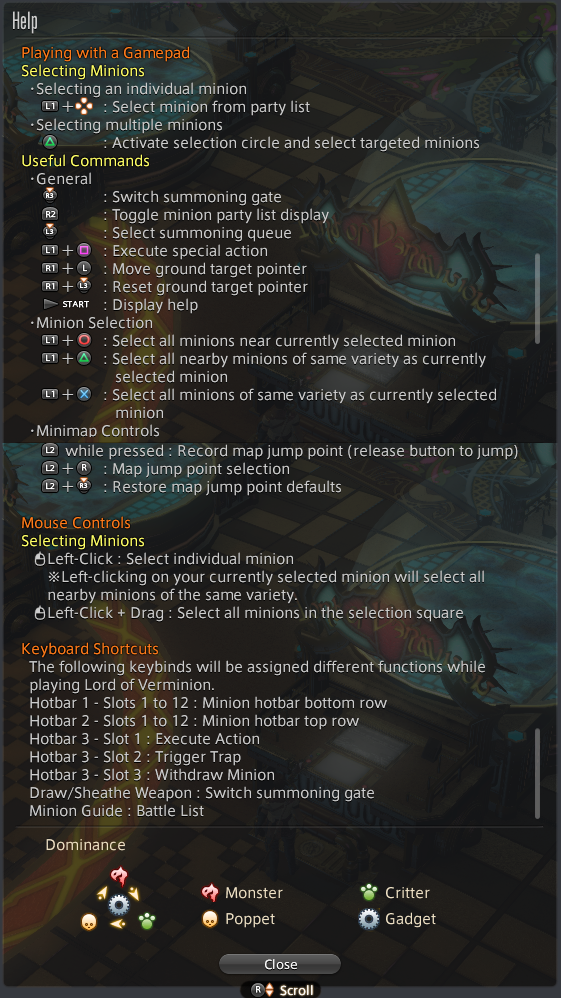
The only missing directions are:
- Use the d-pad to browse your minion bar (for summoning). Press confirm to summon.
For R2, which is mentioned above, when they say “Toggle minion party list display”, it means toggling between a list of your minions, or a list of the enemy’s minions.
Is Verminion harder on Controller?
Moving around the map can feel harder, especially if you haven’t learned to master the Map Jump Points.
However, selecting groups of minions, can be easier since there are multiple shortcuts to pick either:
- All nearby minions
- All nearby minions of the same variety
- All minions of the same variety, nearby or not
These shortcuts are actually not available on mouse & keyboard unless they set up keybinds to the gamepad to use gamepad controls.
Deep Dungeon
During a Palace of the Dead or Heaven on High run, you will have two special UI:
- A special Map
- Character Info, which has your pomanders
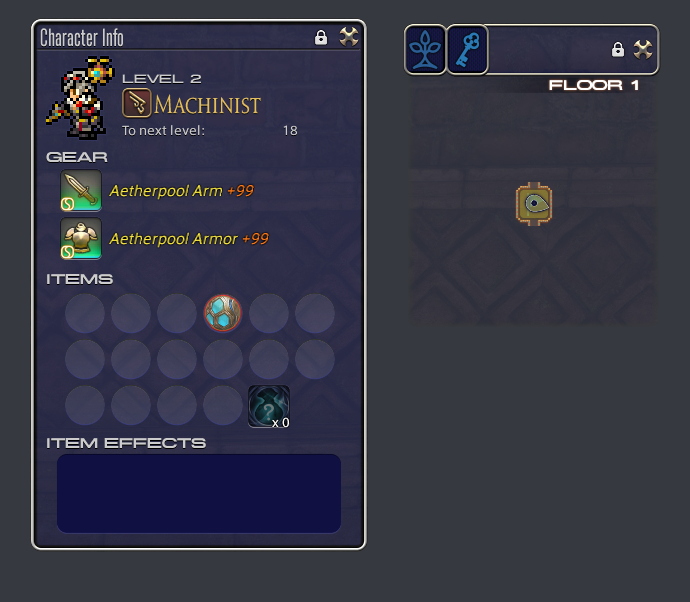
Both of these can be locked so you don’t accidentally close them. This is a recommendation as the last thing you want when things go wrong is to not have a clear view of your pomanders. The map is more optional if you wish to lock or not.
As both of these UI elements do not appear in the HUD layout, please use the same directions provided at the beginning of the Content-Specific section for instruction on how to move or resize them.
Managing Pomanders
Using the HUD Select button while you have no UI element selected will go to the Character Info UI first, regardless of where you put it on your screen.
Most importantly, the Character Info will remember where you last left off the hand icon. Because of this, you may wish to make sure to leave it on a pomander that can help you if things go wrong. This can be very helpful as there is no way to bind pomanders to the cross hotbar, or any hotbar for that matter, so creating your own shortcut by making use of this memory feature could save a run.
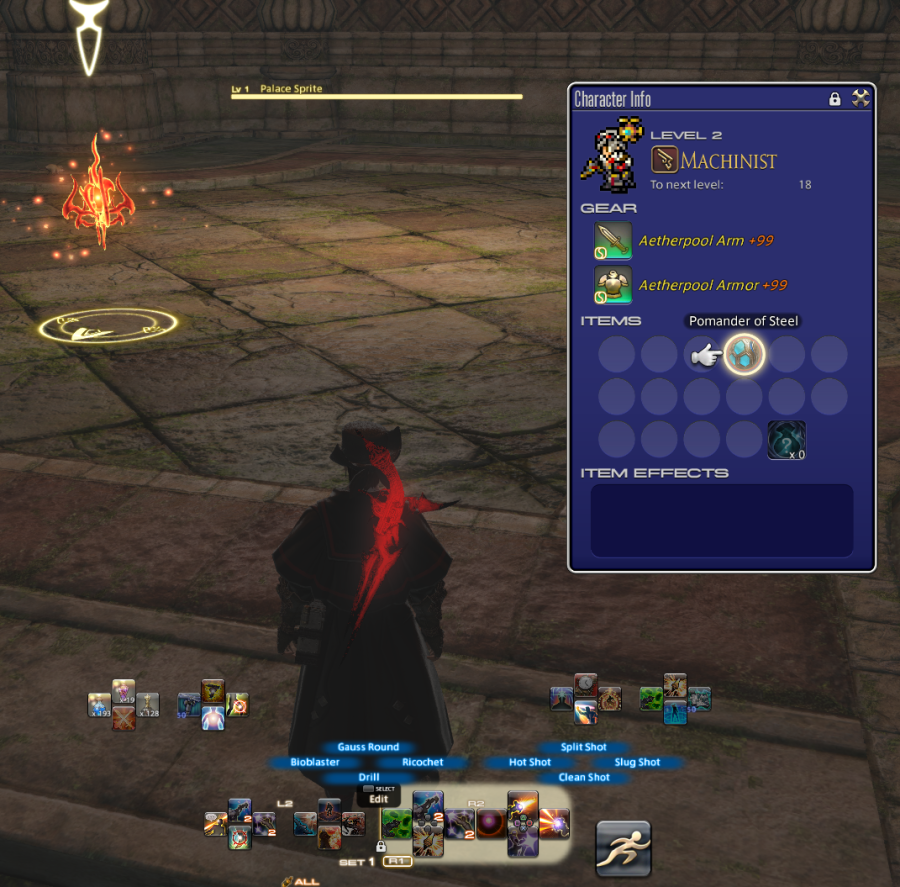
You can also keep the Character Info page activated in HUD Select while being able to target and attack enemies.
Gathering
Miner & Botanist
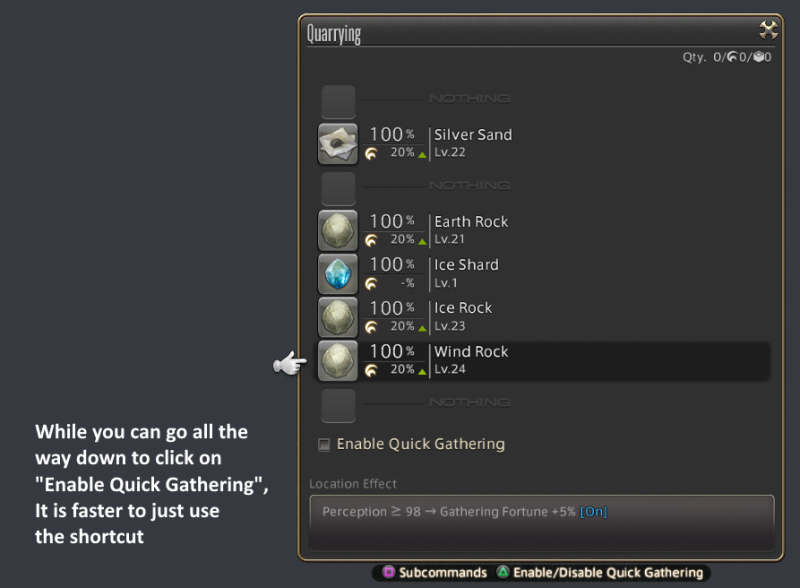
Controller and gathering go hand in hand. Sit back, relax, and maybe have a video playing on the side.
When it comes to miner and botanist, you can turn on and off auto-gathering by using your Jump (Triangle) button.
If you are using gathering to work on spiritbonding for materia, it would also be read up on controller your HUD to leave a menu open.
Fisher
Fisher just absolutely shines on controller, especially the PS4 controller (regardless of whether you are on PC or PS4/PS5). There are two reasons for this:
Vibrations
All controllers with vibration support excel for fishing. You’ll be able to feel when a fish has reeled in and it will have a different feel for the type of tug (! , !! , or !!!).
Controller sounds
While vibrations are great for reeling, sound is great for knowing if you finished reeling in your fish so you can cast out again, and for monitoring whether you need to come back to the game to buy more bait or to move because the fish sense something amiss. The PS4 controller comes with its own speakers as well as a headphone jack.
- PC users can technically route their game to output the entire game’s sound to the controller by setting that as the game’s default sound output.
-
For PS4, you can either use the controller’s speakers or hook up some headphones:
- Speakers: Can configure to have system sounds. This is not particularly useful as most fishing sounds are categorized as Sound Effects, not System. Only successfully catching a High Quality fish results in a system sound.
- Headphones: Can configure your PS4 to route all game sounds to your headphones.
By having the game come through to the PS4 headphone jack (or any other controller that supports it, or through wireless headphones), you can easily grind fishing without even being in the same room as the PS4. Not all fishing benefits from this method. Ocean fishing, for example, is best done while paying attention, and same for Big Fish that have very specific intuition fishing requirements that require changing baits.
However, if you’re just fishing for Skysteel relic fish, for Big Fish that have no intuition requirements, gathering mass amounts of levequest fish, or just grinding somewhere to level mindlessly, using your wireless controller’s rumble and sounds to fish without having to even be in the same room as your console or computer comes in very handy.
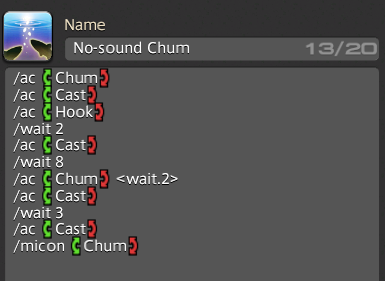
Here are examples of some fishing macros:
All macros are available at the end of this page for easy copy/paste
One-Button Chum macro:
Cast out and then press when you feel vibrations. Good for certain big fish with large windows and no mooching or intuition fish requirements.
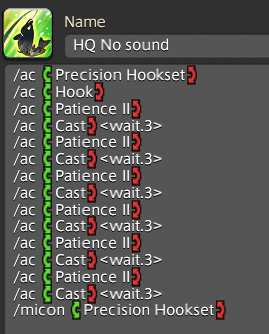
One-Button HQ Fishing Macro:
Cast out and then press when you feel vibrations. Good for skysteel fishing since you only need a specific HQ fish, but you need multiple of them. Can also be useful for leve fishing. Adjust precision to powerful based on whether the fish you need is a small tug or a medium tug.
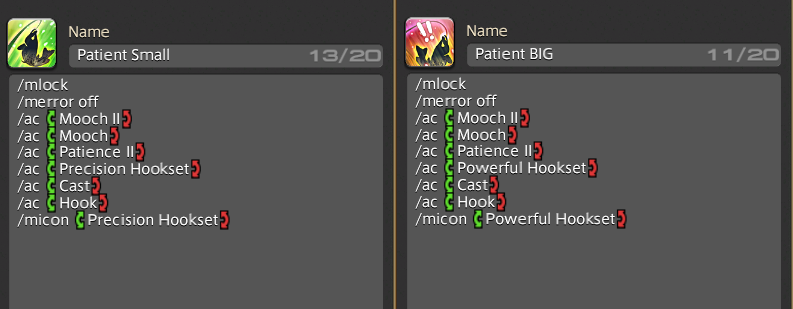
Two-Button HQ fishing
For this set you need to have both vibration and sounds.
Sounds are how you determine whether to cast out again. Vibrations are used for reeling.
This is useful if you wish to level, since HQ fish give more, but you don’t want to do leves or Ocean fishing, as it can let you mindlessly fish in a level-appropriate spot (whether in the open world or The Diadem). While technically a slower method of leveling, it’s great for when you just don’t want to have to pay much attention to the game.
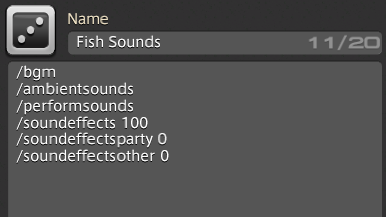
You may wish to make a macro to change your sound settings to something fishing appropriate, such as turning off BGM and turning up sound effects since you do need to react to sound queues.
Fishing Macros (English)
/ac "Chum"
/ac "Cast"
/ac "Hook"
/wait 2
/ac "Cast"
/wait 8
/ac "Chum"
/ac "Cast"
/wait 3
/ac "Cast"
/micon "Chum"
/ac "Precision Hookset
/ac "Hook
/ac "Patience II"
/ac "Cast"
/ac "Patience II"
/ac "Cast"
/ac "Patience II"
/ac "Cast"
/ac "Patience II"
/ac "Cast"
/ac "Patience II"
/ac "Cast"
/ac "Patience II"
/ac "Cast"
/micon "Precision Hookset" /mlock
/merror off
/ac "Mooch II"
/ac "Mooch"
/ac "Patience II"
/ac "Precision Hookset"
/ac "Cast"
/ac "Hook"
/micon "Precision Hookset"/mlock
/merror off
/ac "Mooch II"
/ac "Mooch"
/ac "Patience II"
/ac "Powerful Hookset"
/ac "Cast"
/ac "Hook"
/micon "Powerful Hookset"/bgm
/ambientsounds
/performsounds
/soundeffects 100
/soundeffectsparty 0
/soundeffectsother 0