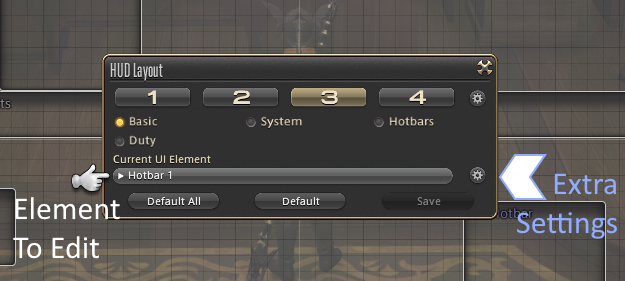
Working with the HUD layout screen
Buttons Only
You can use the D-pad and Confirm button to pick an element.
From there you can use your Camera analog stick to move them around. The regular analog stick moves the HUD layout menu itself if you need it out of the way.
You can also use your Jump button (Triangle) to enable/disable that element (some elements cannot be disabled, like job gauges), and use your R3 to cycle through the various sizes. These are actually shortcuts as you can use that gear icon to the right to change those settings (and sometimes other settings) there as well.
Virtual Mouse / Physical Mouse / Touchpad
If you enable the virtual mouse, you can edit the HUD Layout in the same way a mouse user would.
As a reminder, to enter Virtual Mouse, use Auto-Run + Right Click (L1 + R3) and it does need to be enabled in System Configuration.
Use the movement analog to go to an element and you can use Left Click to select it.
Then you can Hold Left Click and use the Movement analog to move things around, or use Right Click to disable the element. In this mode, you can combine both cursor and gamepad controls as you can still choose to use R3 to cycle through element sizes, and you can now use the d-pad to do a more fine-tuned movement of the element.
Help, I used virtual mouse and now I’m having trouble getting back into the regular mode
Sometimes it does freak out a little if you are switching between the two modes. If you’re completely done, you could just use Mouse mode to hit Save and hit the Exit button. However if you’re trying to get back into the regular mode and it’s not coming back to the main HUD Layout menu, first get back into virtual mouse mode and “left click” on the drop down. With the drop down opened, exit virtual mouse mode. This should fix any issues with it not properly detecting.
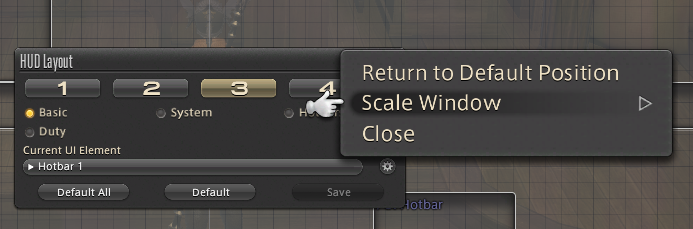
How to make the HUD layout menu bigger?
Since clicking on R3 will affect the element in “Current UI element”, how do you make the actual “HUD Layout” window bigger if it’s too small to see? For this you will need to use a mouse cursor, such as the virtual mouse, and you will need to “Right Click” on the “HUD Layout” window.
This will bring up the subcommand menu and you can choose a different size.
Assigning Actions to Regular Hotbars
Many controller players use the regular keyboard hotbars as a way to keep track of their cooldowns. Depending on your controller style, this may or may not be necessary.
First you’ll want to have a keyboard hotbar visible. You can do this either in Character Configuration->Hotbar->Display or in the HUD Layout screen. Please refer to the section on working with the HUD Layout screen if you need guidance on that.
Either way, now that you have a keyboard hotbar showing, you need to place some actions down. Because these are meant for Mouse & Keyboard players, you will need a mouse to place them. However, it doesn’t have to be a real mouse - you can use the Virtual Mouse or the Touchpad.
- Make sure the hotbar is turned on
- Open up the menu that contains the action/item/macro/etc.. you wish to place
- Open up the Virtual Mouse (L1 + R3), or use the touchpad, or hook up a physical mouse
- Drag the skill to the spot on the hotbar. If you have your m/kb hotbars set to hide unassigned slots (Character Config, Hotbar Settings, Display), the unassigned slots will be visible while you are actively dragging
To drag the skill, there are two ways, though they are very similar.
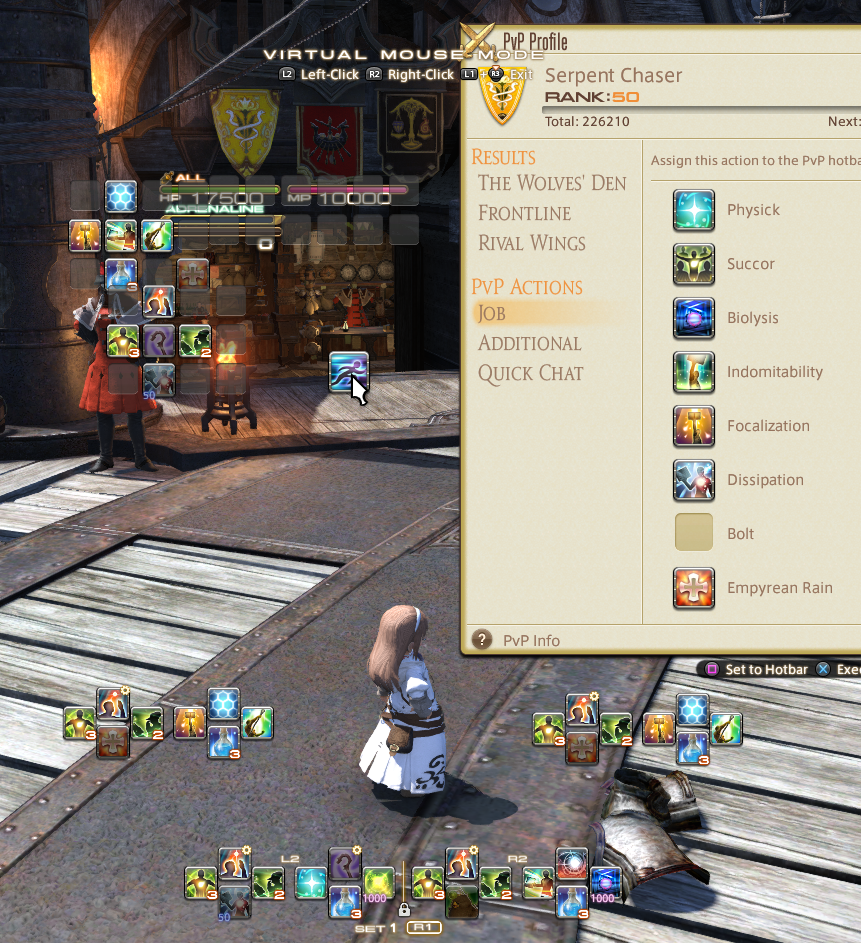
A Shadowbringers PVP scholar dragging bolt towards a keyboard hotbar for visibility
Method 1:
- While using the virtual mouse, move the cursor to the action you wish to drag
- Press and hold “Left Click”
- While keeping “Left Click” held, move the virtual mouse to where you wish to place the action
- Left go of “Left Click”
Method 2:
- While using the virtual mouse, move the cursor to the action you wish to drag
- Press “Left Click”, but do not hold it; the game will pick up the action
- Move the virtual mouse to where you wish to place the action
- Press “Left Click” again
Using “Right Click” will cancel the attempt to move the action.
For those using the touch pad, the second method is easier.
Gamepad Type and Hud layouts
Before we go into working with HUD Layout, let’s first go into Character Configuration for something important.
What does Gamepad Mode actually do?
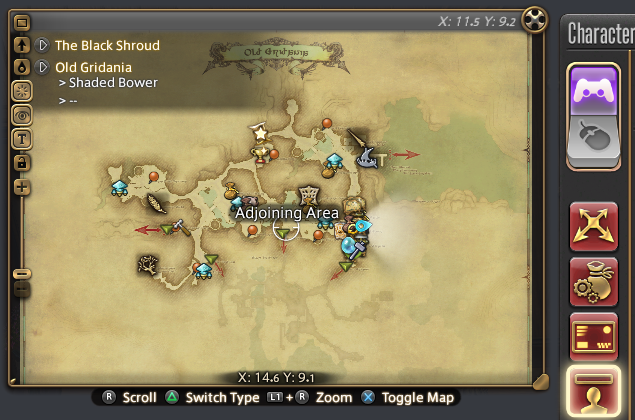
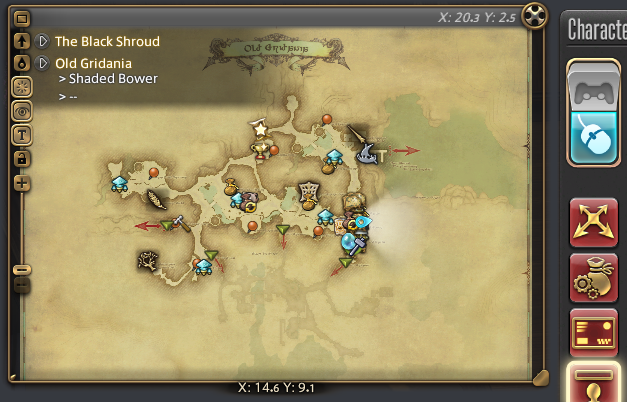
At the top left of Character Configuration is a switch for Gamepad Mode or Mouse Mode.
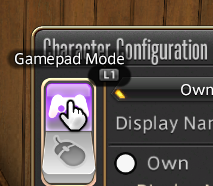
To be clear, you can play on controller (or keyboard) in either mode. You can also play on both at the same time in either mode. While each mode comes with different default settings, everything is configurable.
There is only ONE actual non-configurable difference between the two modes and that’s whether or not gamepad hints show up on various menus.
And this applies to various menus, such as (but not limited to) :

That’s it, that’s the only actual difference in controller functionality between the two modes. Everything else that people typically associate with gamepad mode, from the giant main menu, to having direct chat input on your keyboard, is entirely configurable.
Why does it matter that they’re essentially the same?
Since the two modes are the same, aside from the gamepad hints, most people would naturally want to play in Gamepad mode. After all, why wouldn’t you want the hint reminders? (Even if some of them are incomplete and don’t show every possible command available)
Because you can store certain settings separately between them.
In the game you can store 4 HUD layouts, and that’s great when it comes to where you want to place your bars and other UI components. However there are also some settings not related to the HUD layouts that can be stored separately between Mouse and Gamepad mode.
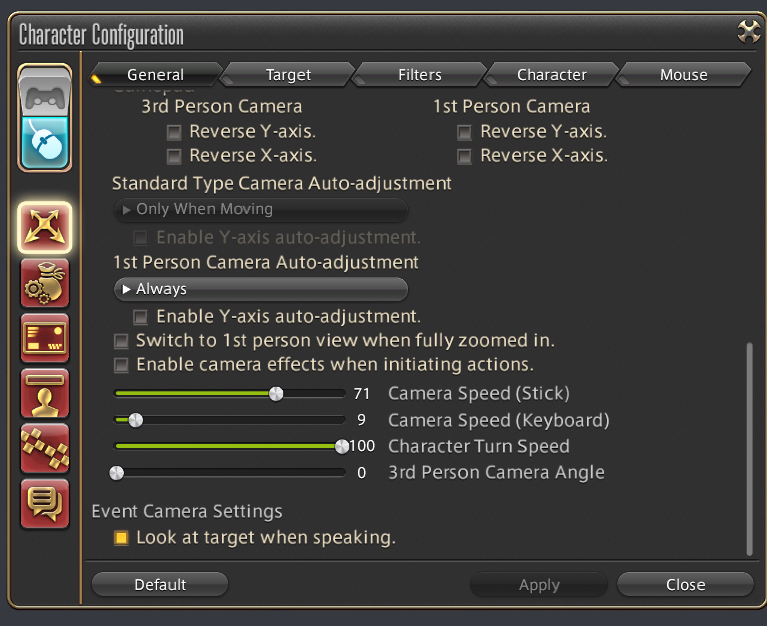
For example, you can store a different 3rd Person Camera Angle setting for both gamepad and mouse mode.
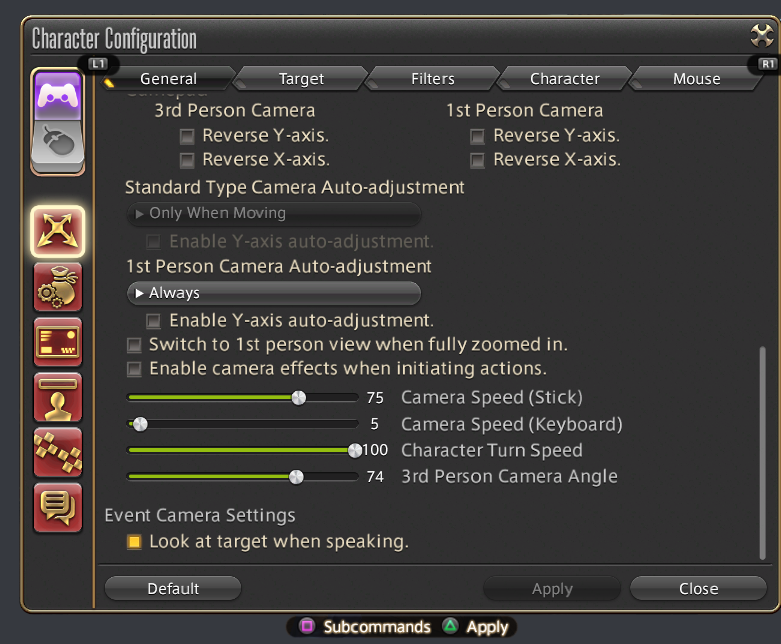
Therefore you can essentially use Mouse mode to store a profile. For example, you can store different targeting settings in both modes, which can be useful if you wanted to have different settings for PVE and PVP, RP, or video recording.
Therefore, rather than thinking of them as Gamepad Mode and Mouse Mode, you can think of them as two separate profiles of settings.
Unfortunately, not all settings are actually stored separately, and there is no way in-game to know which setting is stored separately other than changing it in one and seeing if it changed it in the other as well.
Customizing Dialog Boxes
Turning on/off Dialog Auto-Advance
You can use your Jump button, by default Triangle, to turn on or off the auto-advance of the text for cutscenes.
Hiding HUD elements while talking to an NPC
While you can hide your entire HUD by doing your “Targeting Modifier/Auto Run” button and your “HUD Select” button (L1 + touchpad), that will hide everything including the dialogue.
There is also a way to hide other HUD elements without hiding the dialogue, and that’s by pressing the subcommand button (Square). This can be more immersive for quests that do not have full proper cutscenes, and you just want to focus on the dialog.
Changing Dialog Boxes: Size and Location
Unfortunately you cannot do this while IN a proper cutscene, but you can do this when you just have a regular dialog box. To do this:
- Locate a nearby NPC that has dialogue and interact with them.
- Open up Virtual Mouse mode (L1 + R3), or grab a physical mouse.
- Move the cursor over to the dialog box.
-
To change size: Note, this will affect dialog boxes for cutscenes as well.
- Use the “Right Click” button.
- Select Scale Window and pick a different size. You can use the d-pad for this.
-
To drag: Note, this will not affect dialog boxes for cutscenes.
- Use the “Left Click” button and hold
- Use the Camera Analog stick (the right analog stick) to move it around
- Once done, leave Virtual Mouse mode
What about the special dialog box for when a boss is talking?
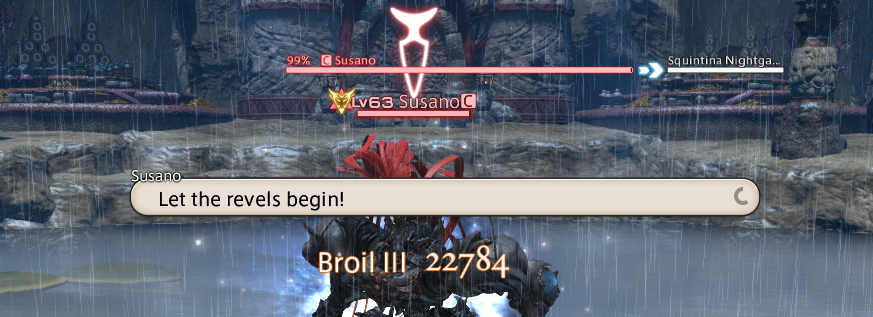
Unfortunately, there are no configurations specifically for that, nor can you interact with it with the virtual mouse.
It cannot be moved, and there is only one way to change its size - Unfortunately it will change all your other UI elements as well. So if you absolutely need the size changed, be prepared to have to then spend the time fixing the rest of your UI.
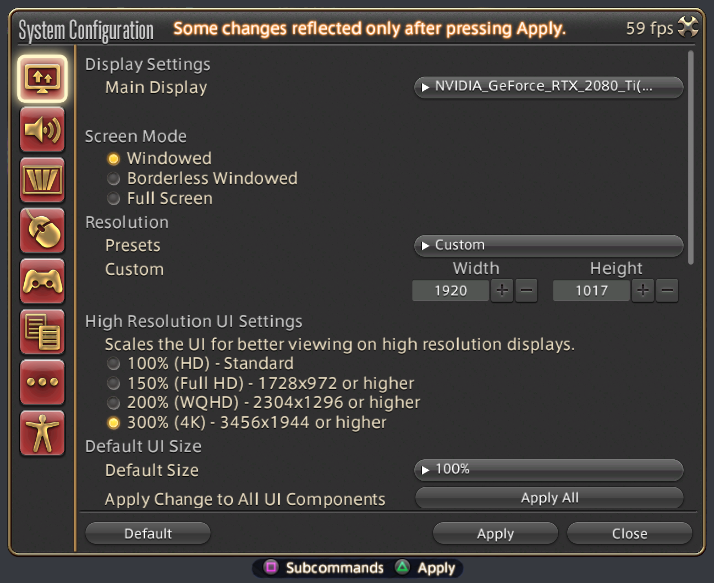
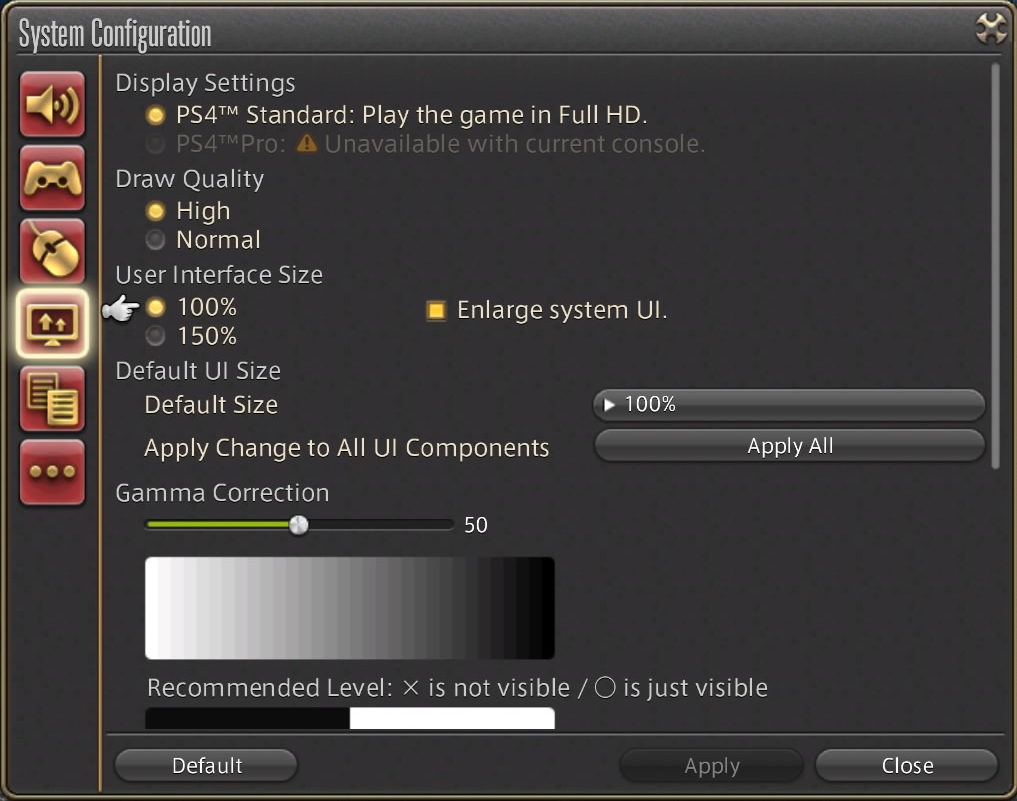
The only way to change the size is to head to System Configuration.
For PC it is in Display, High Resolution UI Settings and pick a different resolution.
For PS4 it is Display Settings, User Interface Size. Putting on “Enlarge System UI” also affects it, giving it a size between 100% and 150%.
Regardless of whether you are using the PC or PS4 directions, the result is the same: all of your HUD elements will be affected.
Test it out with a boss you can just queue in to check quickly, like Susano, and then once you have figured out your desired size, go through every single other HUD element in your HUD layout you have and fix their sizes to look nice in your new resolution.
Screenshots and Gpose
Playing the game is great, but we all know glamour is the true endgame, and needs to be memorialized with screenshots!
Hide your HUD
The easiest way to hide your HUD is to use the existing shortcut, which is your Targeting Modifier / Autorun button and your HUD select button.
By default, this would be L1 + touchpad click-in.
If you are using the PS4’s HUD Select forward and back, either one will work for this combination.
Taking a screenshot
This actually depends on whether you are using a console (PS4/PS5) or PC version.
Console
Hold the Share button.
PC
You also do so by using the Targeting Modifier/Autorun button and the Main Menu button. This would be L1 + Options, by default on PS4.
So if you want to quickly take a screenshot, you would be holding L1, pressing HUD select (touchpad) to hide the HUD, and then pressing the Main Menu button to actually take it.
Gpose
Enter Gpose by using the chat to type in /gpose, placing the Group Pose action from the EXTRAS section on your cross hotbar, or maping /gpose to a macro.
The gpose menu will actually have a Control Guide for you to check, which is mostly complete, which will adapt to any binding changes you have done. Below is the default one:
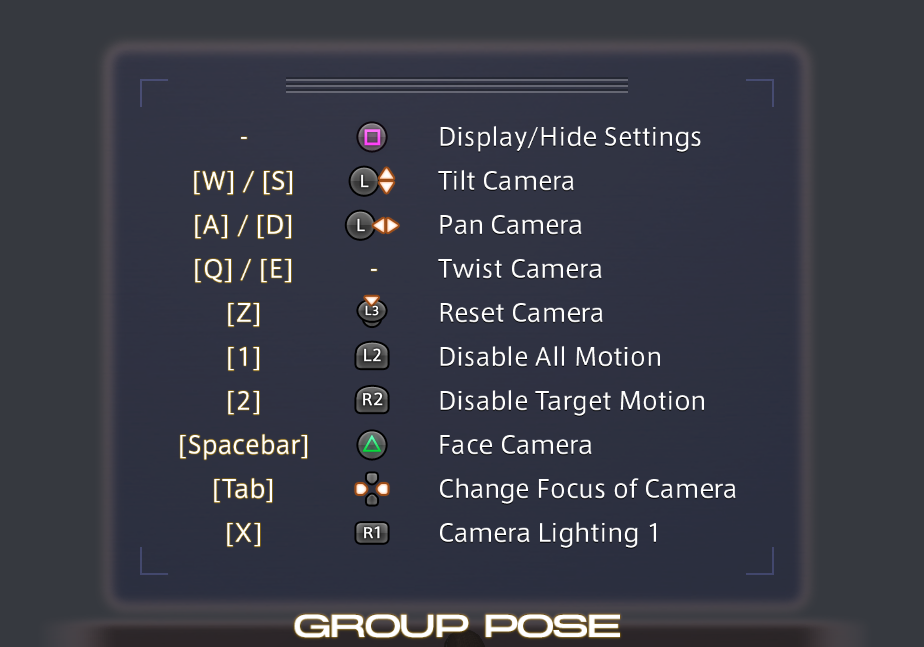
If you do not see the Control Guide, it just means you have it turned off. You can turn it back on using the last icon in the Settings.
Here is a list of the what is not listed in the built-in guide:
Move camera

Camera movement analog
Zoom in/out
To zoom in/out, use the “Targeting Modifier/Auto Run” button + Character Movement Analog (L1 + Right Stick)
A little note about the Change Focus of Camera, this is while the Group Pose Settings is not active. So either when it is hidden, or if you use virtual mouse to “left click” elsewhere.
Accessing the chat in Gpose:
Within gpose, you can use the HUD select button to get back to the gpose settings, access the chat, or put the guide in focus.
How to move or change the size of the Control Guide or Settings?
Moving the Control Guide or Settings:
- Open up Virtual Mouse mode (L1 + R3), use the touchpad, or grab a physical mouse.
- Move the cursor over to the element you wish to move
-
Use the “Left Click” button and hold
- Use the Camera Analog stick (the right analog stick) to move it around
- Once done, leave Virtual Mouse mode
Resizing the Control Guide or Settings:
For this one, you do not need the virtual mouse, though it is an option as well.
Controller-only method:
- Use the HUD select button to put the element you wish to make bigger into focus
- Press R3
This method does require that in System Configuration, you have “Enabled window zoom via R3” enabled. Otherwise, you will need to use the Virtual Mouse method below.
Virtual Mouse method:
-
Open up Virtual Mouse mode (L1 + R3), use the touchpad, or grab a physical mouse.
- Move the cursor over to the element you wish to move
- Use the “Right Click” button and Select Scale Window and pick a different size. You can use the d-pad for this. (Alternatively, you can also use R3 for this step if you only wanted the virtual mouse to replace using the HUD select button)
Backing Up to the Cloud
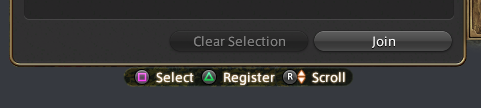
To back up your character settings to the cloud, you can either use the subcommand button from the Character Selection screen, or select the little icon for it on the right next to the character name.
To back up Client Settings, which are your System Configuration and your Shared Macros, you select the icon at the top right. For System Configuration Settings, not all settings will be saved as some settings are not applicable from one machine to another.

This can be used to transfer your various settings from one machine to another, even if that machine is a completely different platform (PC to PS4, PS4 to PC, PS4 to PS5, etc..). Taking that perfect controller setup to a new machine has never been so easy!